Gallery Of Homes: Carter

Carter residence in Pensacola by Acorn Fine Homes Carter residence in Pensacola by Acorn Fine Homes Carter residence in Pensacola by Acorn Fine Homes Carter residence in Pensacola by Acorn Fine Homes Carter residence in Pensacola by Acorn Fine Homes Carter residence in Pensacola by Acorn Fine Homes Carter residence in Pensacola by Acorn Fine Homes Carter residence in Pensacola by Acorn Fine Homes Carter residence in Pensacola by Acorn Fine Homes Carter residence in Pensacola by Acorn Fine Homes Carter residence in Pensacola by Acorn Fine Homes Carter residence in Pensacola by Acorn Fine Homes Carter residence in Pensacola by Acorn Fine Homes Carter residence in Pensacola by Acorn Fine Homes Carter residence in Pensacola by Acorn Fine Homes Carter residence in Pensacola by Acorn Fine Homes Carter residence in Pensacola by Acorn Fine Homes Carter residence in Pensacola by Acorn Fine Homes Carter residence in Pensacola by Acorn Fine Homes Carter residence in Pensacola by Acorn Fine Homes Carter residence in Pensacola by Acorn Fine Homes Carter residence in Pensacola by Acorn Fine Homes Carter residence by Acorn Construction Carter residence by Acorn Construction Carter residence by Acorn Construction Carter residence by Acorn Construction Carter residence by Acorn Construction Carter residence by Acorn Construction Carter residence by Acorn Construction Carter residence by Acorn Construction Carter residence by Acorn Construction Shake siding on the Carter residence Shake siding on the Carter residence Shake siding on the Carter residence Sealoflex deck Trapping the racoon releaseing the coon foam insulation Carter job in Pensacola by Acorn Construction window installation by Acorn Construction window flashing tape by Acorn Fine Homes door threshold flashing planing out trusses preassembling trusses for Acorn Construction setting trusses for Acorn Construction setting trusses for Acorn Fine Homes setting trusses for Acorn Construction installing a common truss on the roof for Acorn Construction Zip wall installation by Acorn Construction Taping the zip wall by Acorn Fine Homes Pool footings by Gulf Coast Pools Screwing the floor decking Glueing the off grade floor system Acorn Fine Home construction in Pensacola Acorn Construction new home in Pensacola Acorn Construction building the Carter residence in Pensacola Acorn Fine Homes building the Carter residence in Pensacola Acorn Construction builds custom home in Pensacola Acorn Fine Homes building custom homes in Pensacola Acorn Construction pouring foundation for a custom home in Pensacola Acorn Construction bull floating a slab for a custom home in Pensacola Acorn Fine Homes builds an off grade foudnation in Pensacola Acorn Construction building a concrete slab and crawl space foundation in Pensacola Acorn Fine homes building a concrete slab foundation in Pensacola filling the pool for Acorn Fine Homes pool containment structure for Acorn Construction tamping pool fill for Acorn Fine Homes compaction testing for Acorn Fine Homes compaction testing in Pensacola block sealing pool container at Carter job for Acorn Fine Homes pumping concrete for Acorn Construction in Pensacola pumping concrete for Acorn Fine Homes in Pensacola vibrating concrete in Pensacola cutting block on the Carter job drilling inspection holes in the block Carter job site work cutting block on the Carter new home in Pensacola laying block on the carter job laying face block on the Carter job in Pensacola Footings Foundation layout of the Carter job
Craftsman style architecture with twin carriage house garages.


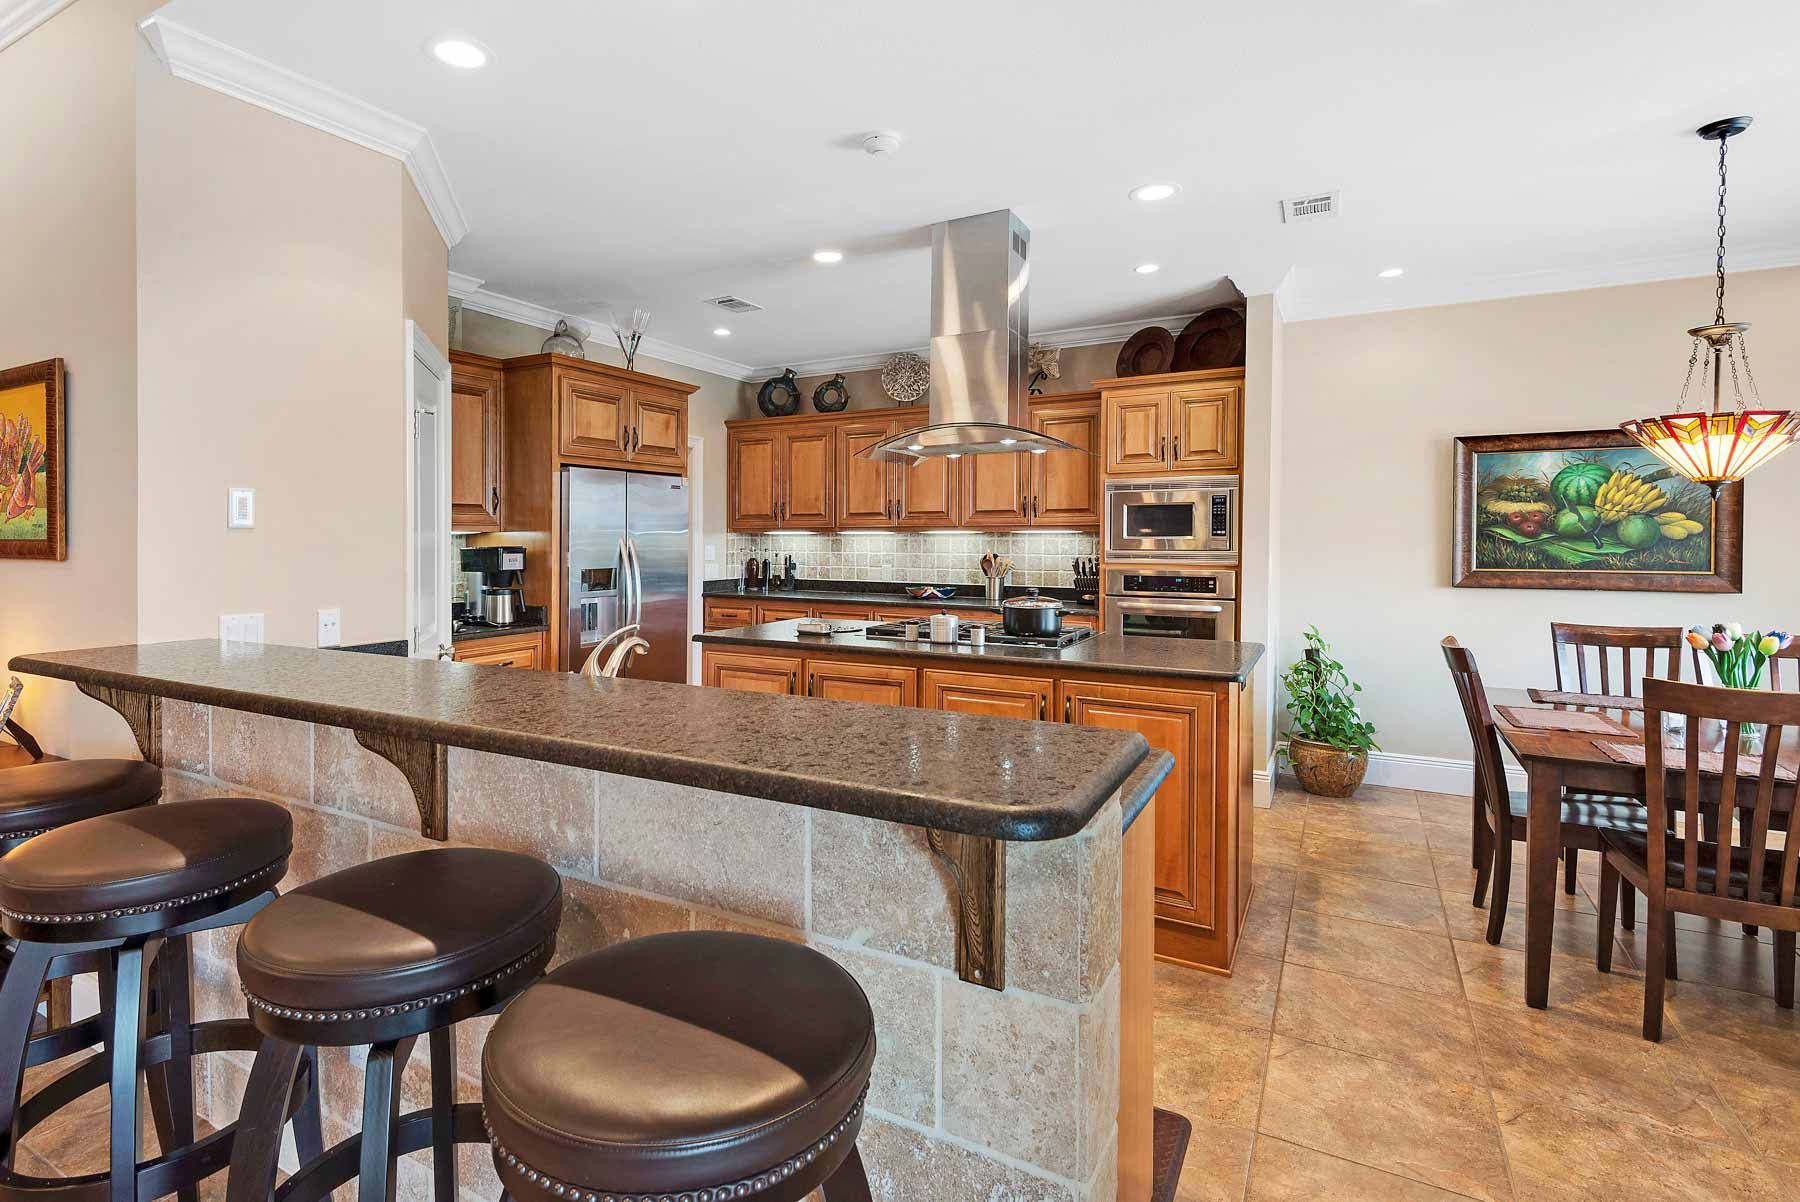
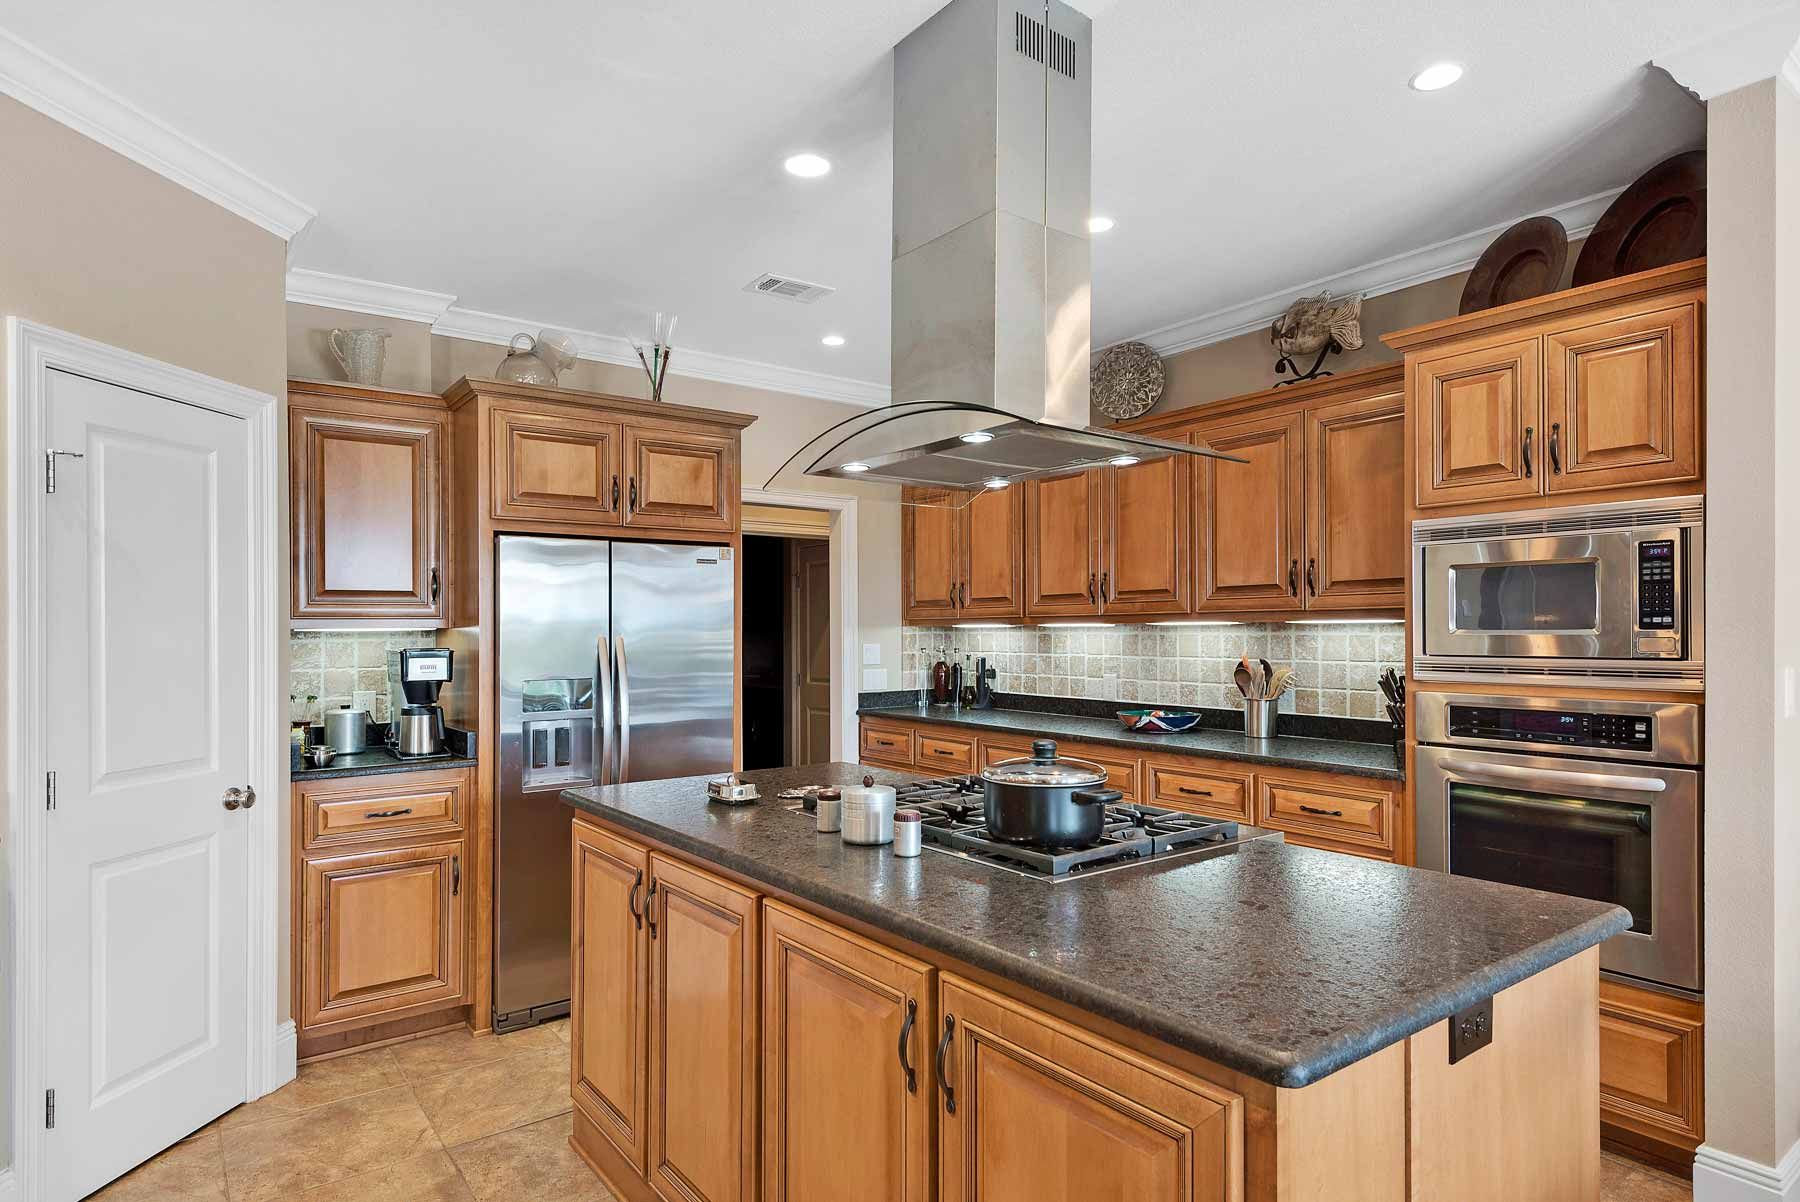
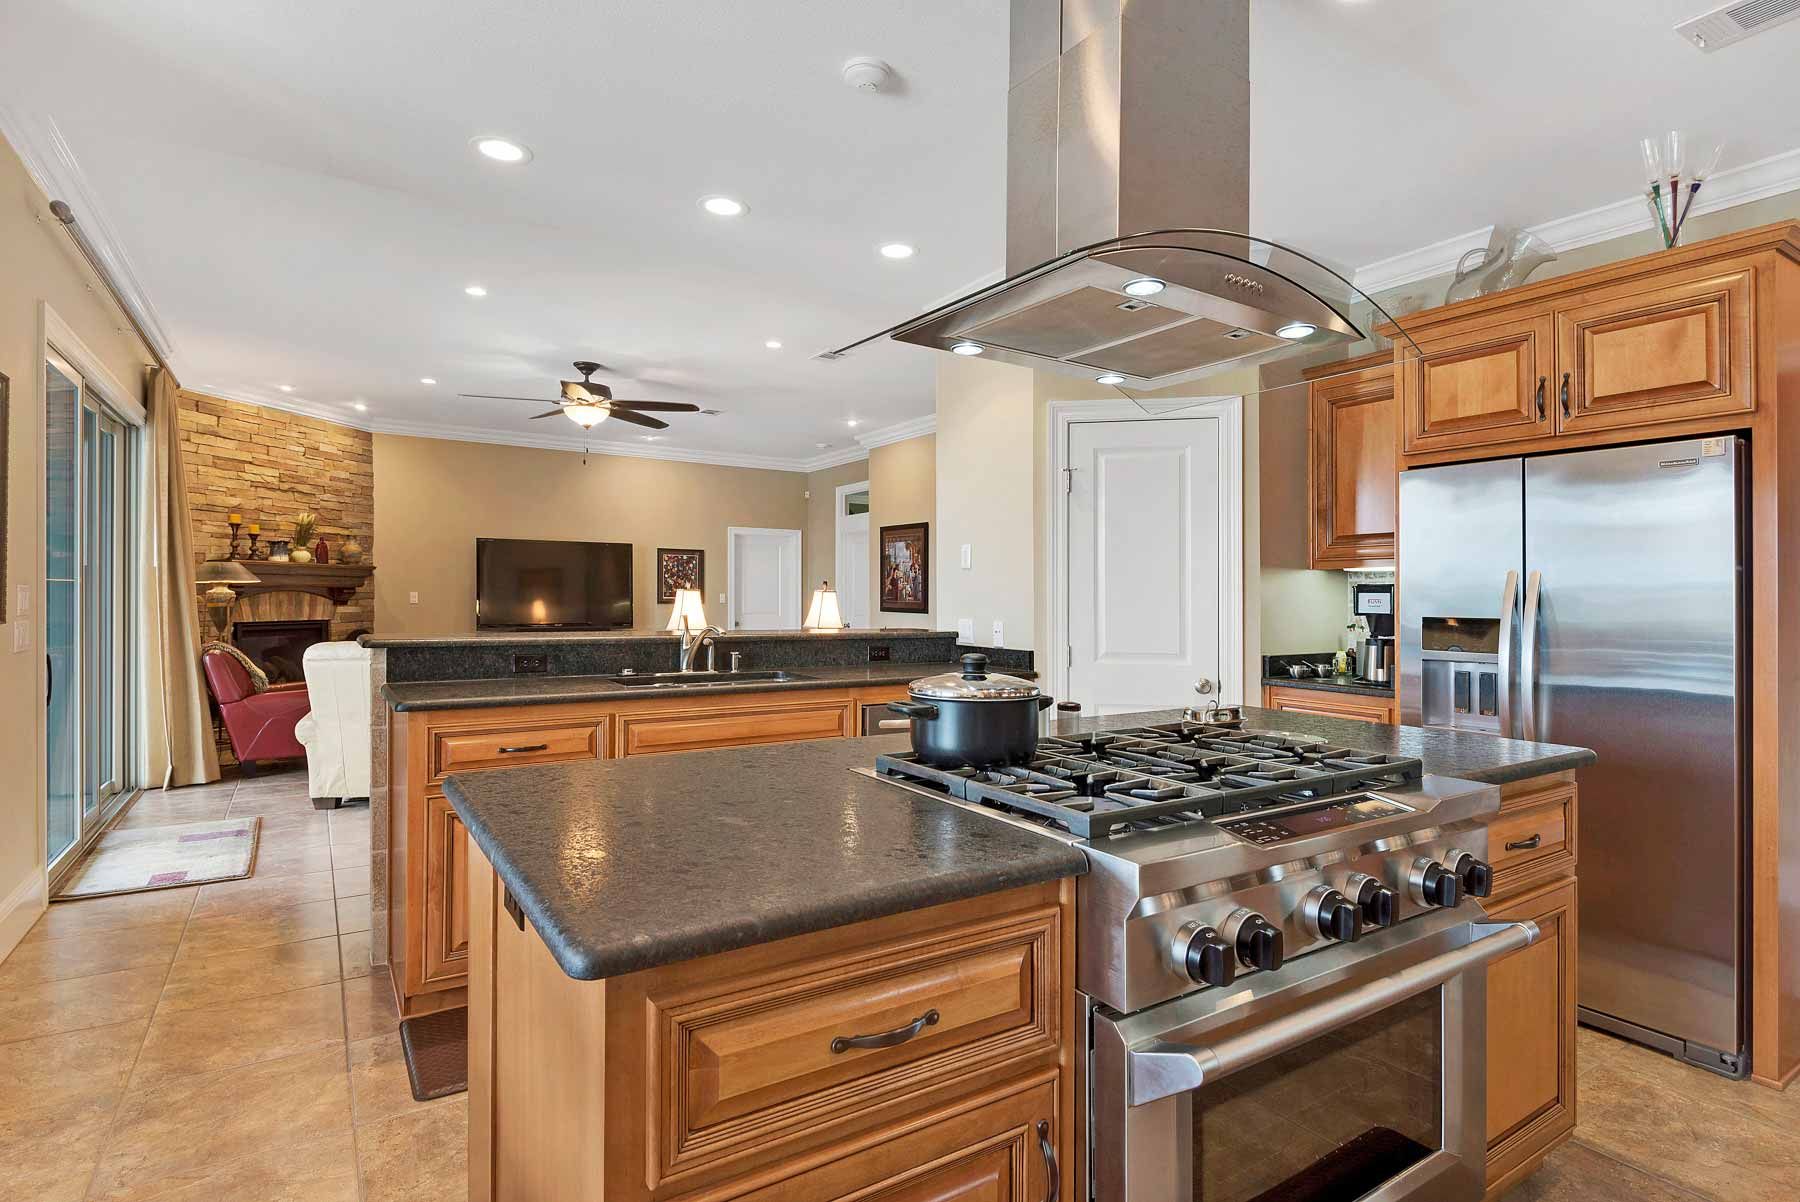
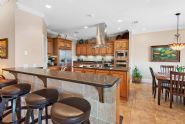
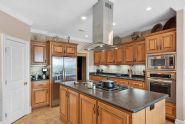
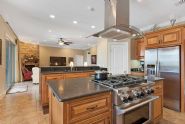
Leathered coffee granite tops by Superior Granite.

Free floating chimney range hood over 42" dual fuel range.


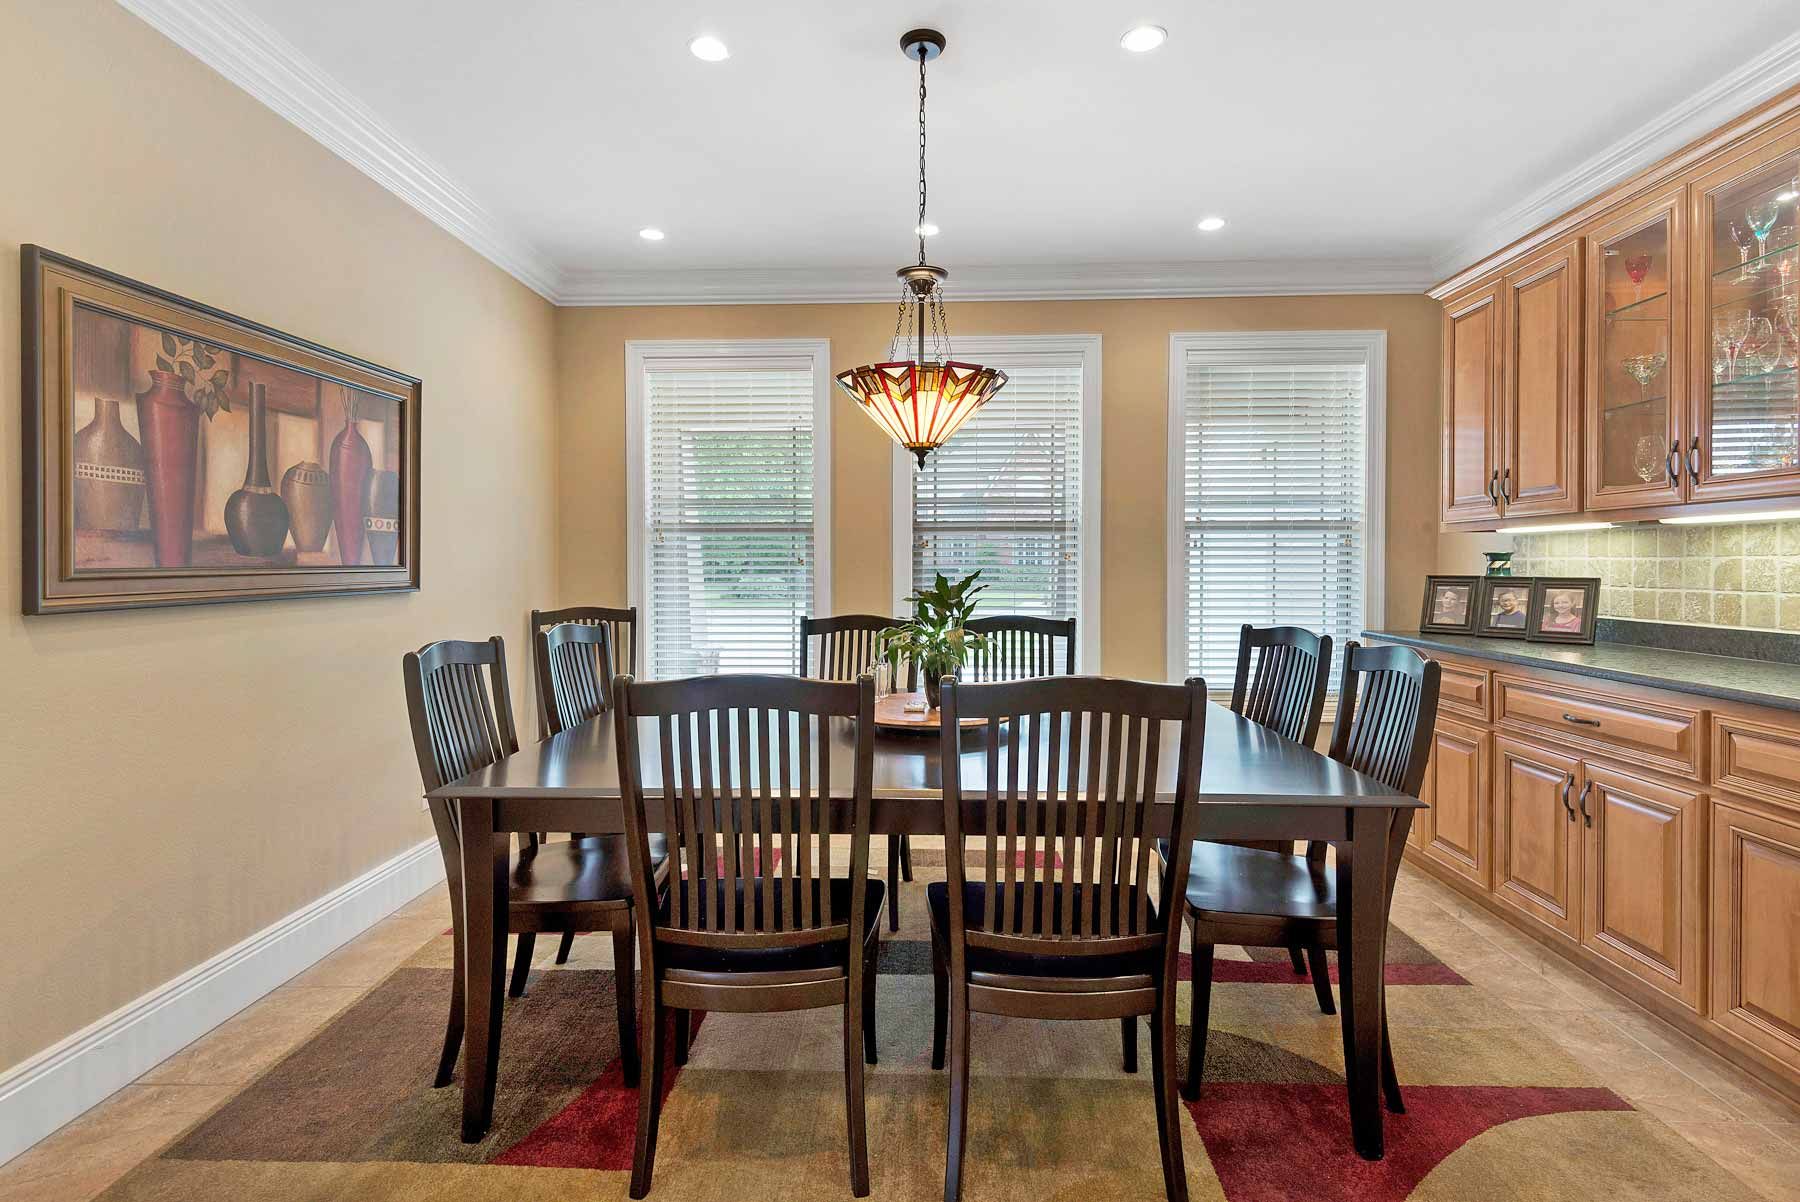
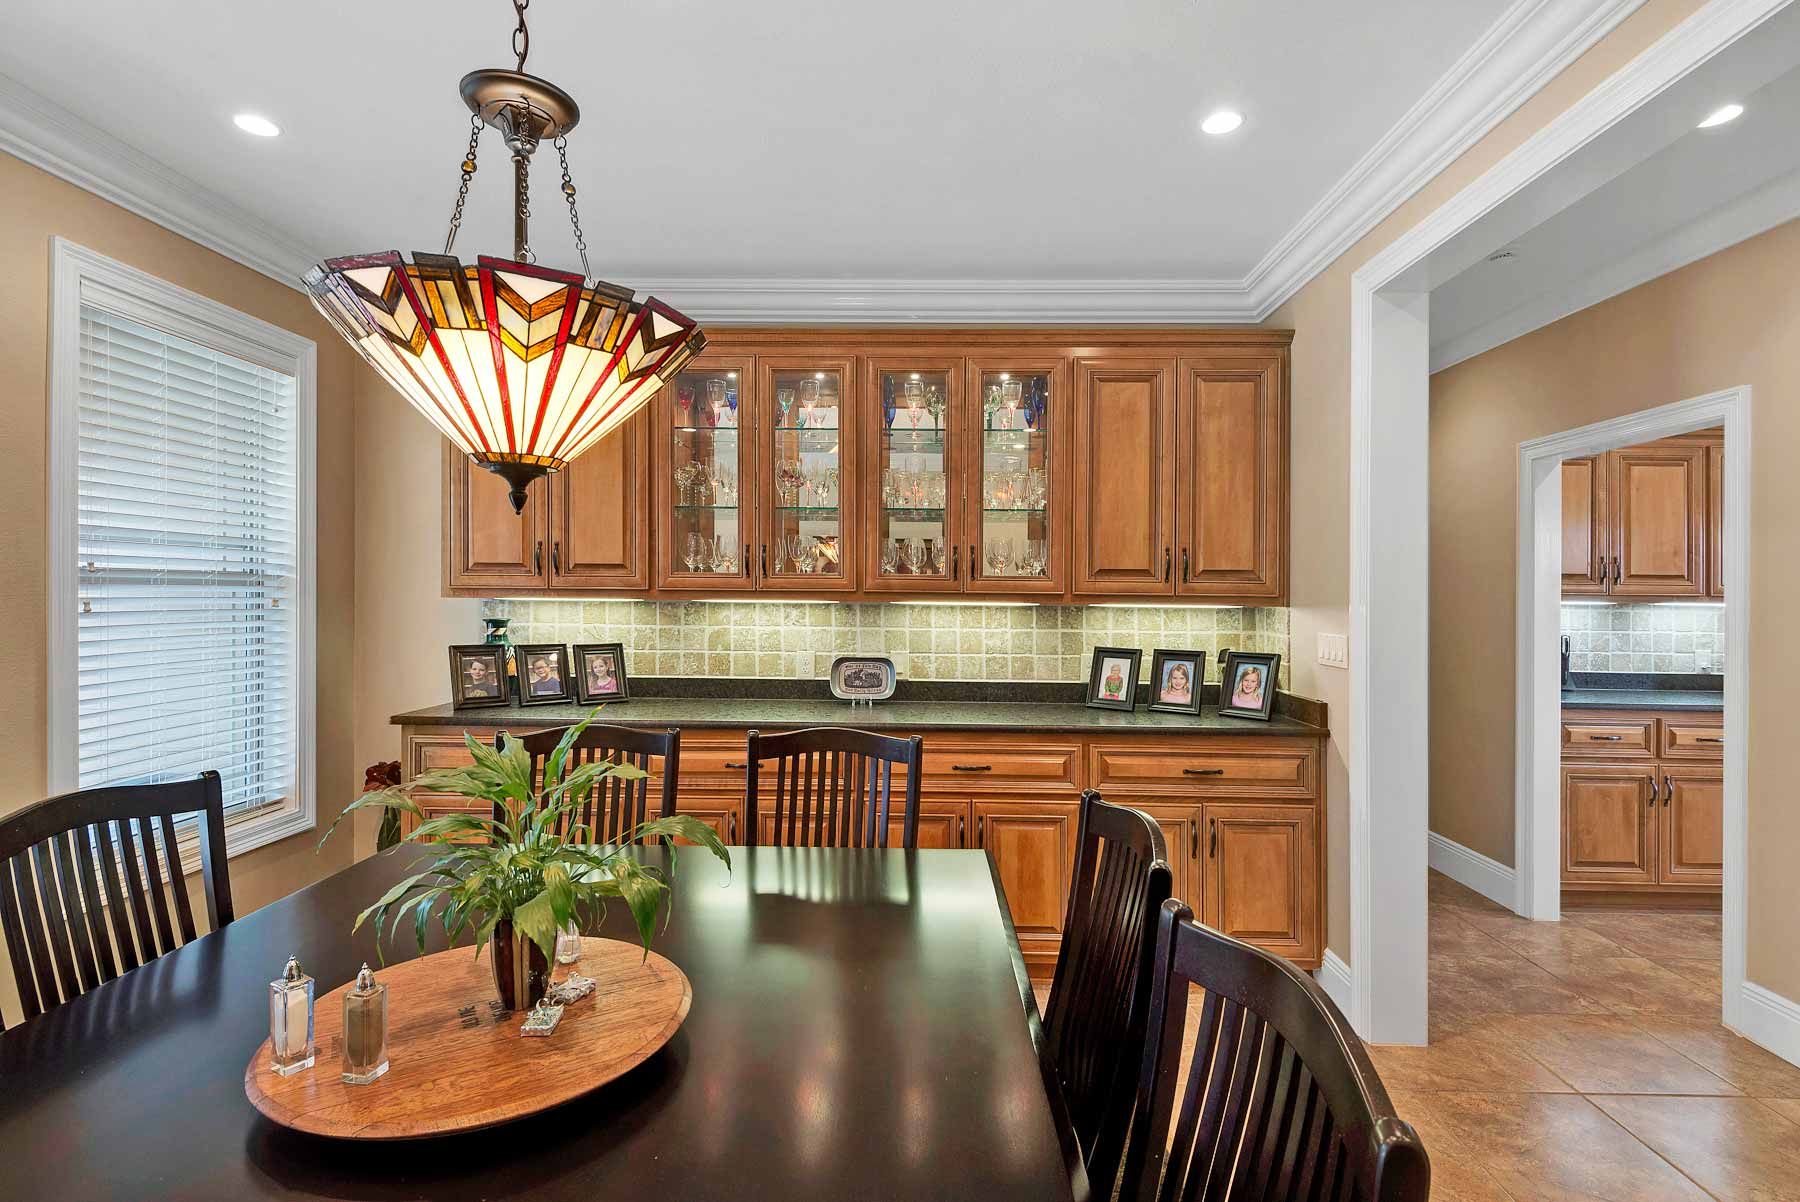
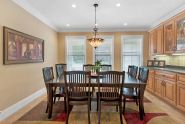
Built in DR buffet and china cabinet.
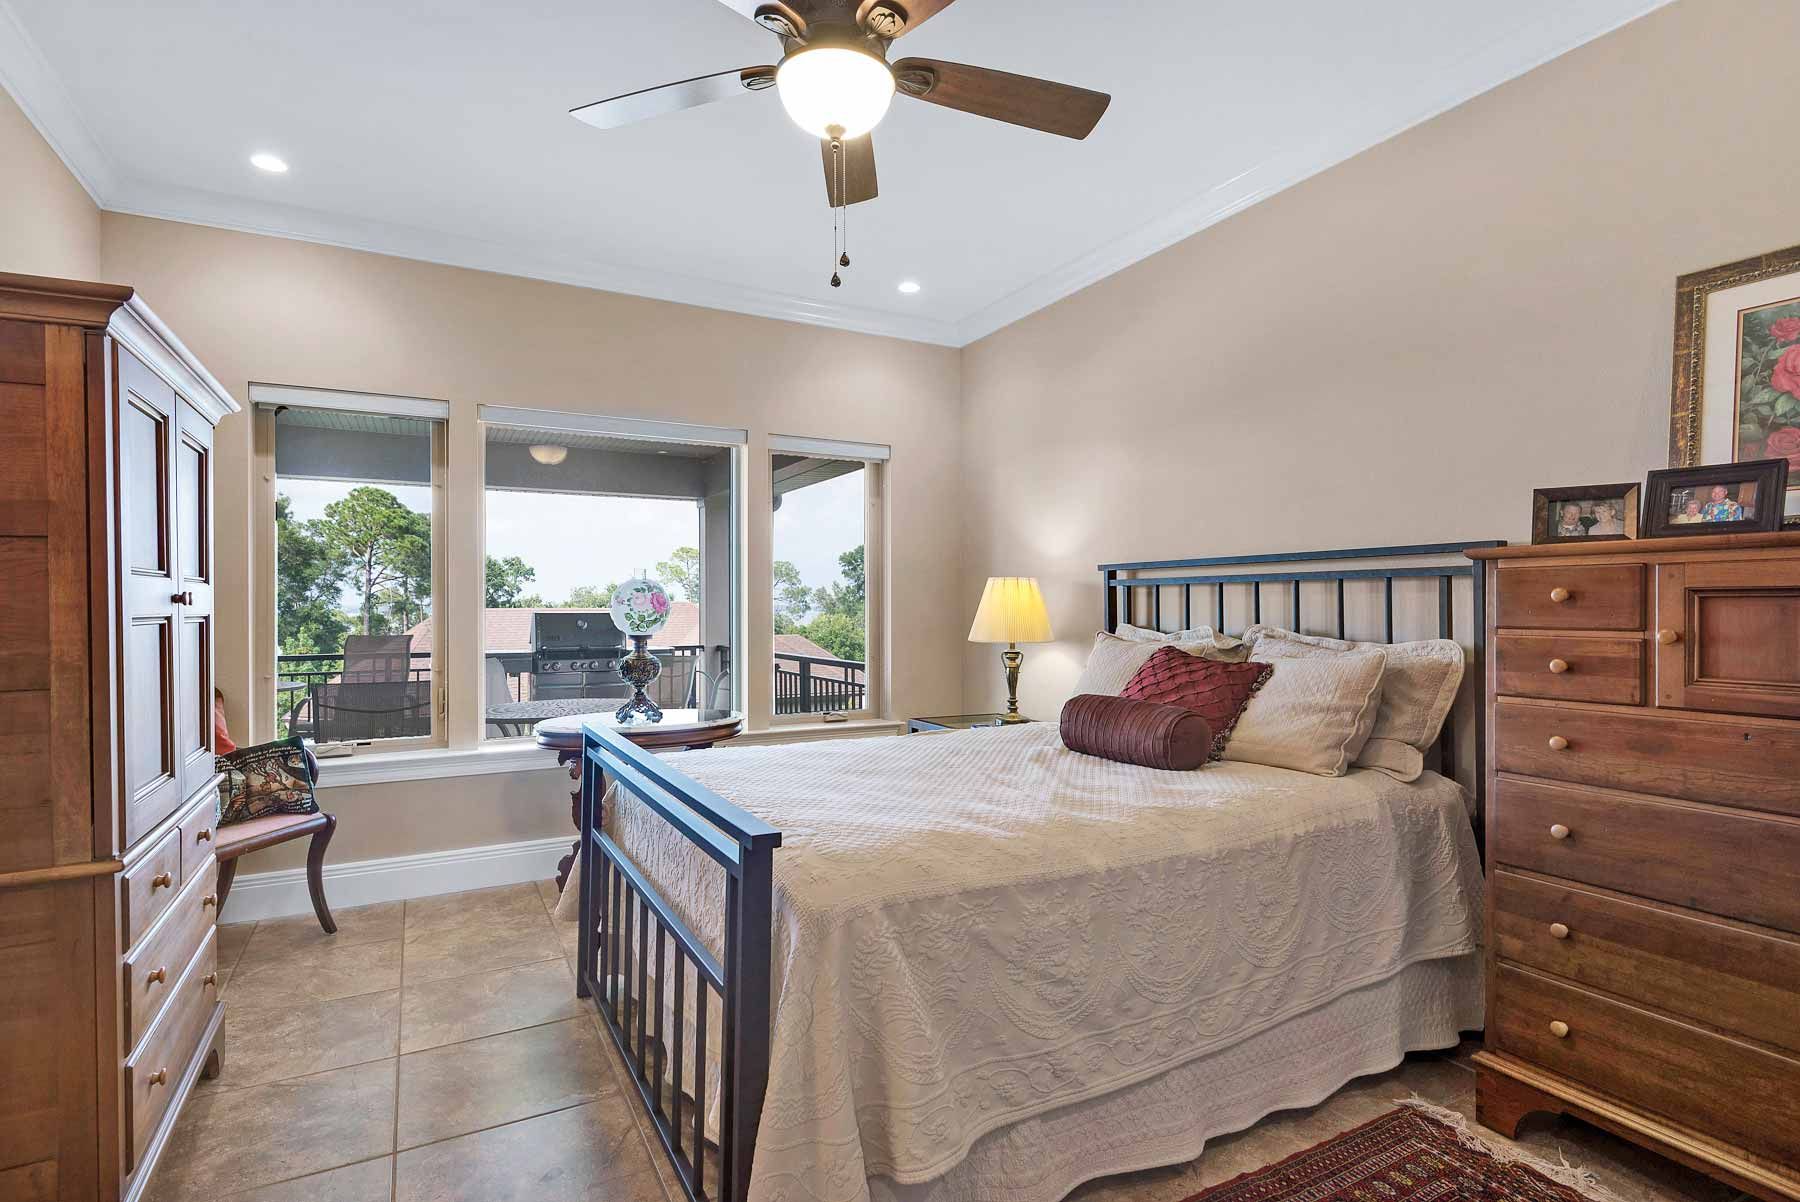
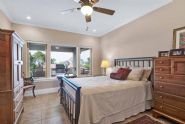
Guest BR.

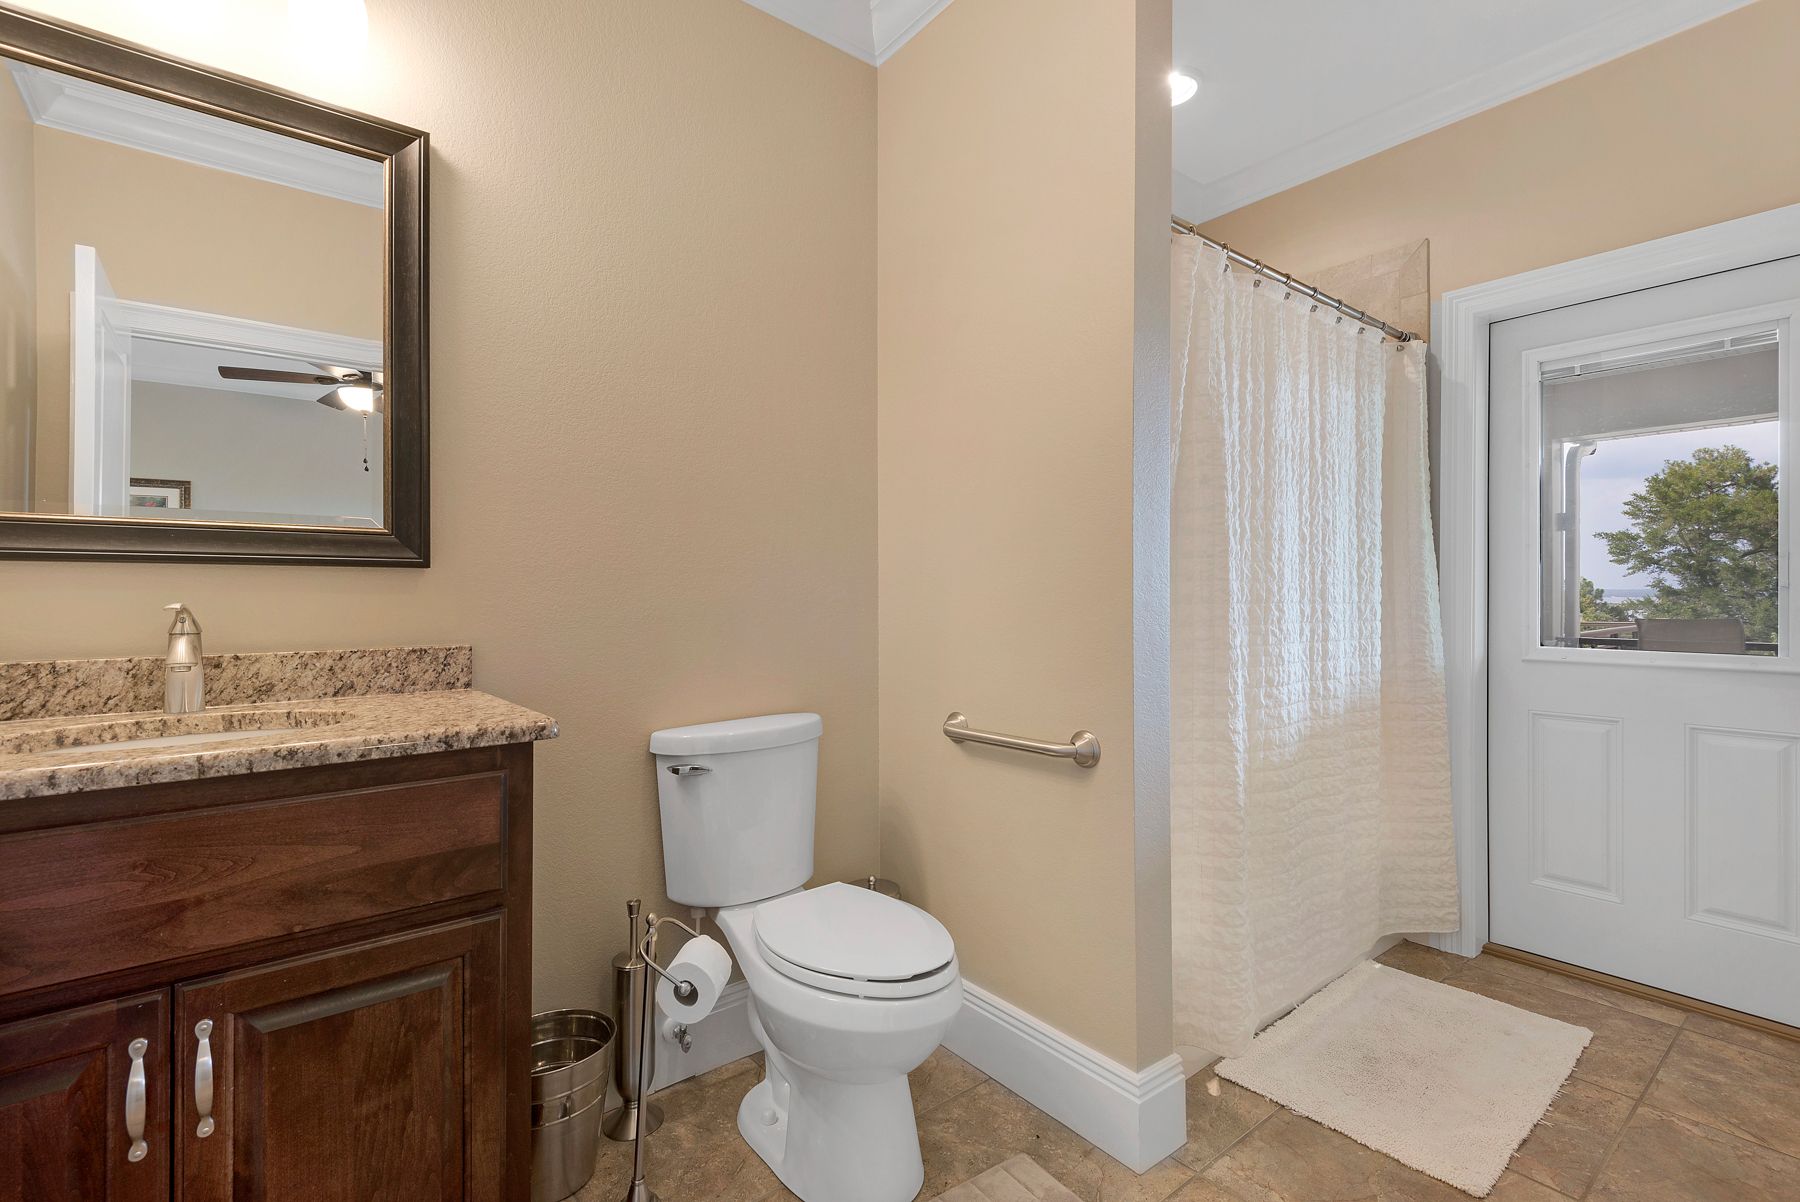
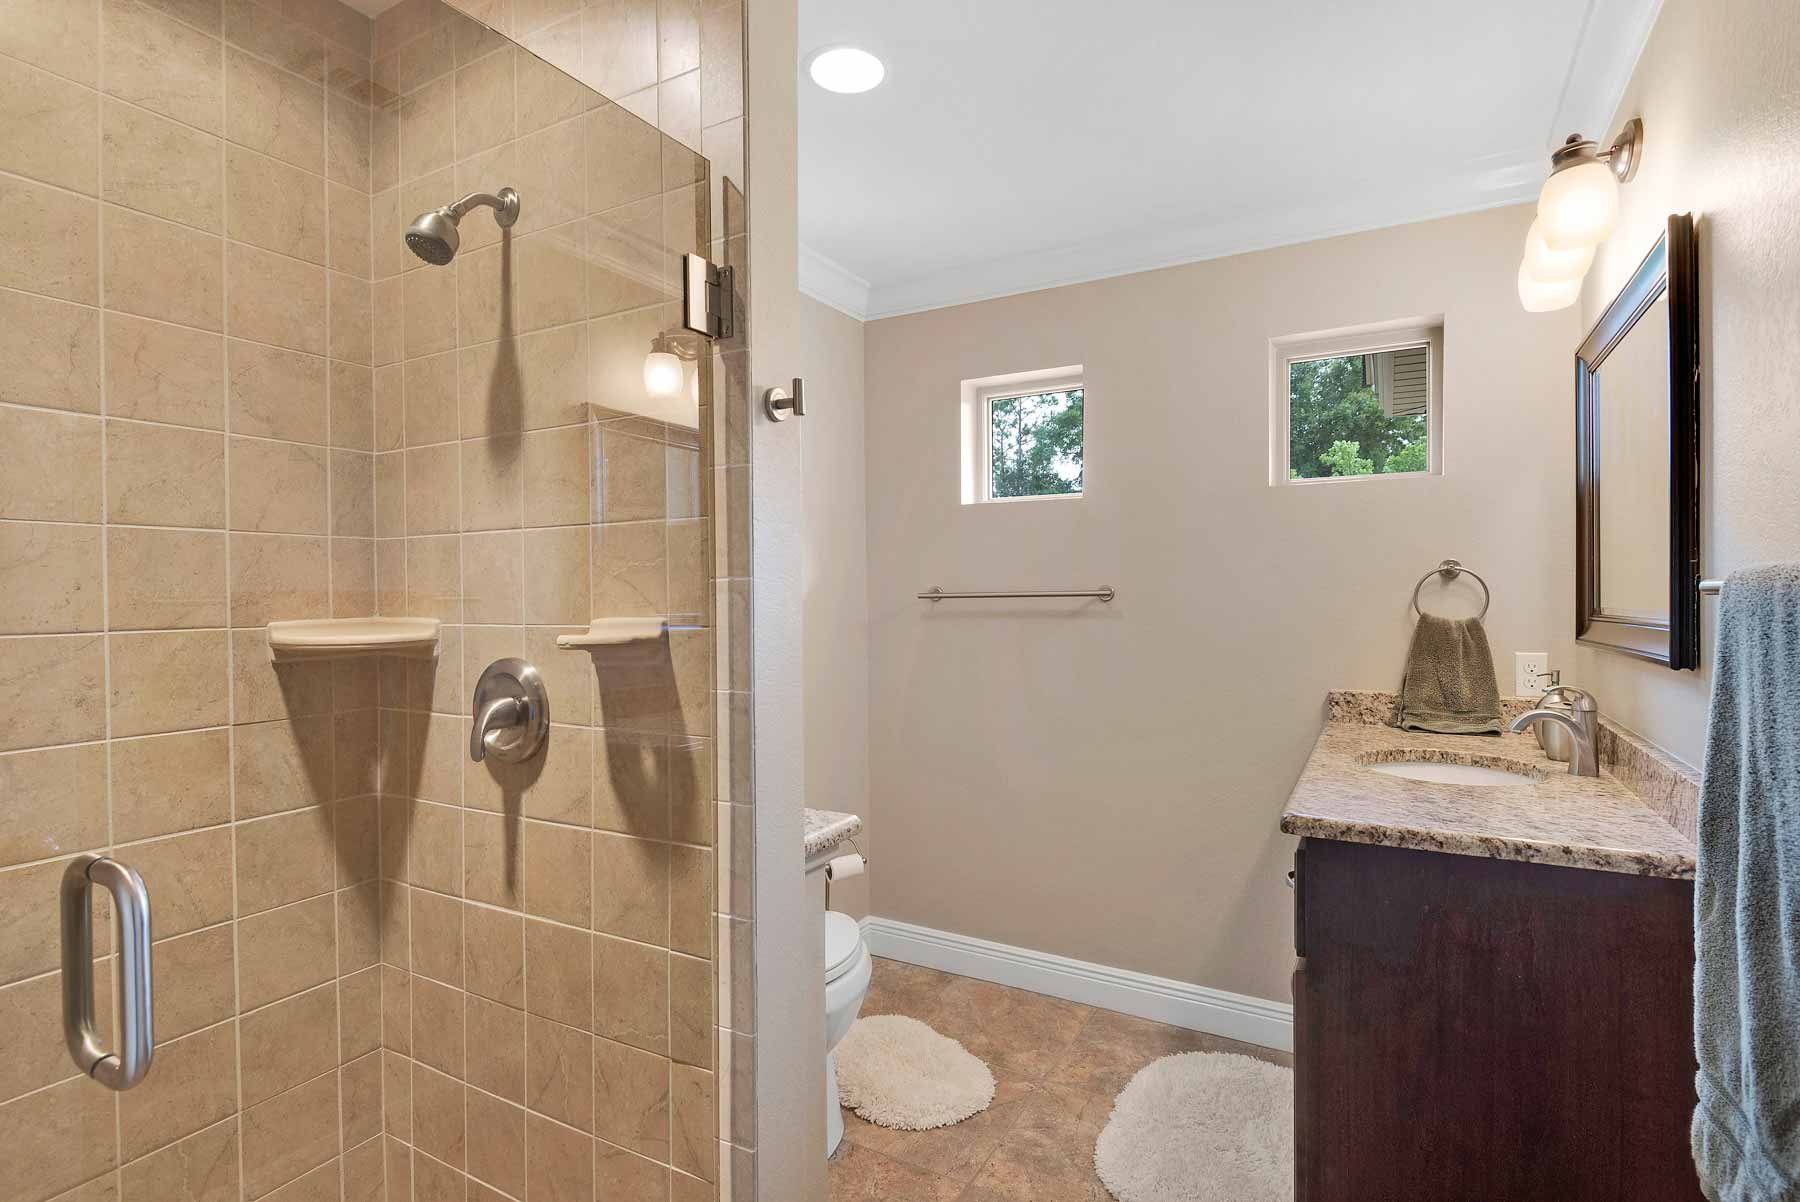
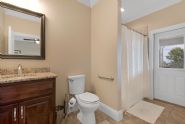
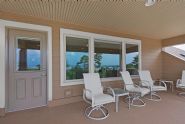
Guest bath with private access to the lanai.

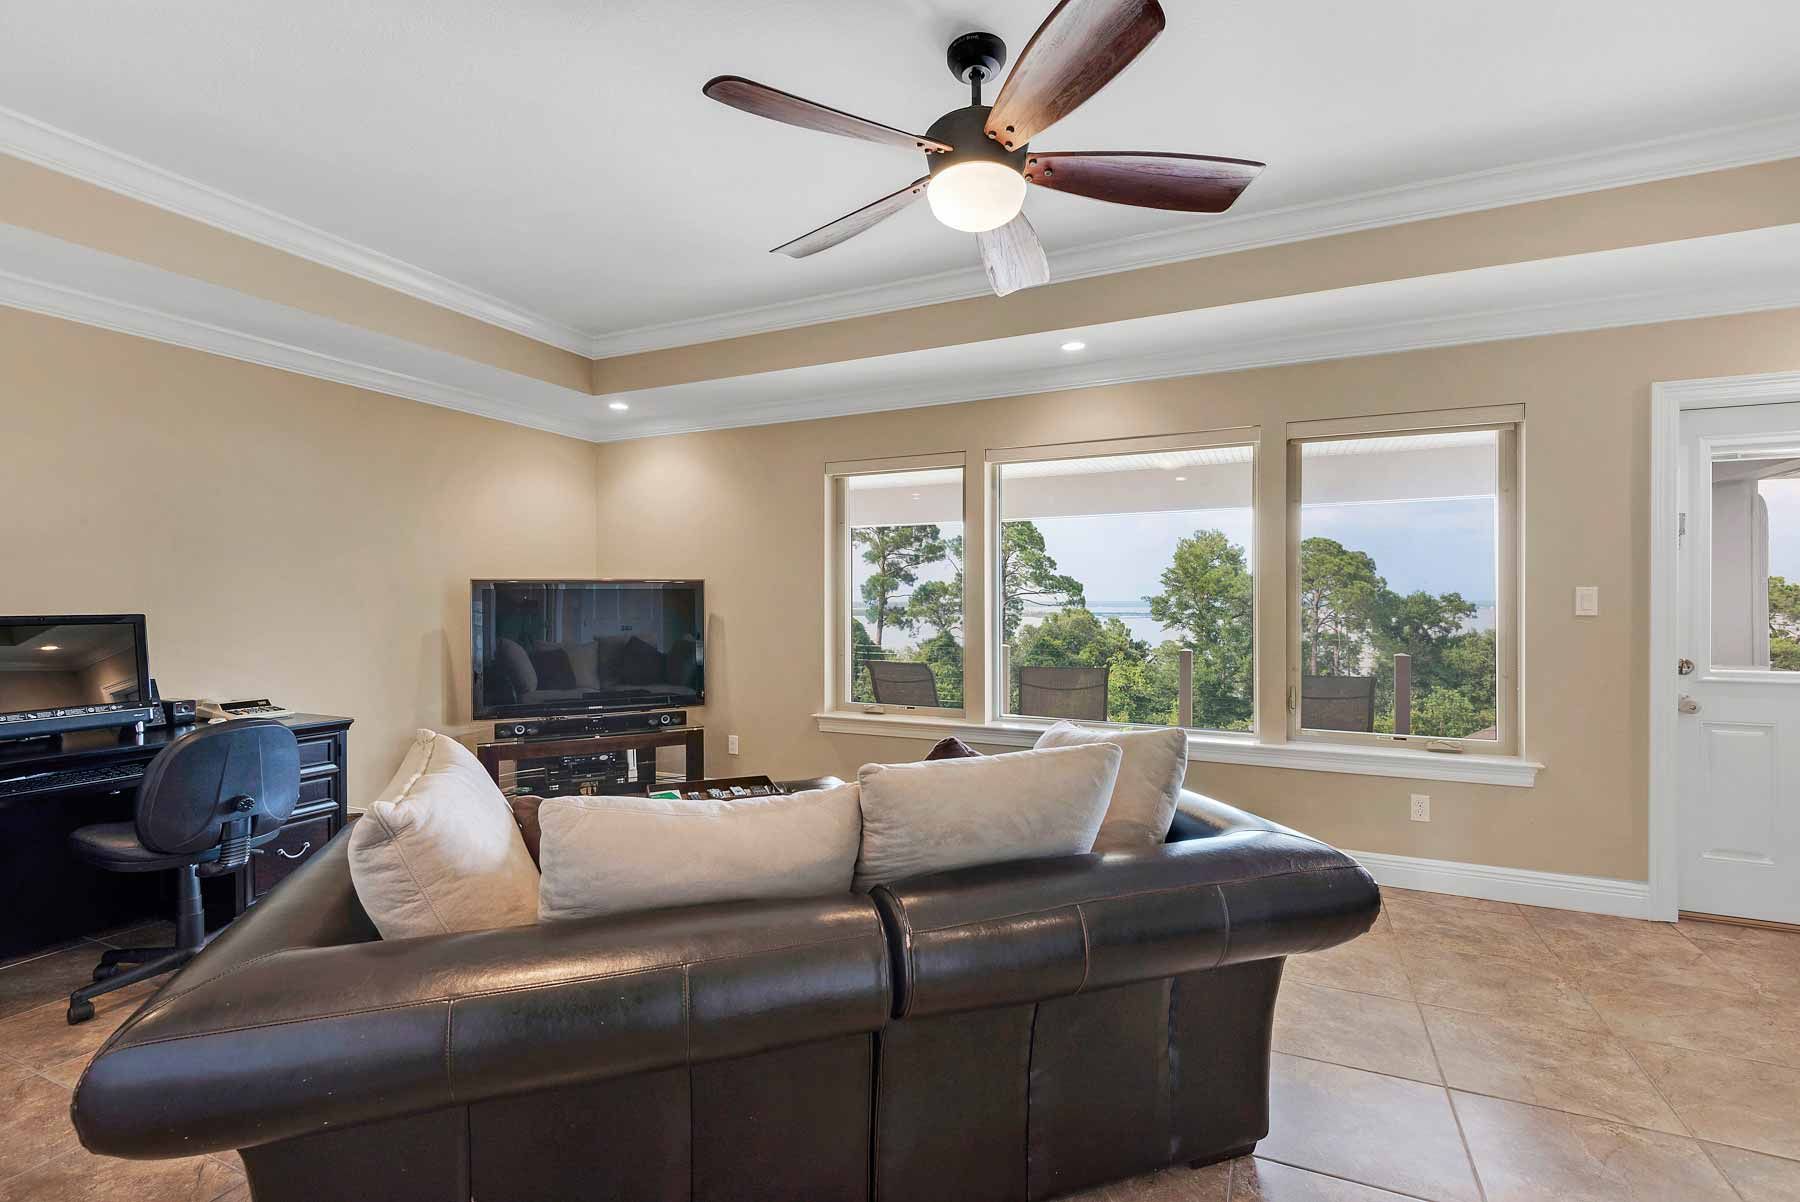
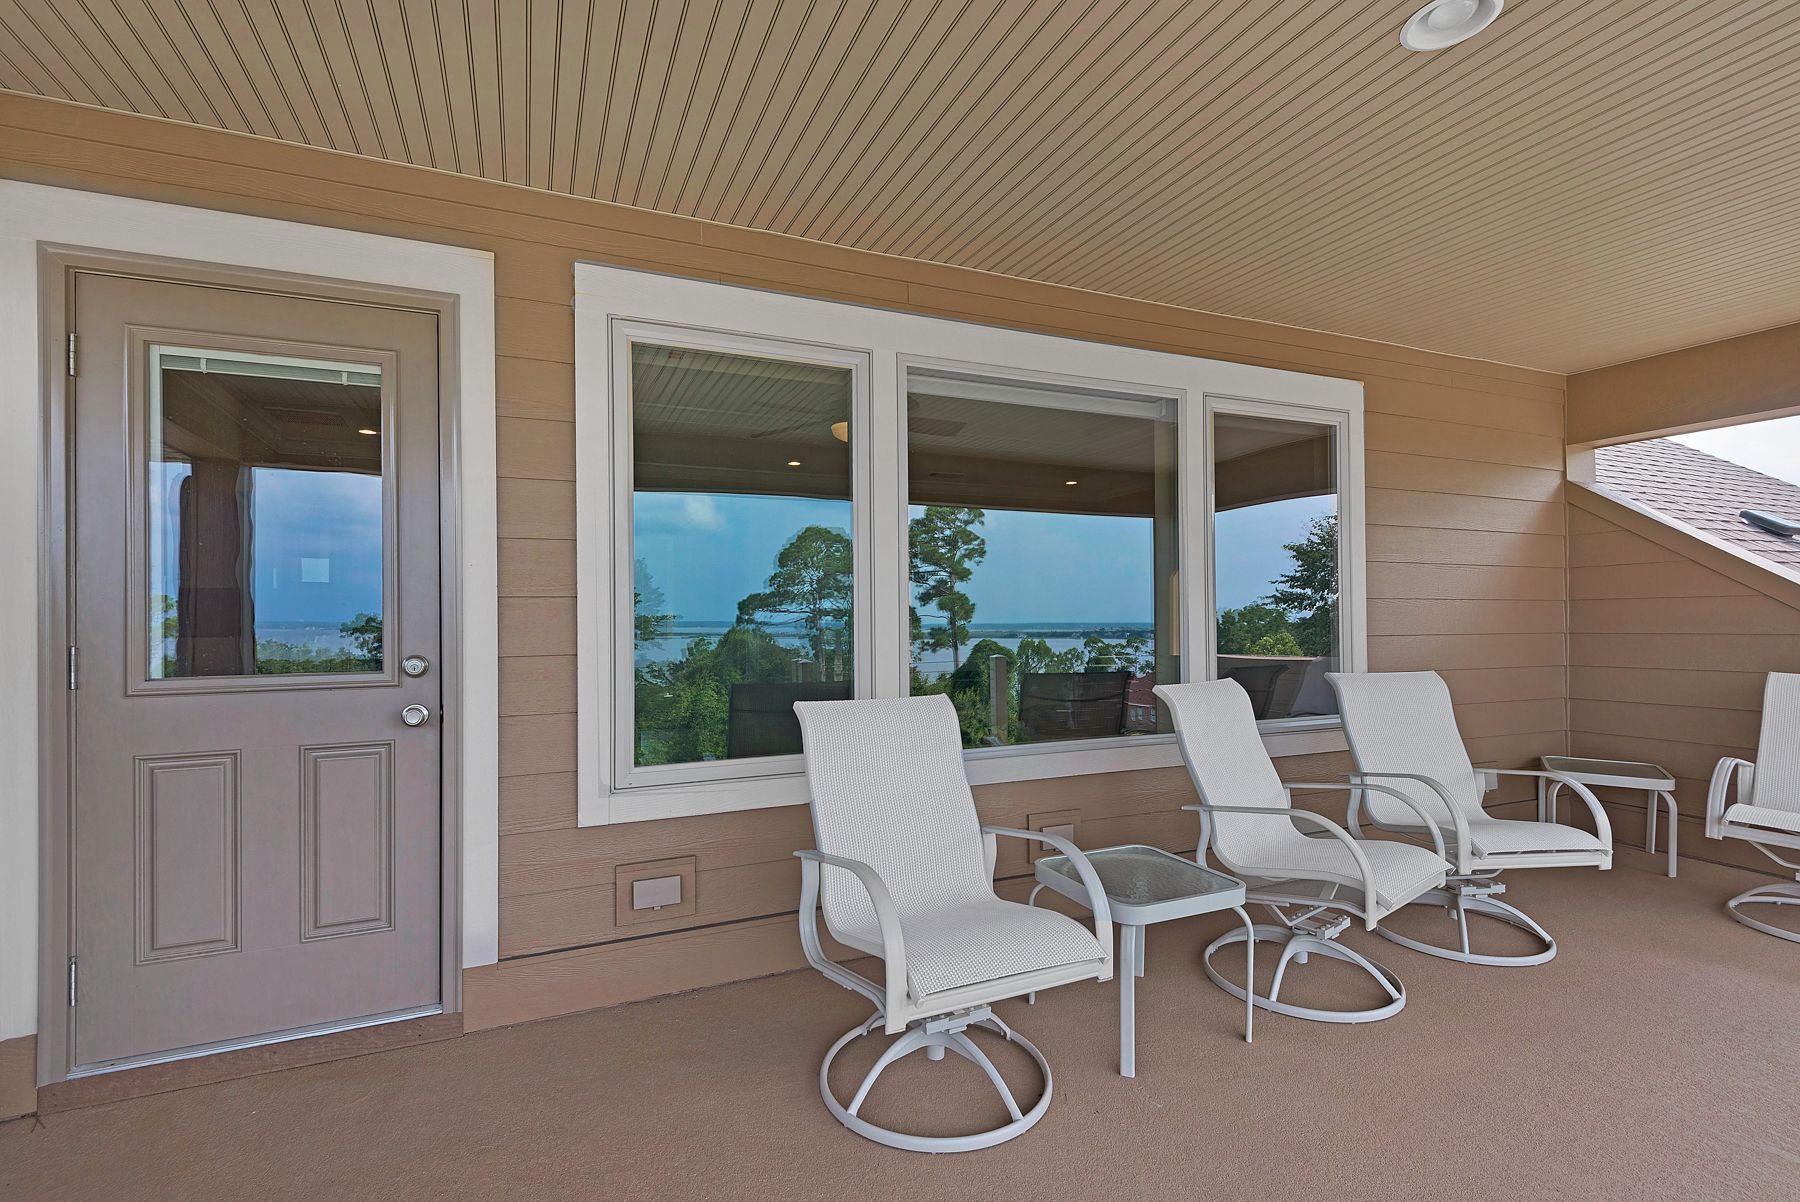
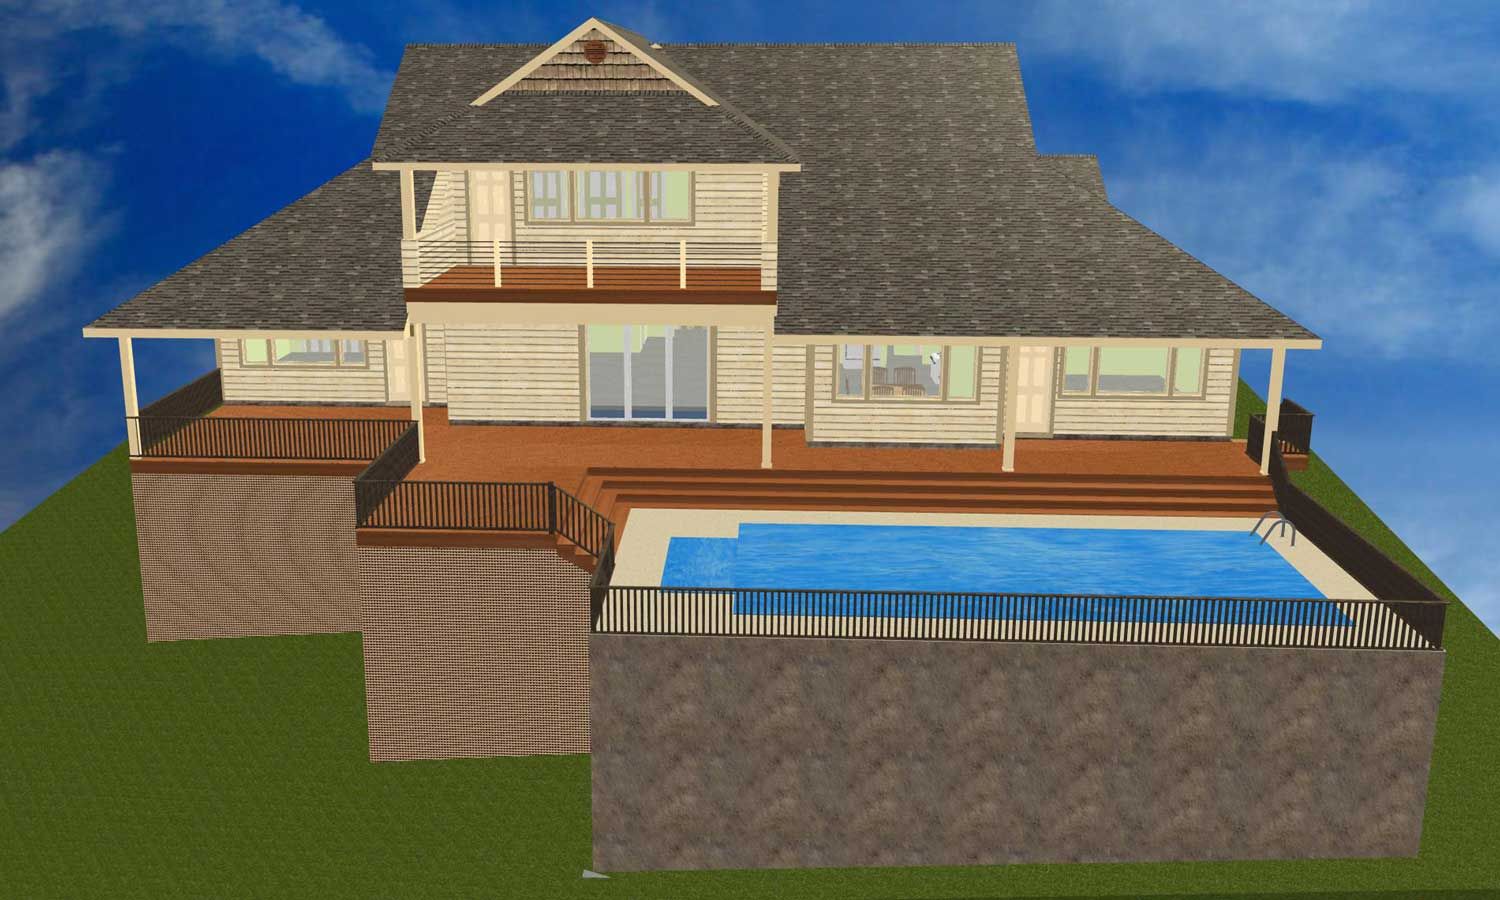
Up stairs game room with magnificent view of the bay.

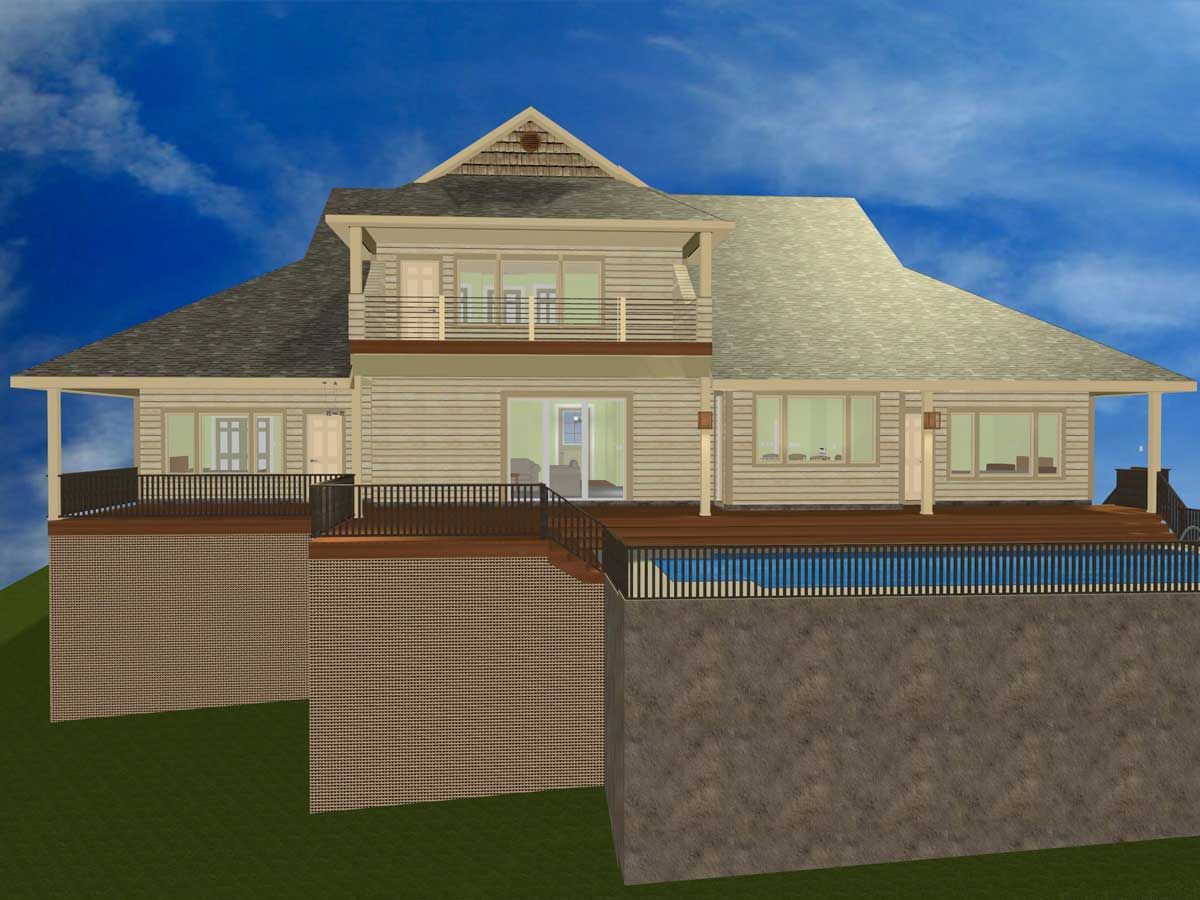
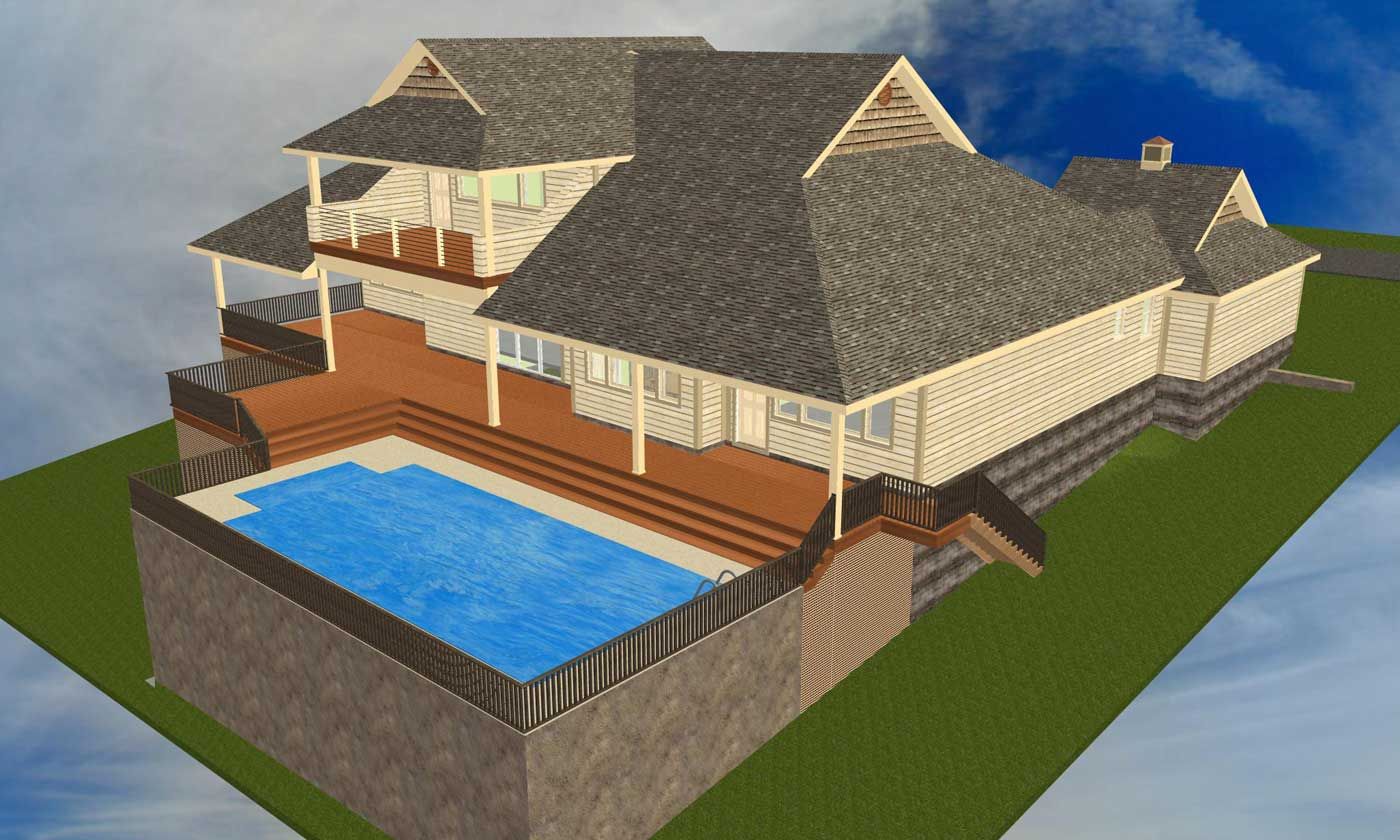
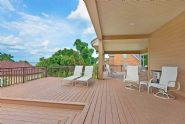
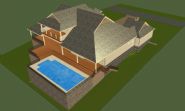
We used stainless steel wire rope railing to create an unobstructed view of the bay.


Upstairs game room bathroom.

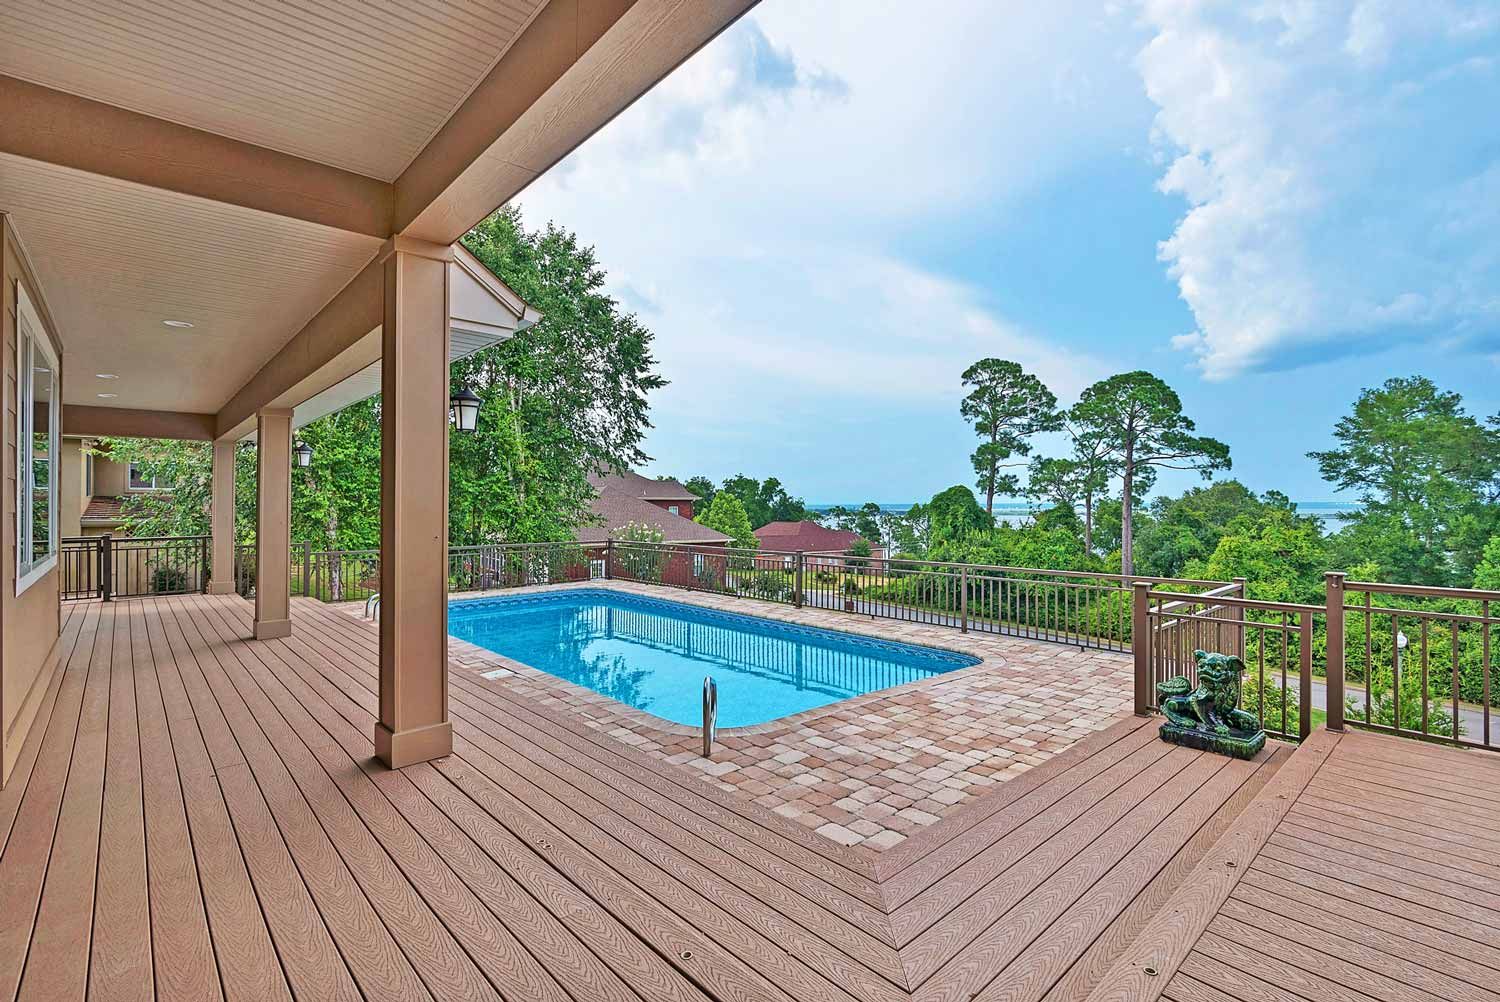
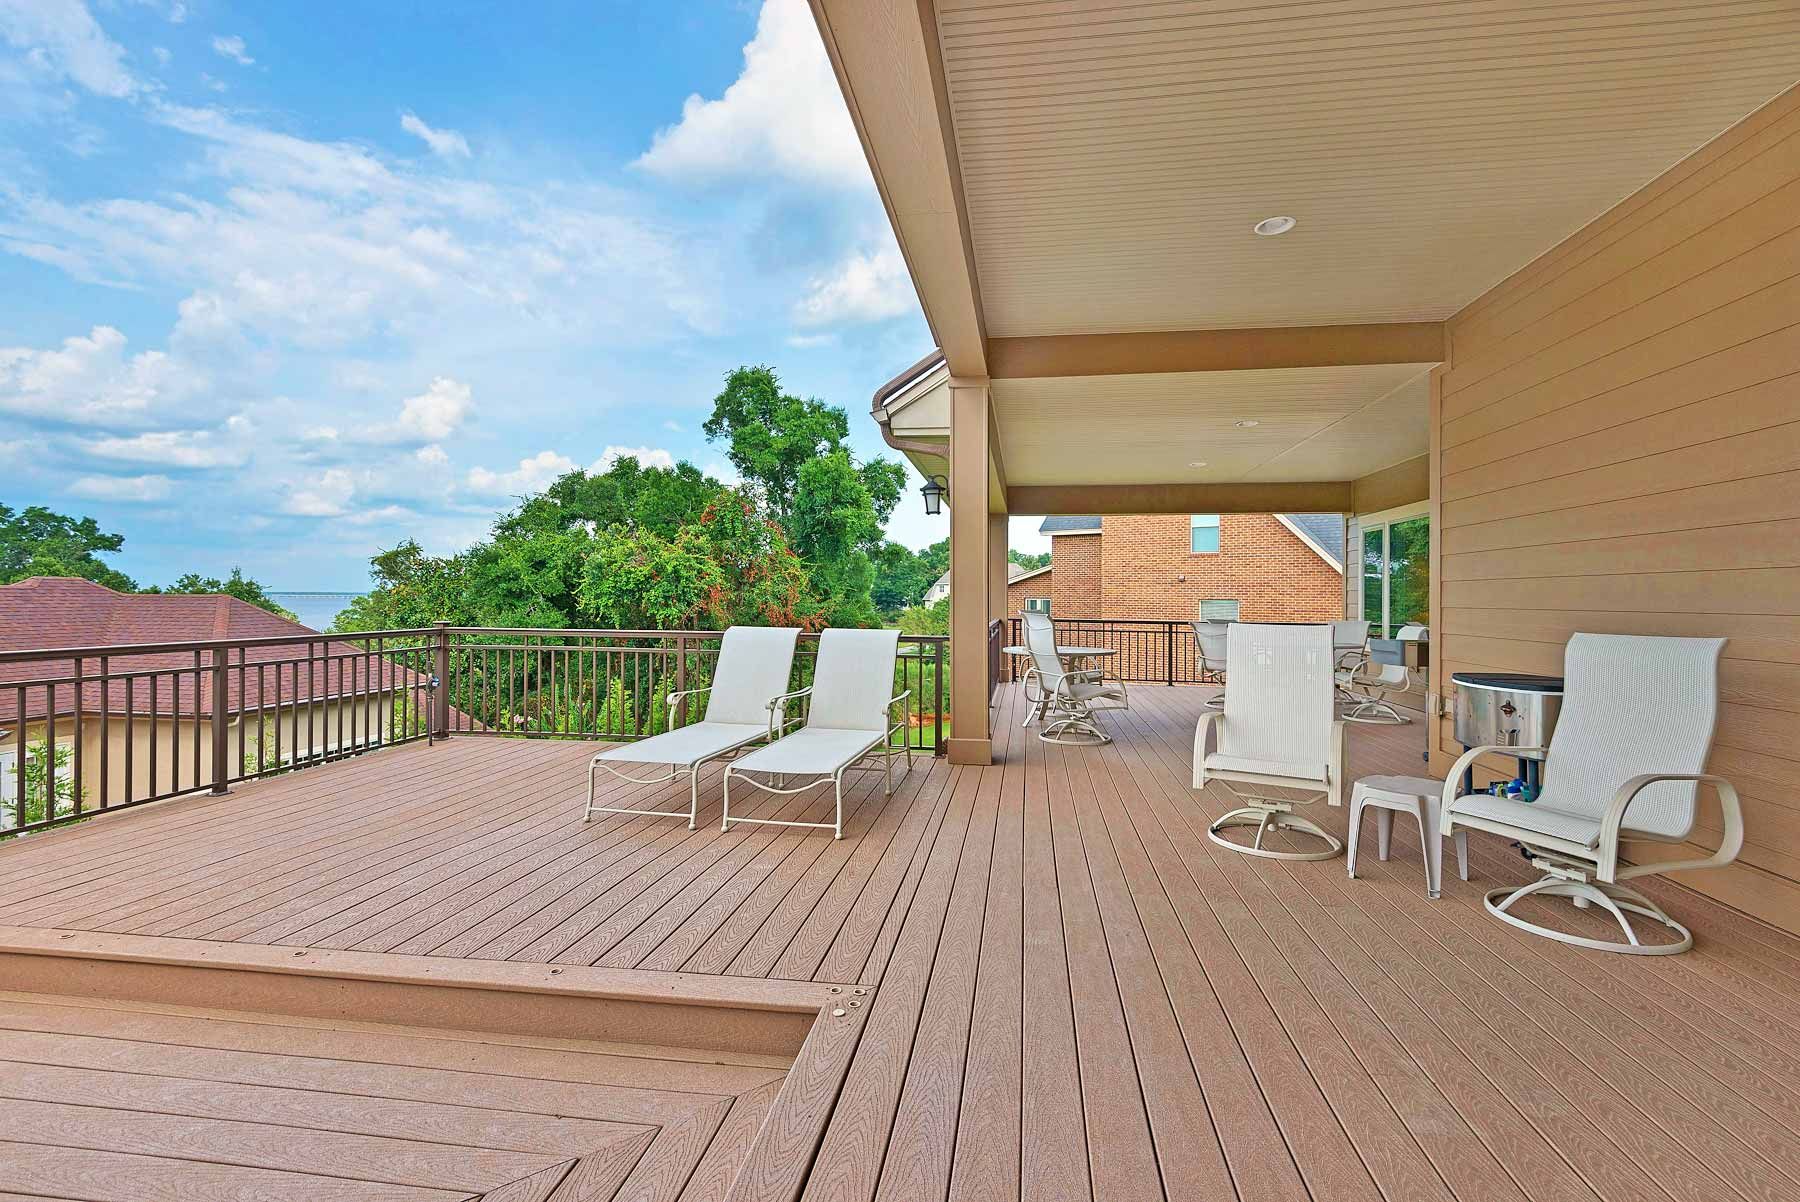
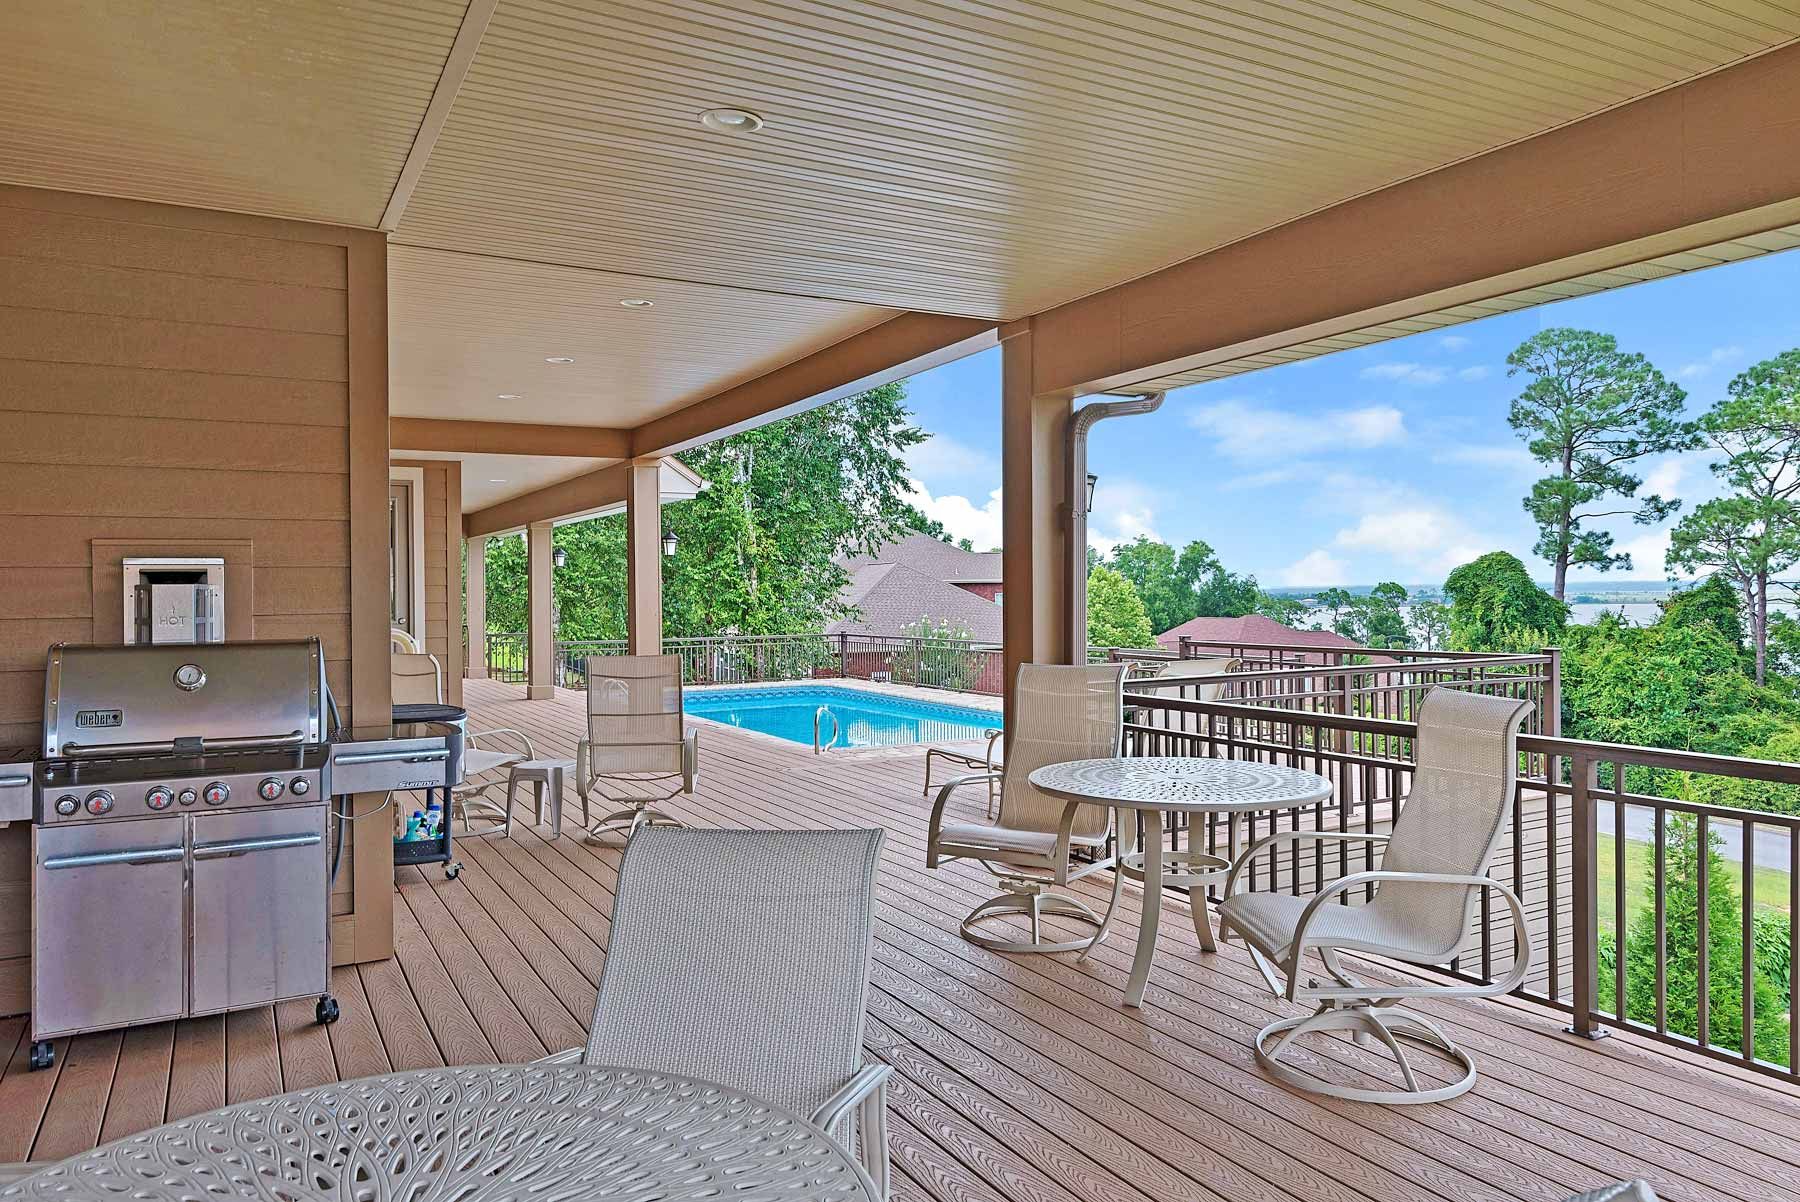
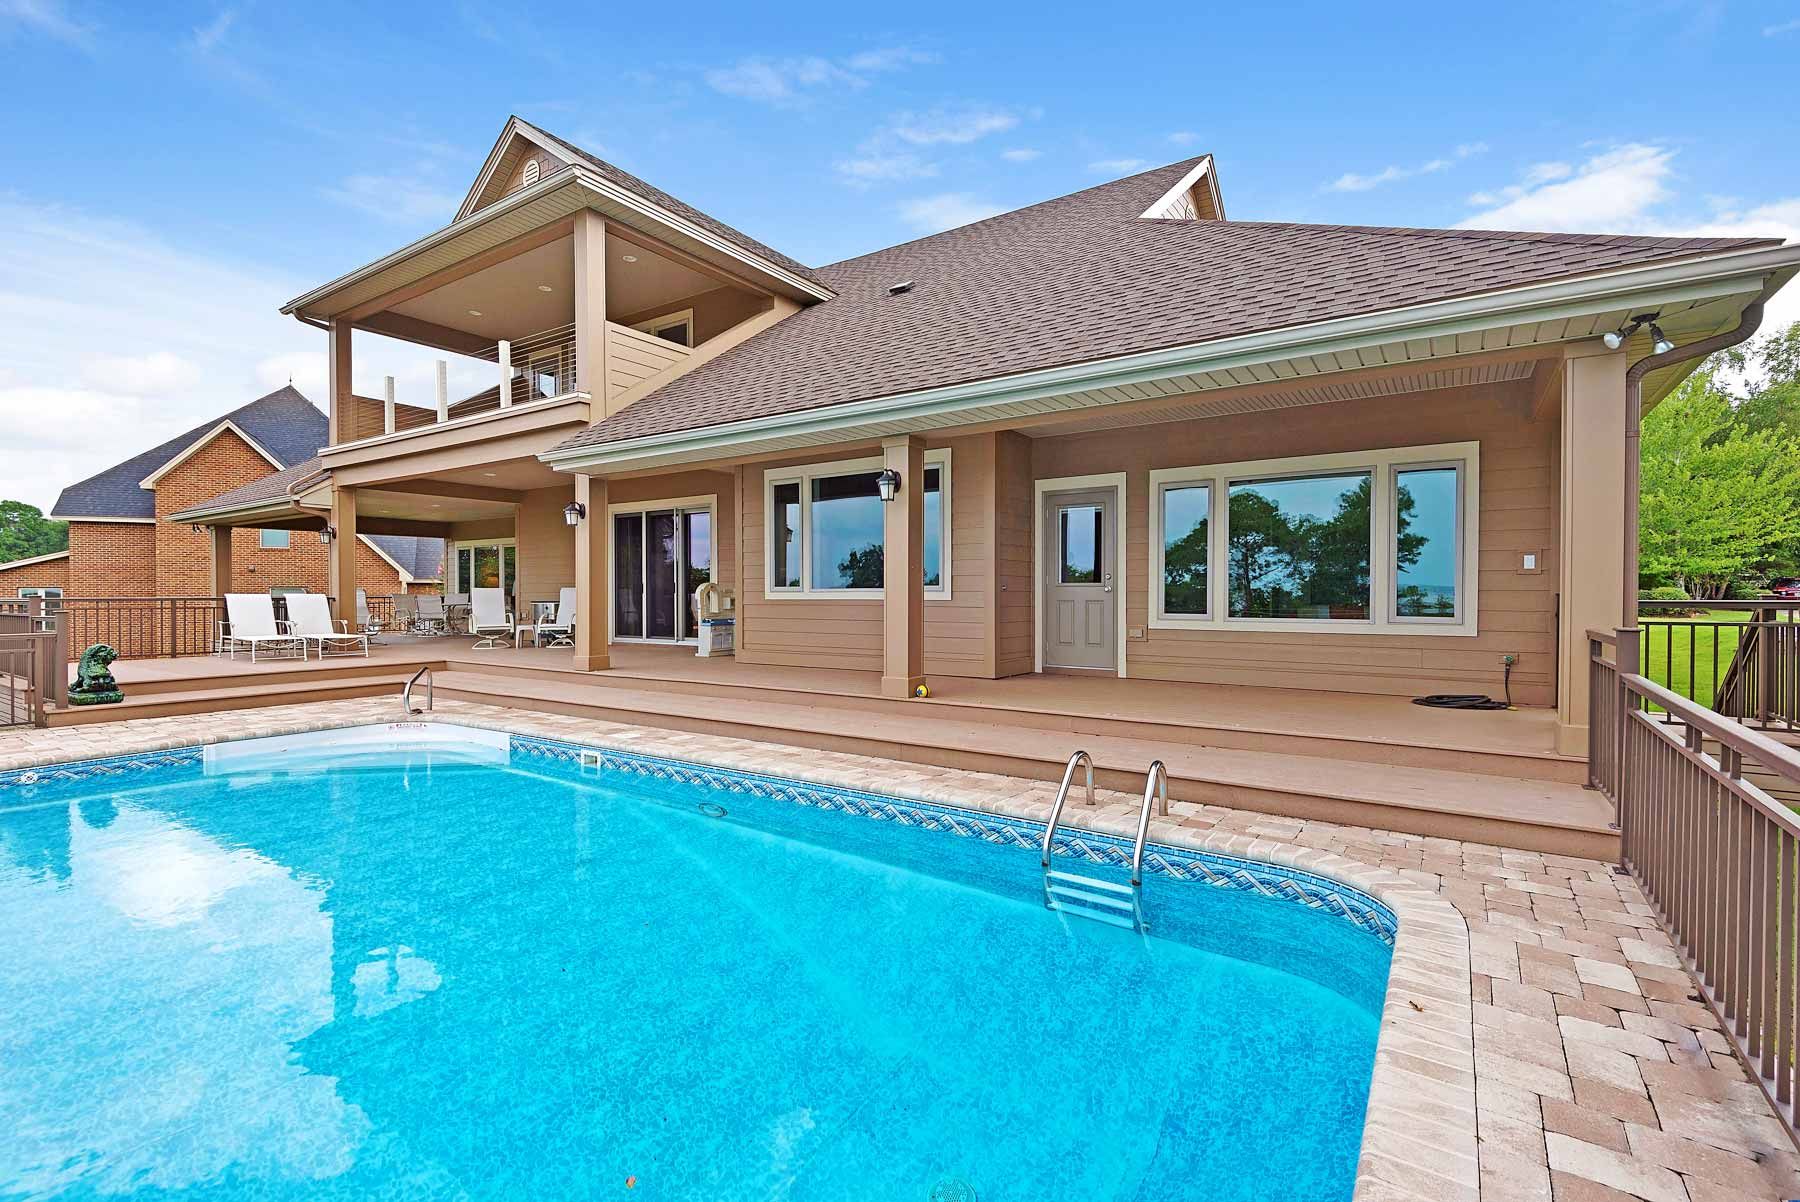
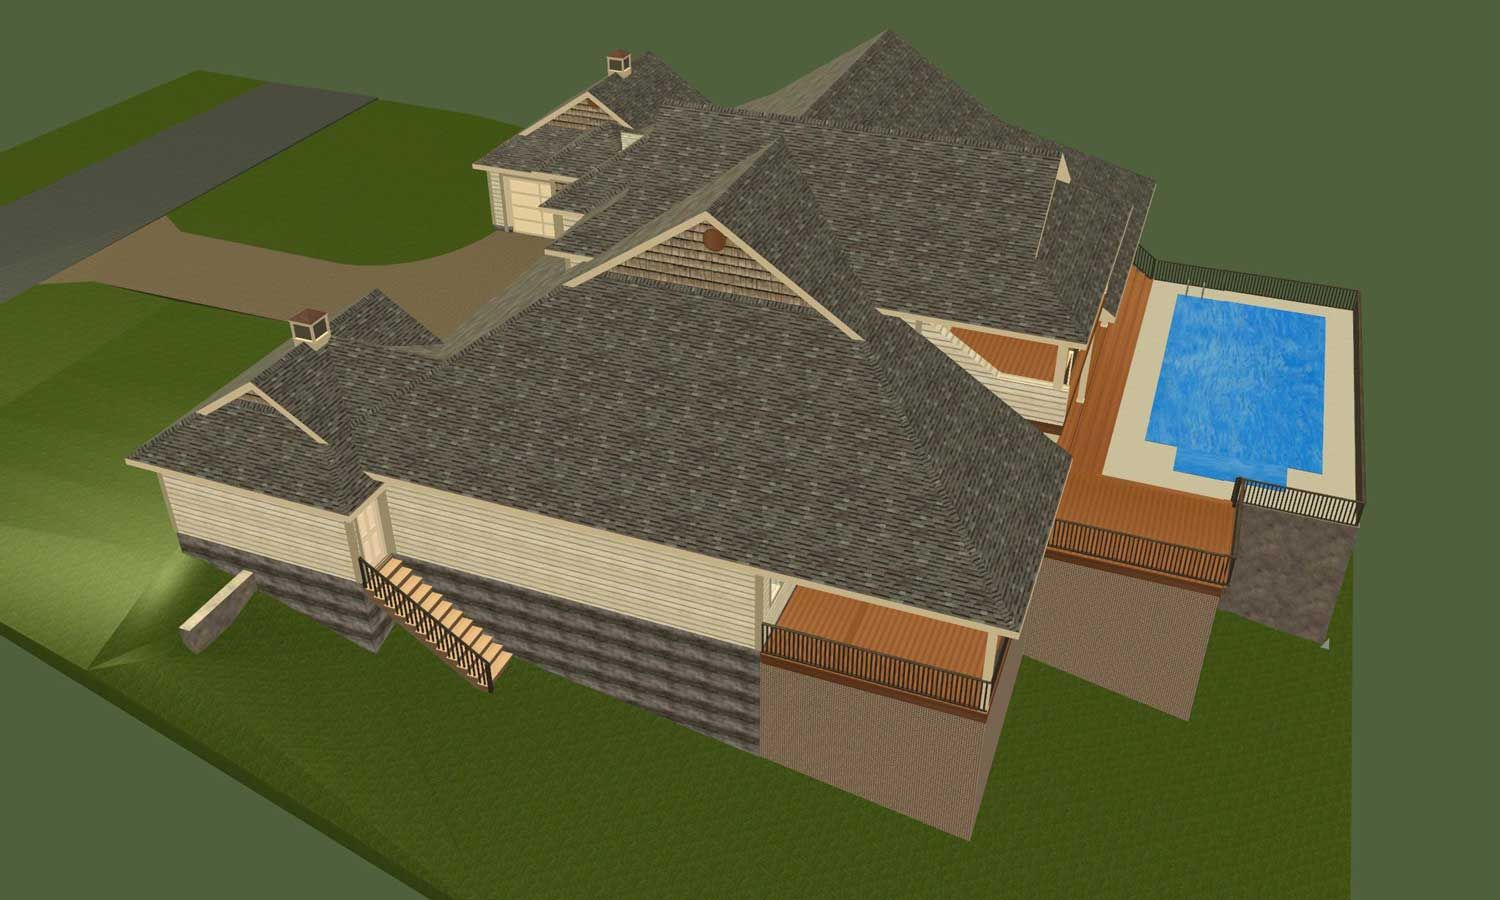
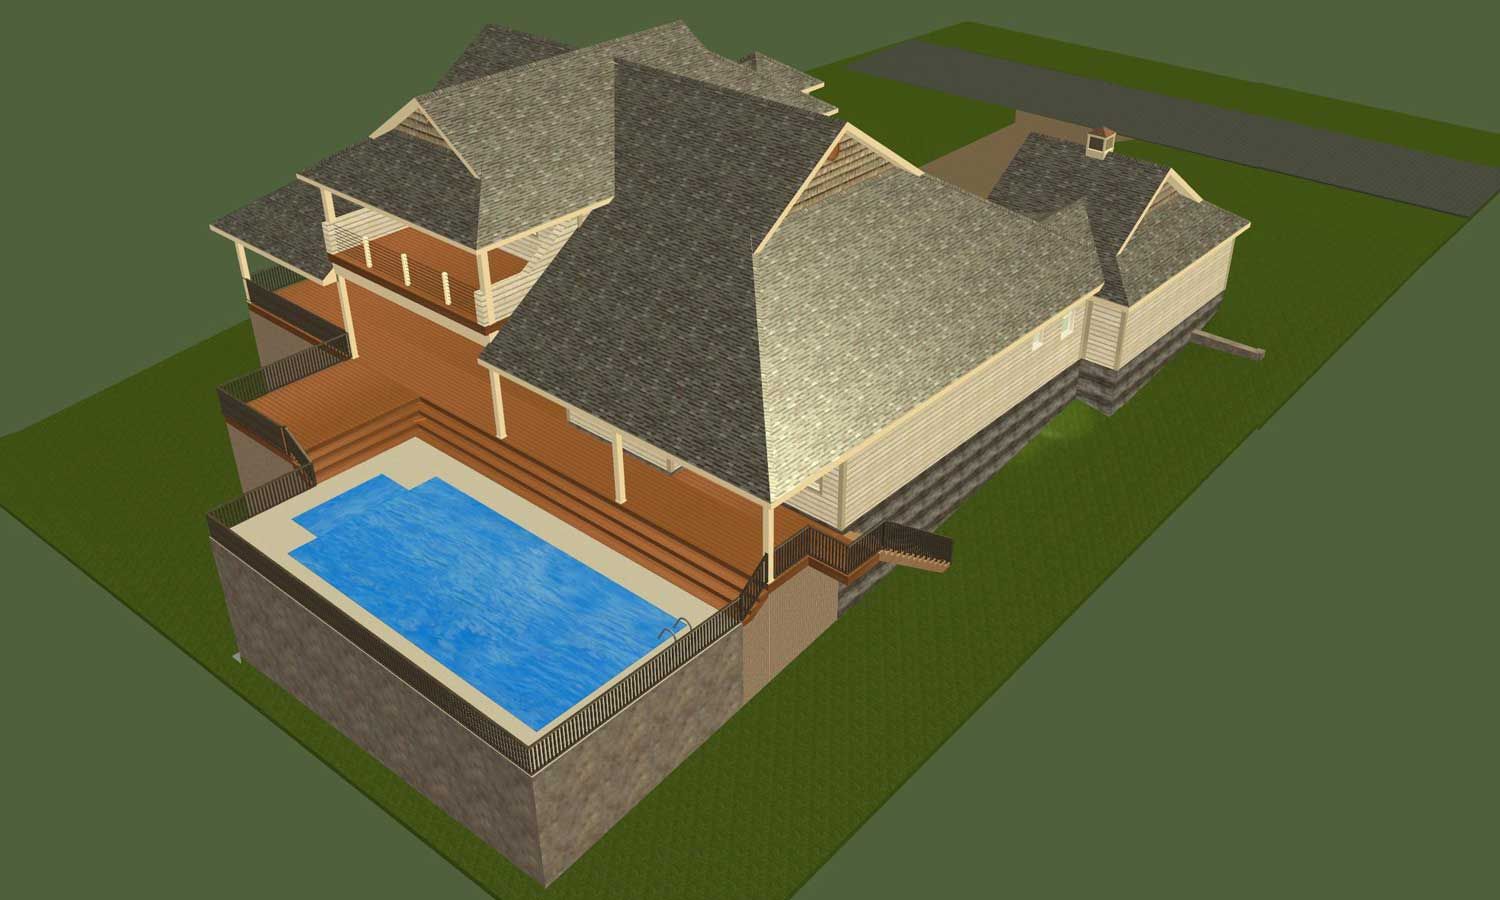
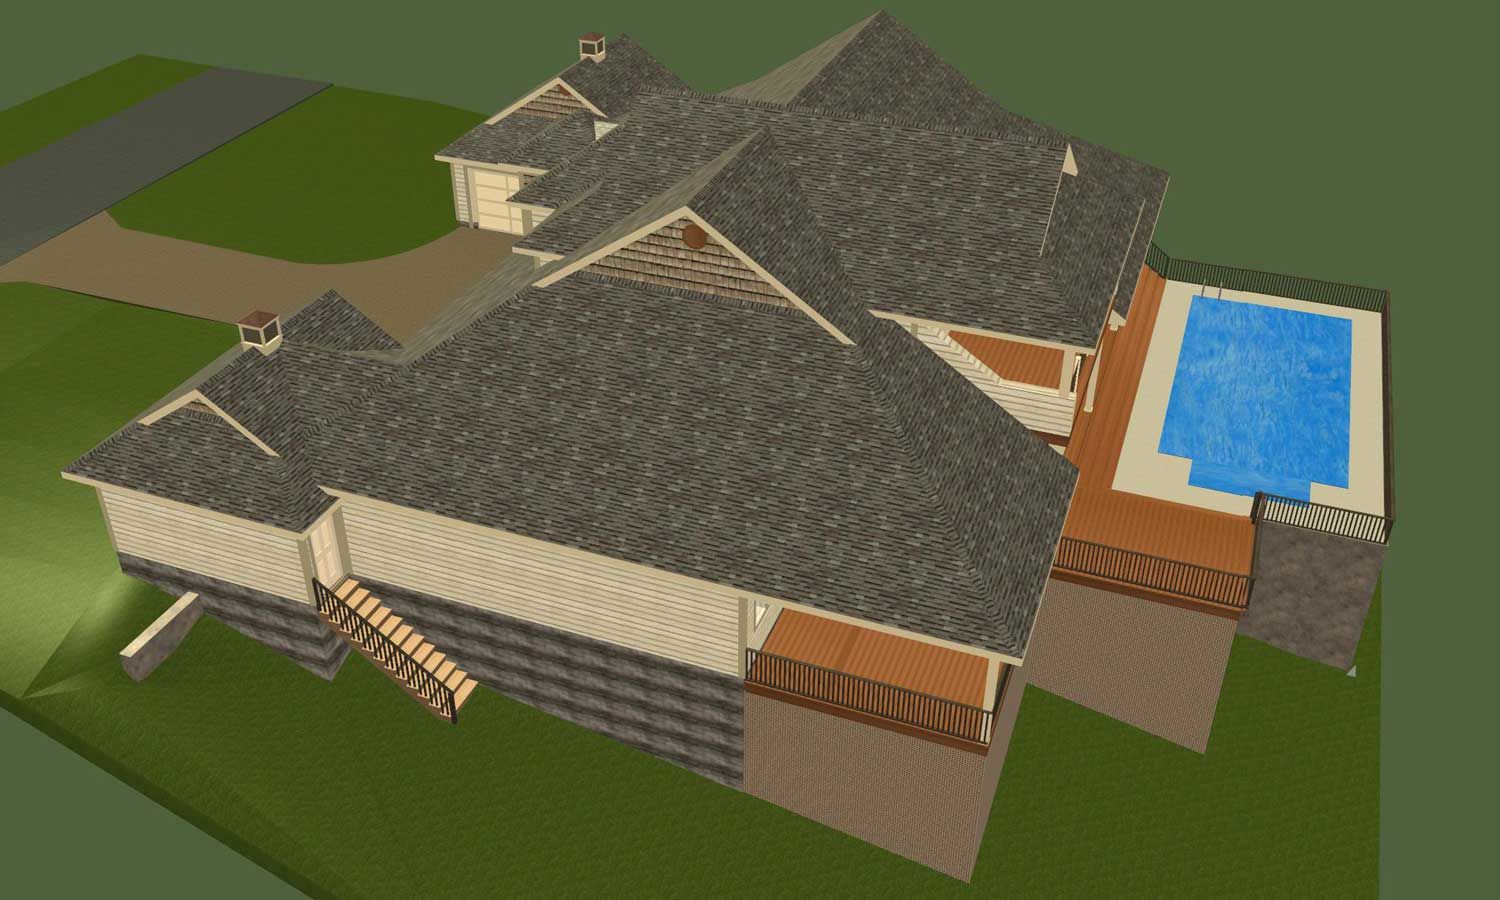
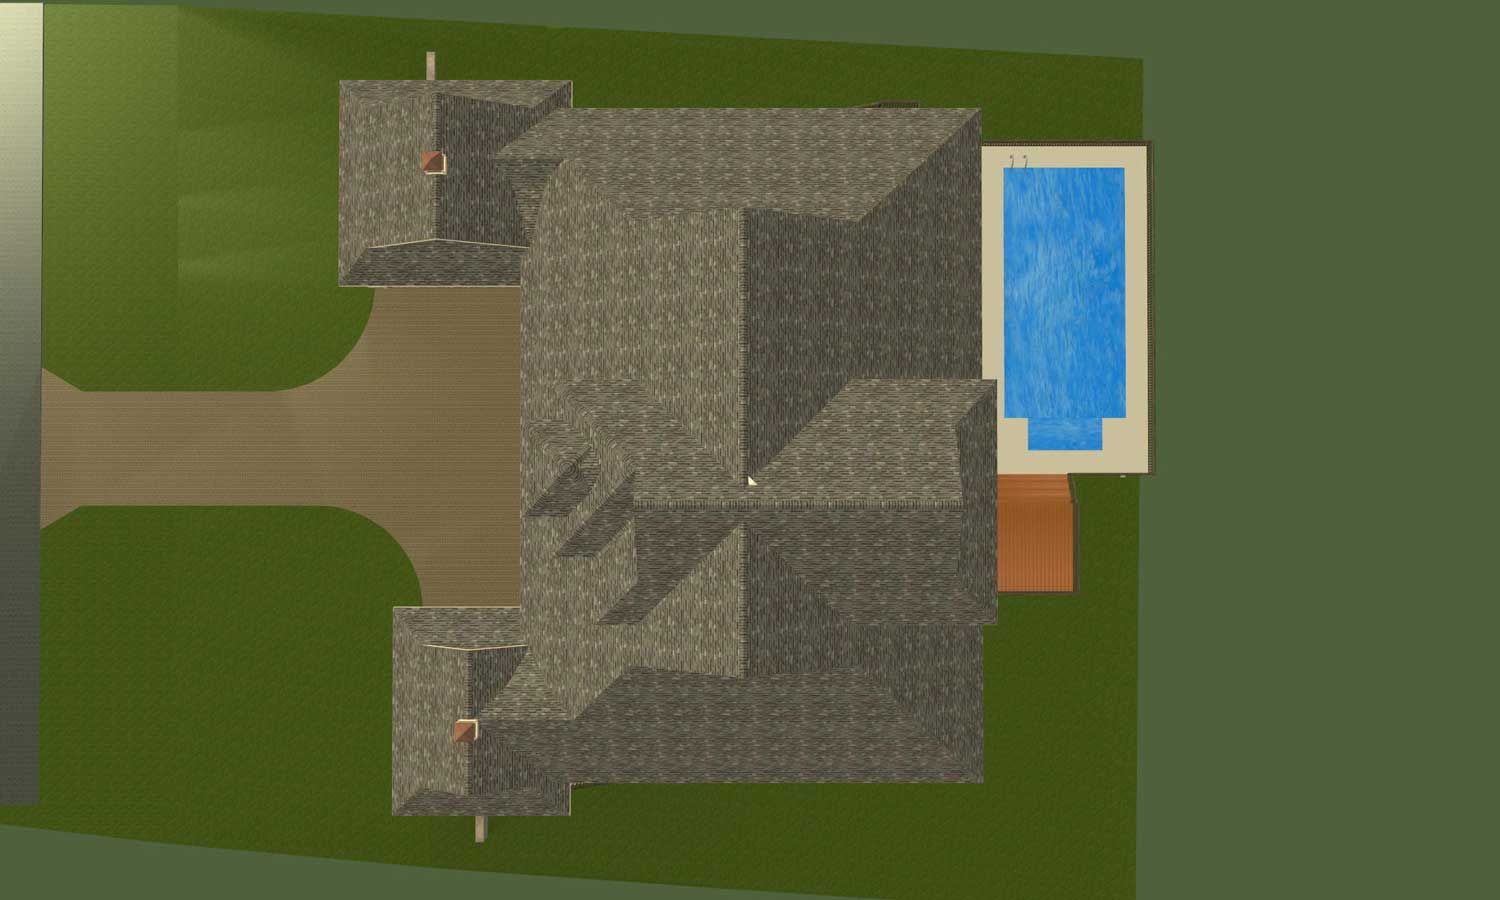
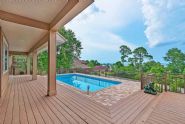
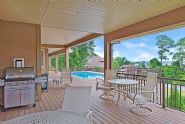
Composite decking, paver pool deck.


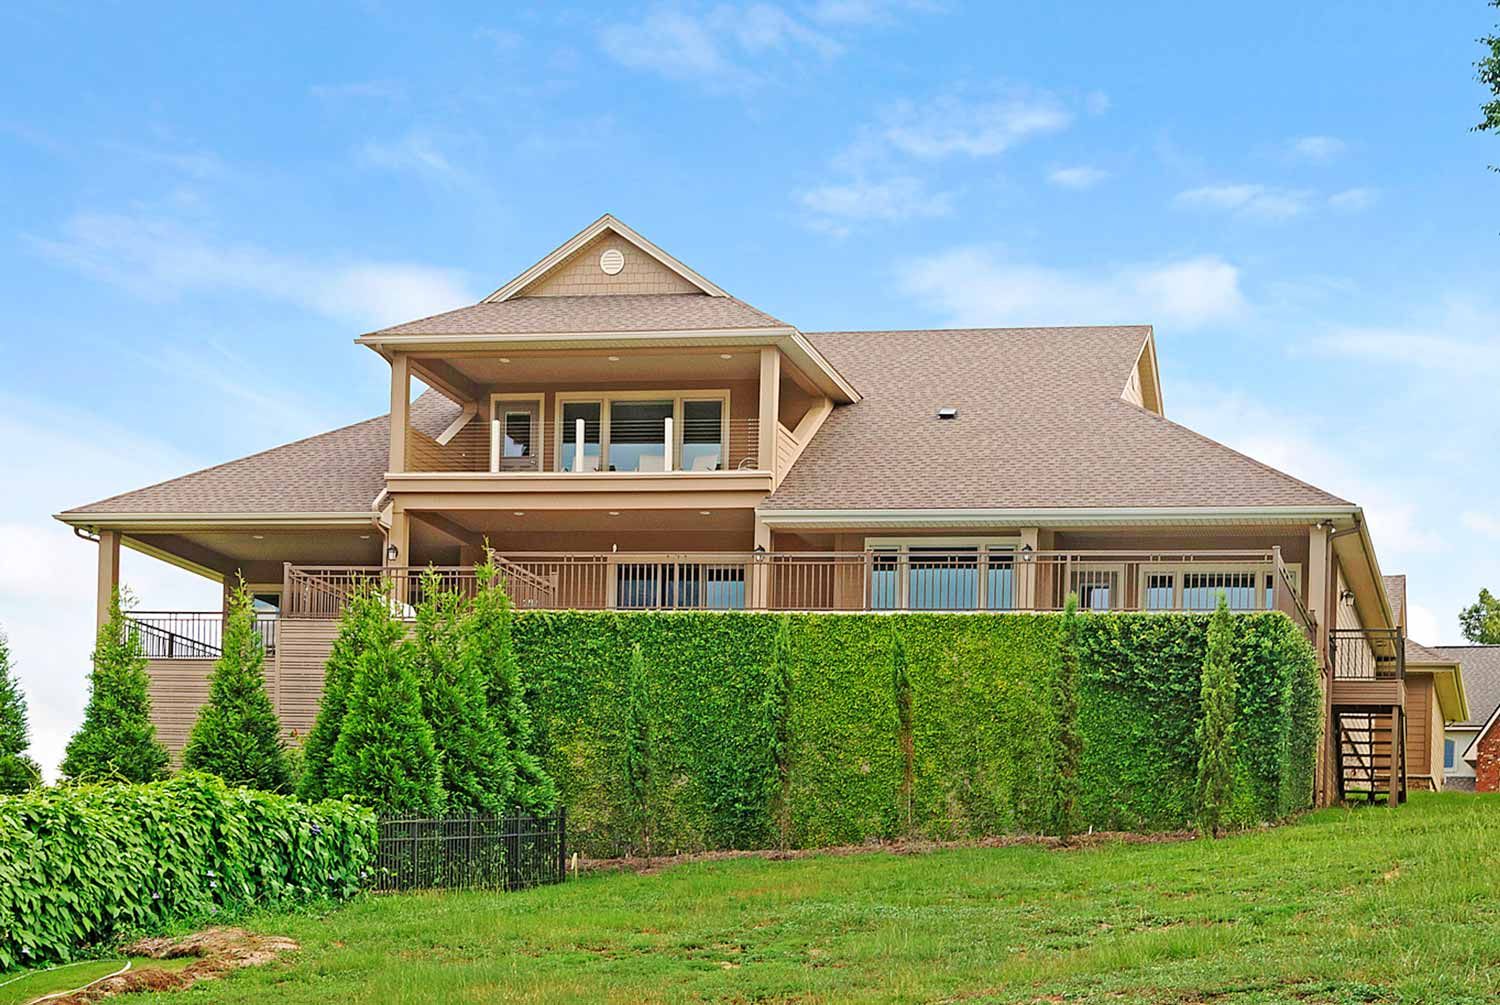
Ivy was planted to improve the appearance of the pool containment vessel.

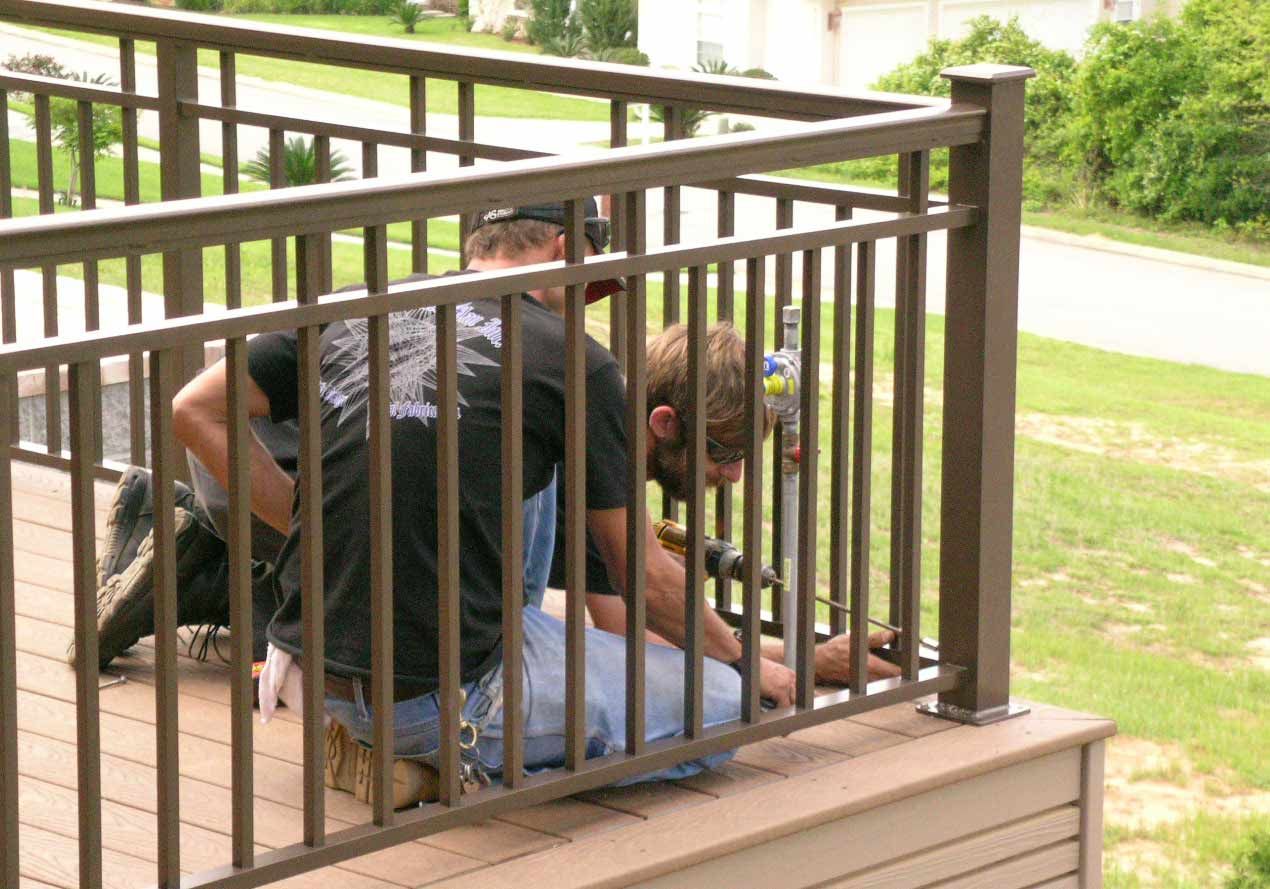
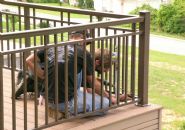
Metal workmen from the Renaissance Man install the architectural railing around the deck.

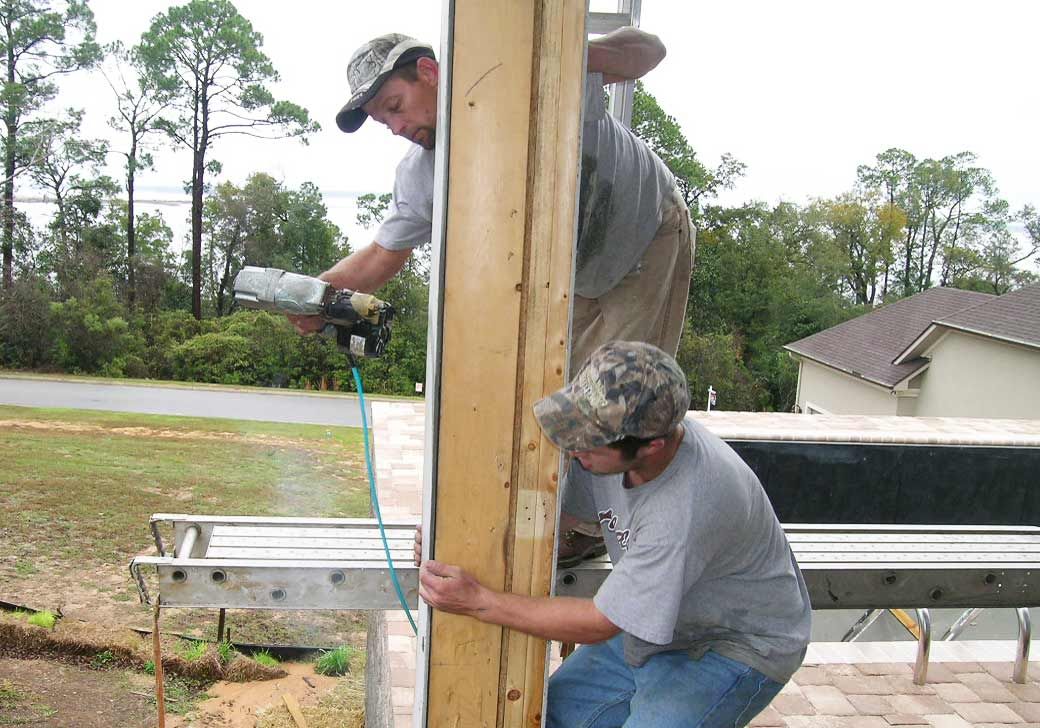
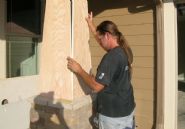
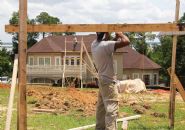
Gerry assembles the front porch tapered columns.  We used marine plywood to ensure durability.

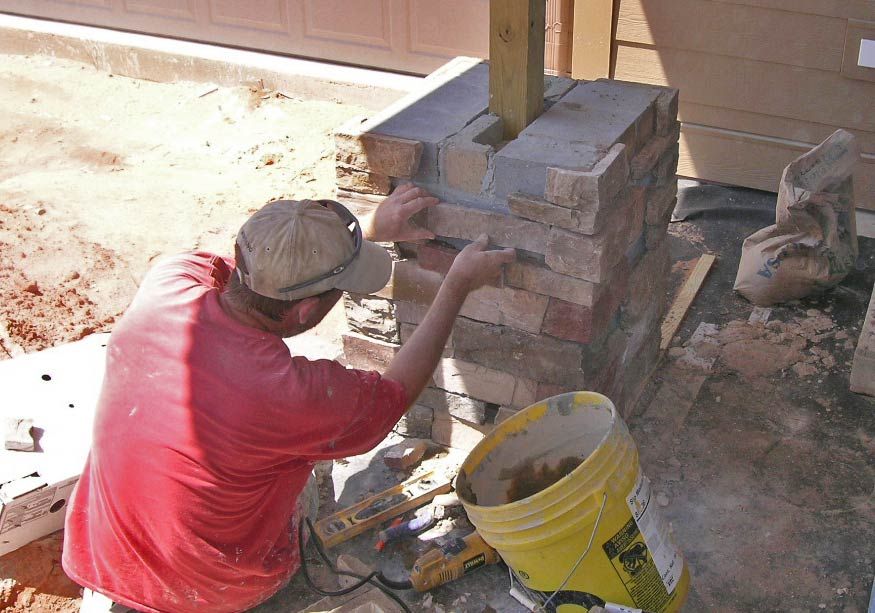
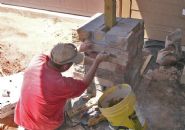
Robert installs stone veneer on the front porch column bases

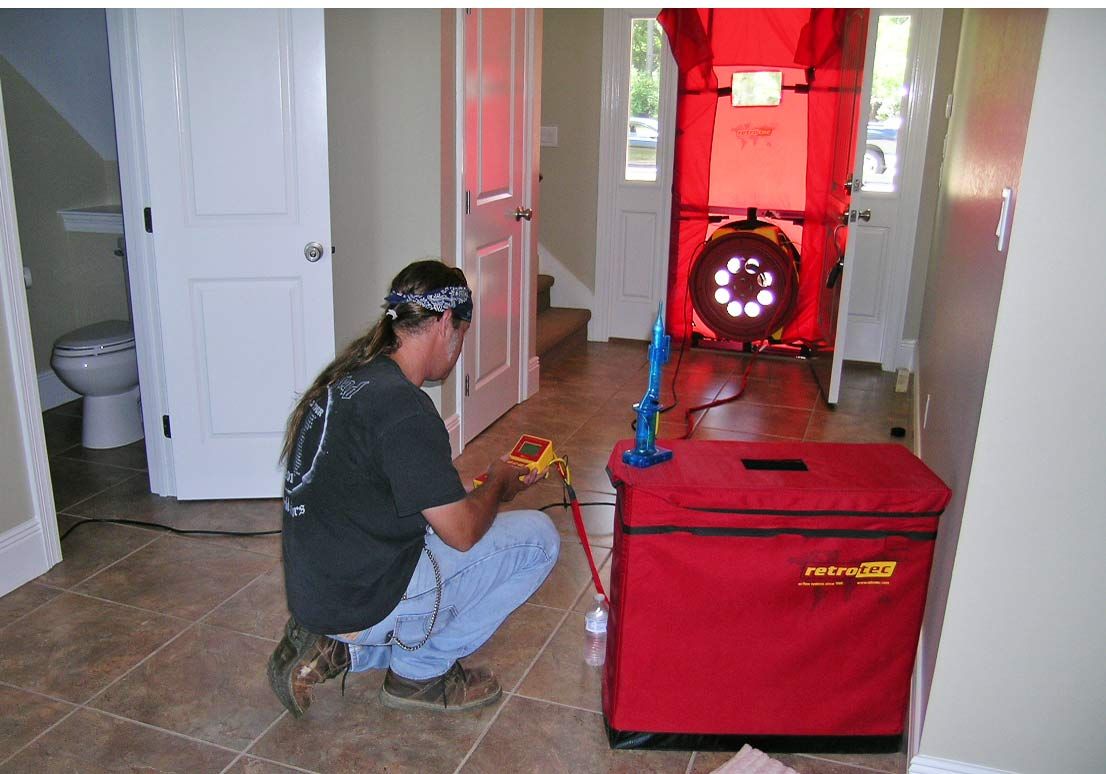
Gerry opereates the door fan to test the thermal envelope by creating a 50 pascal vacuum inside the building and recording the airflow.

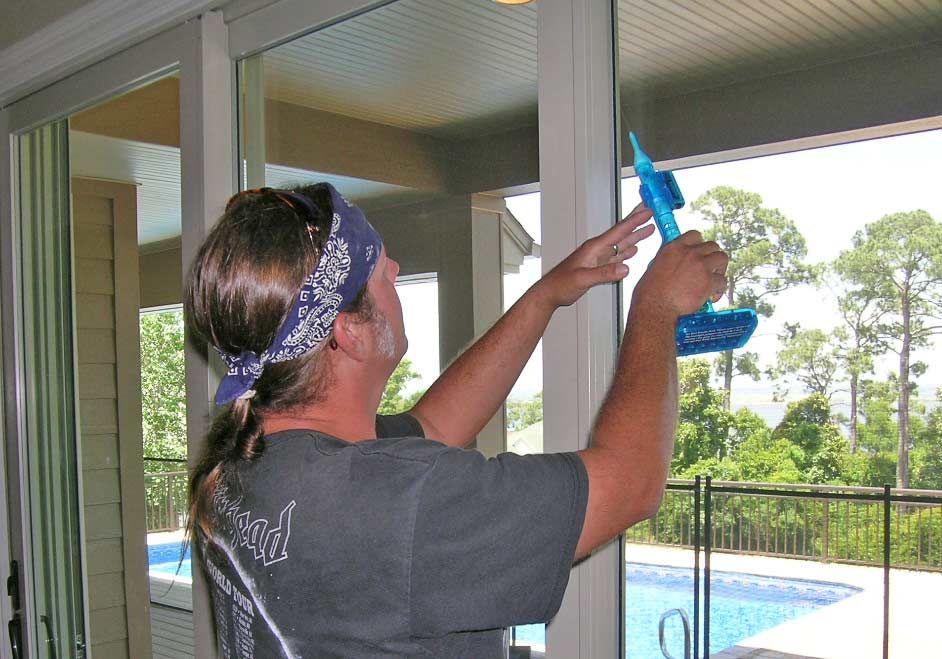
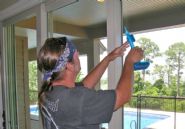
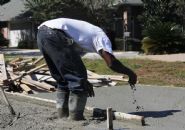
Gerry uses a smoke generator to test for air leakage around the sliding glass door.

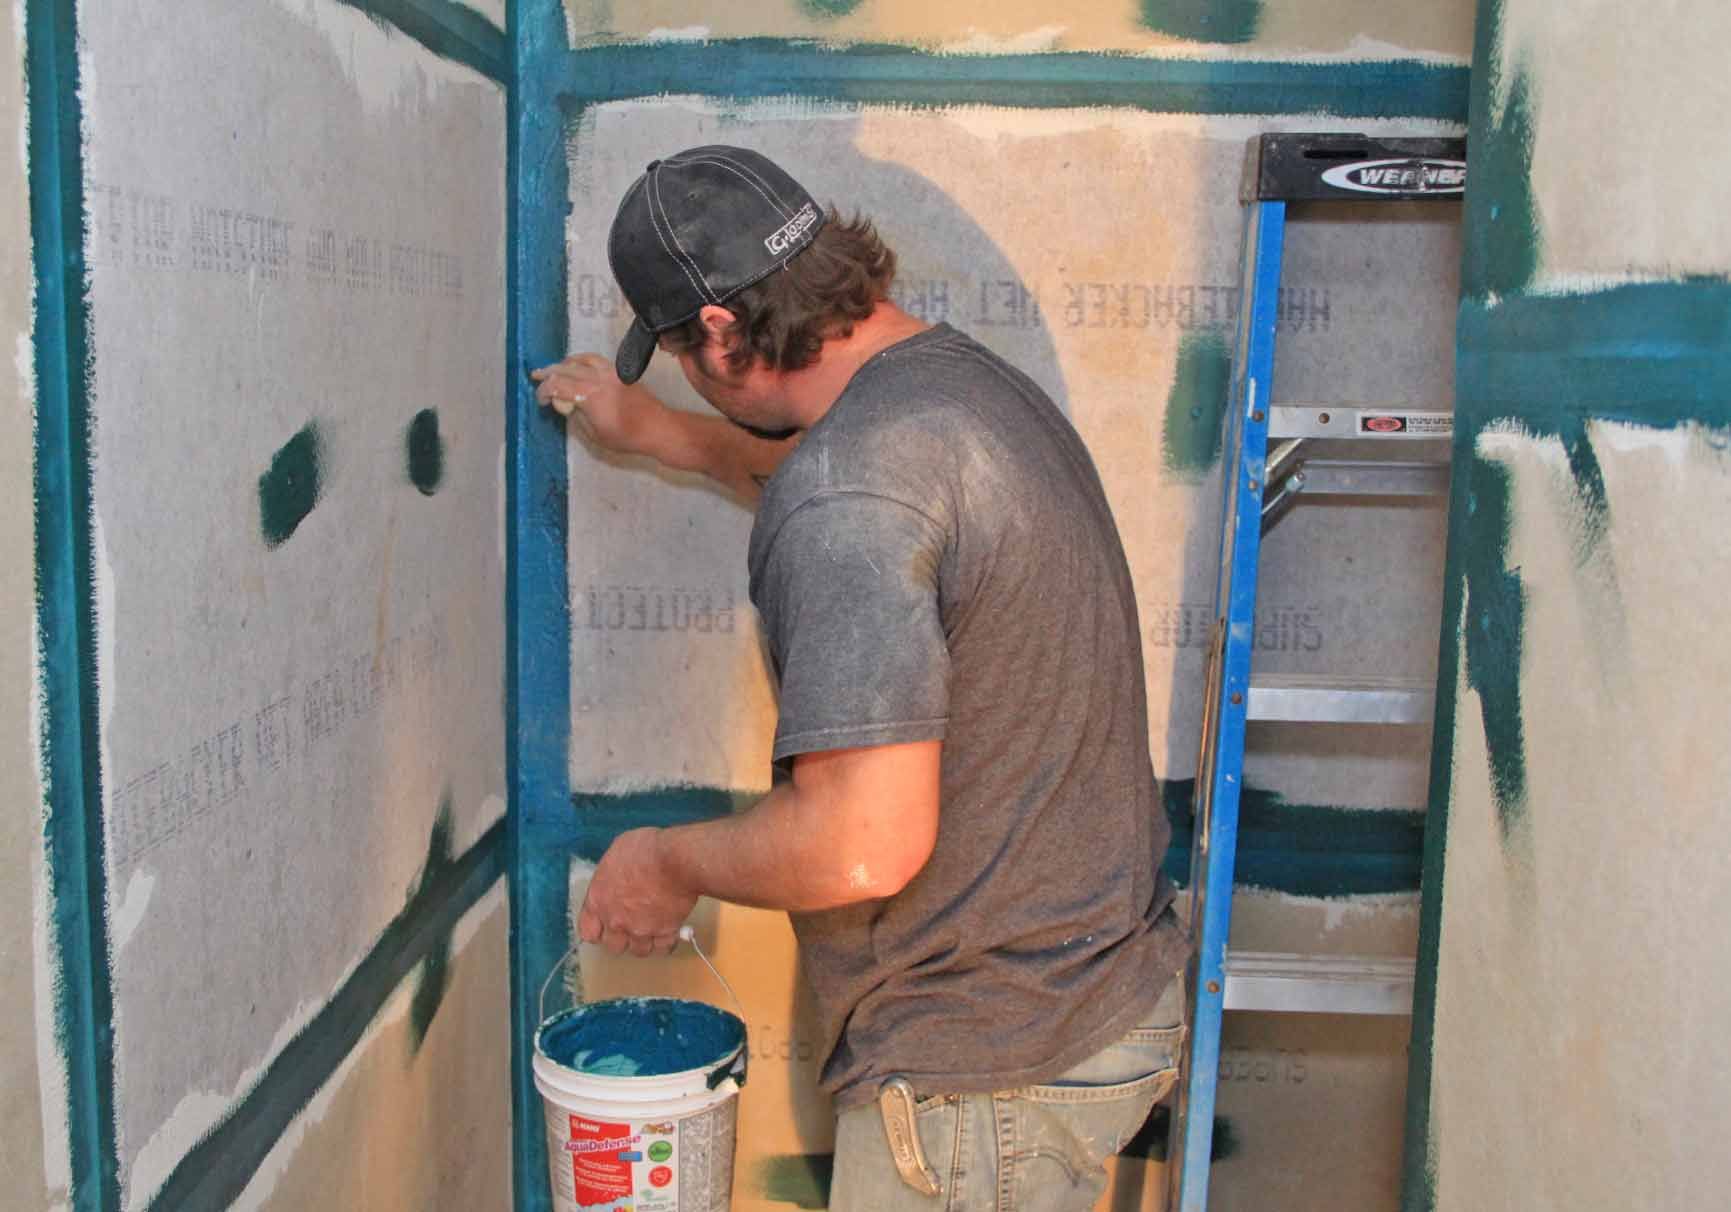
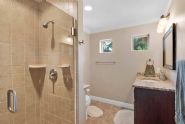
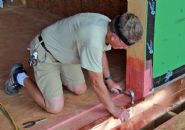
Sean seals the joints in the master shower to create a water tight substrate for the walk-in tile shower.

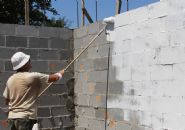
Wrapping the rear porch columns with cement fiber siding.

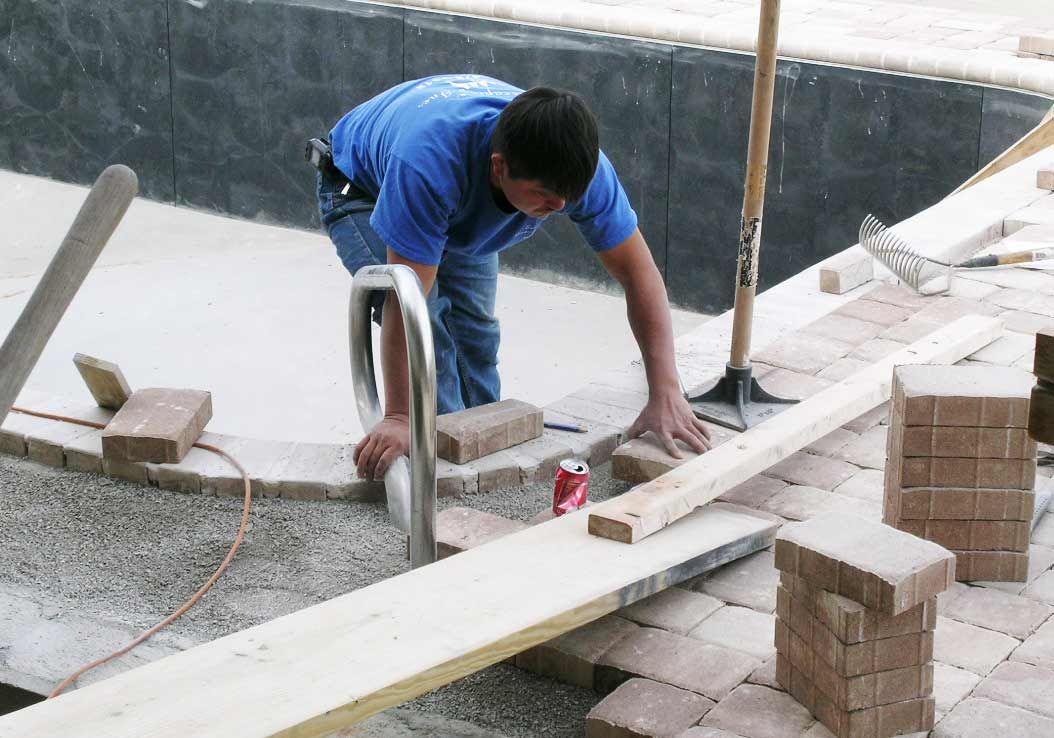
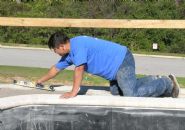
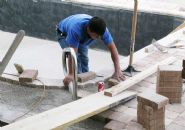
Leveling the base material that the pavers set on.

Setting the pool pavers.

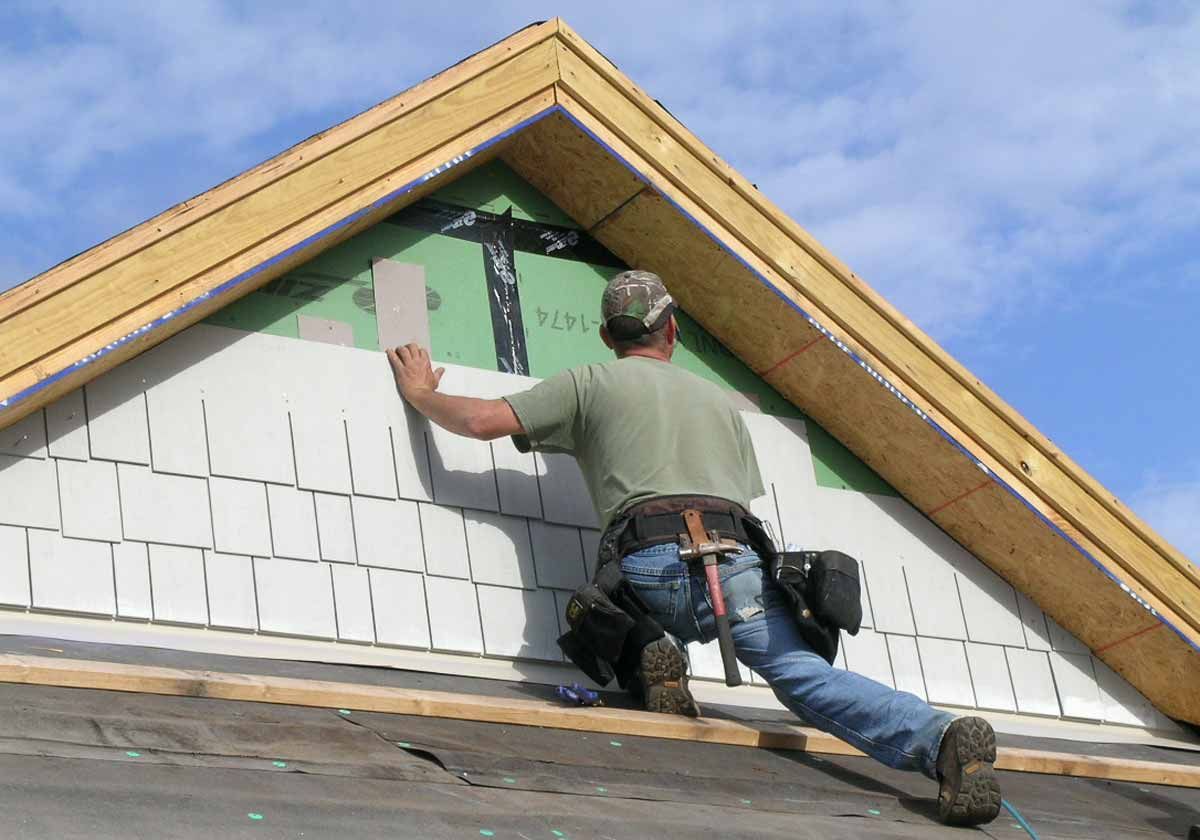
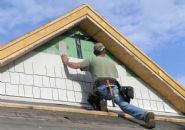
Zachary installs shake cement siding on the gable ends

Zachary nails off a frieze board on the gable end.  Frieze boards give depth to the cornice and make the shake siding stand out.

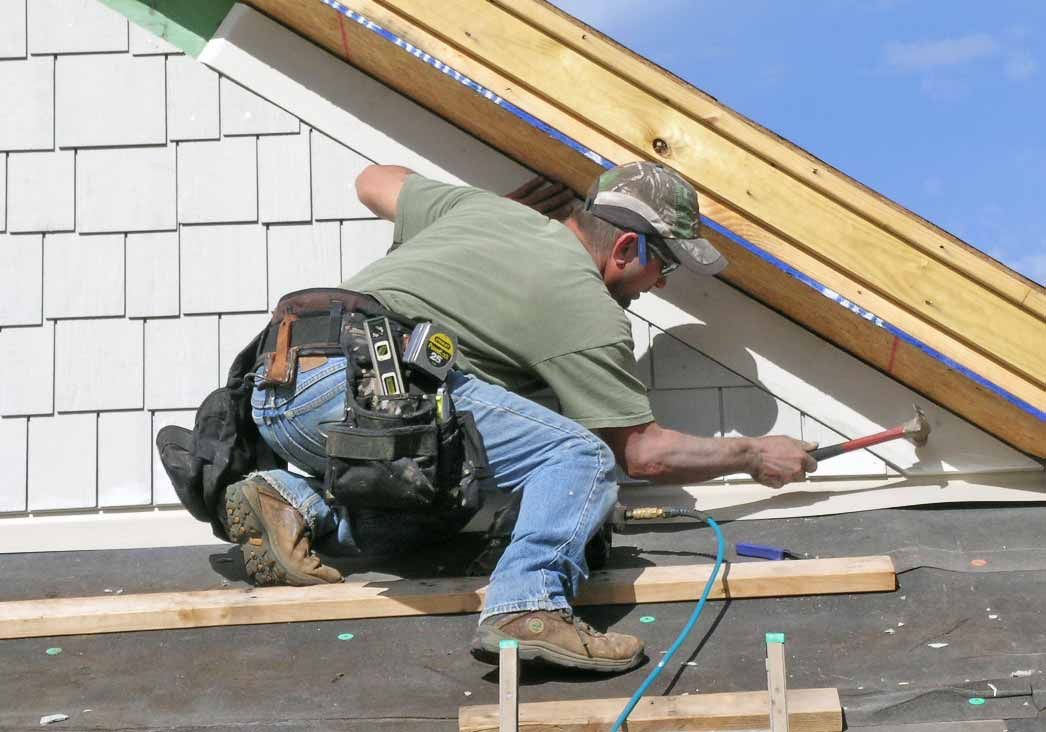
Steven primes the cut ends of the siding.  This is an important and often overlooked step when properly installing cement siding.  If you don't seal the cut ends, moisture will absorb into the siding and cause paint blistering.

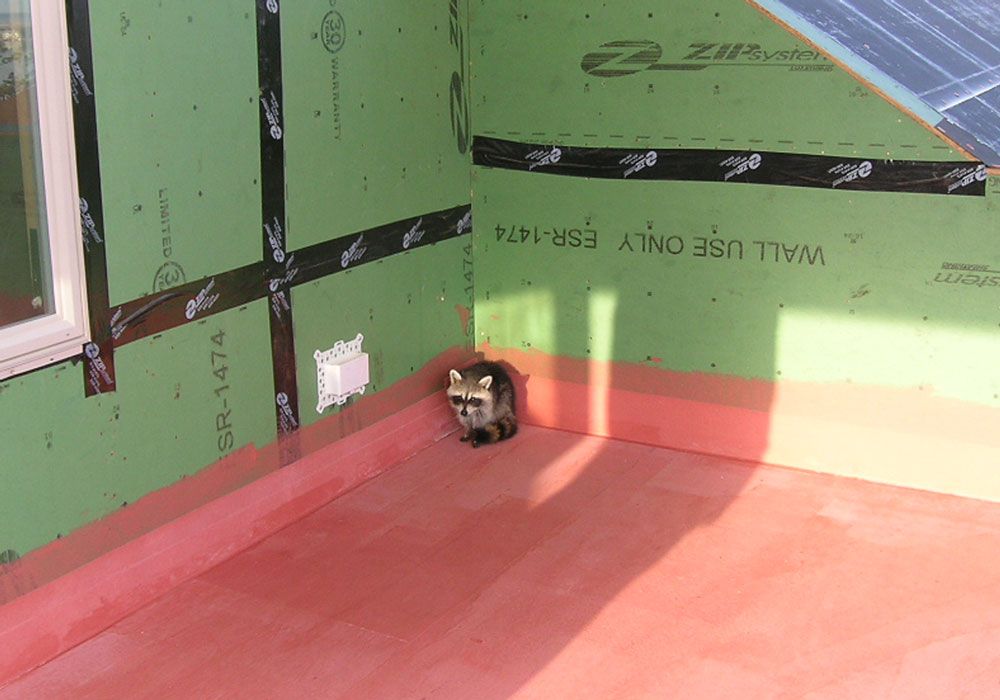
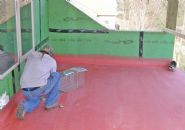
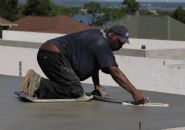
The upper porch deck has been coated with a pink sealoflex water proof coating.  A finish textured wear coating will be applied later.  Oh, the coon?  Jasper found coon poops in the house and finally tracked down the perp.  He ran up the stairs, out the door, and onto the 2nd floor deck but was smart enough not to jump.

Gerry tried to coax him into the trap with sardines and cookies.  He's not buying it right now but later on he did go in and we got him.

We are a green builder so in keeping with our commitment to energy efficiency and conservation of natural resources we released him into a nice habitat in the Gulf Breeze area with natural spring feed ponds and plenty of food sources.

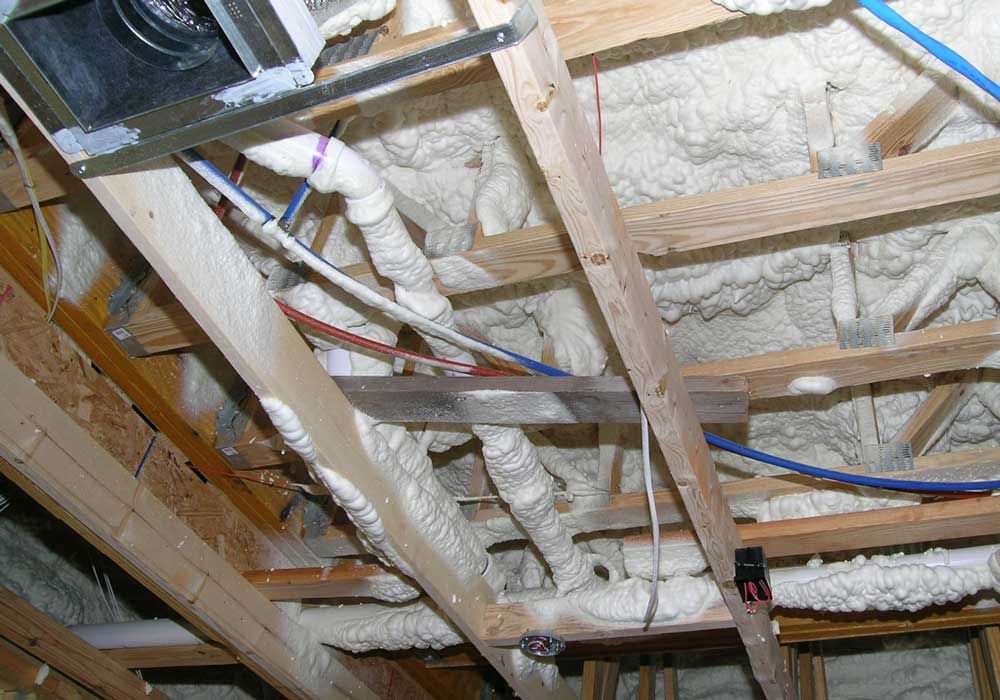
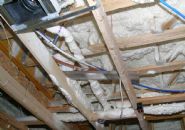
The underside of the second floor decking has been sprayed with foam for sound deadening.  We also sprayed the drain pipes from the bathroom on the second floor to cut down on the noise in the den below. 


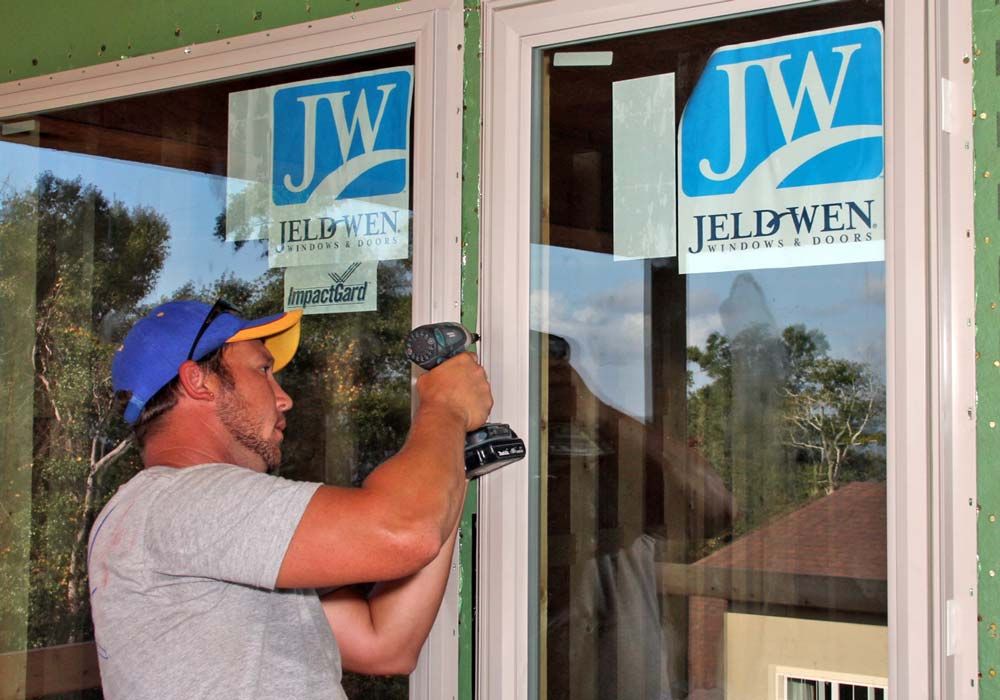
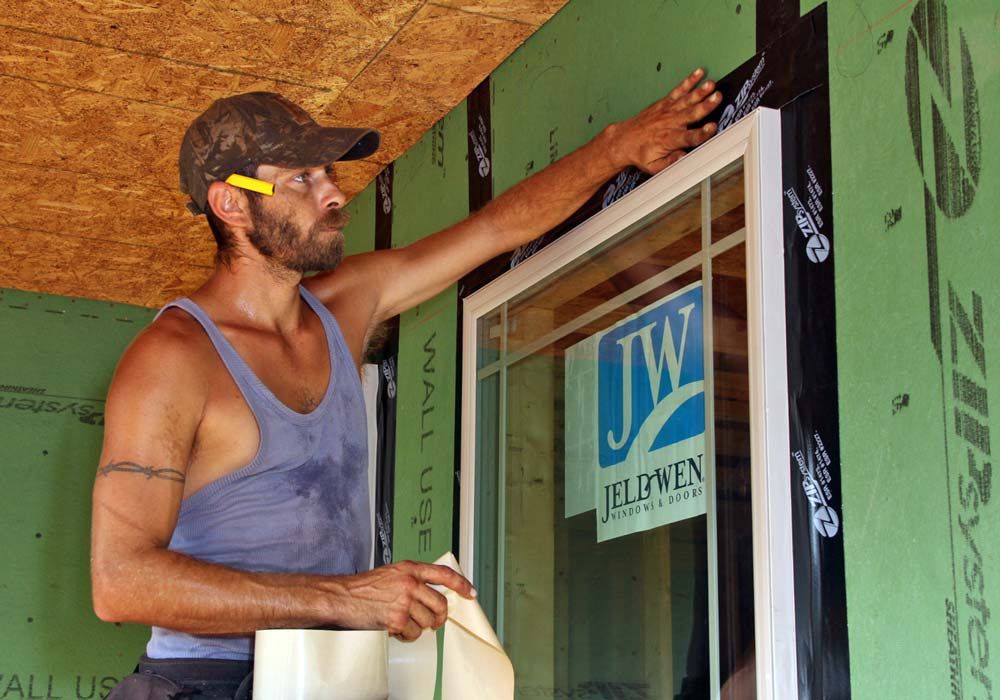
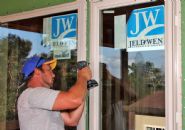
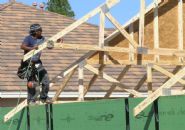
Ricky installs screws in the window frames every 8".  These windows aren't going anywhere.

Robert applies zip tape window flashing.  The window flanges have been caulked, screwed, and zip taped to form a water tight double seal.

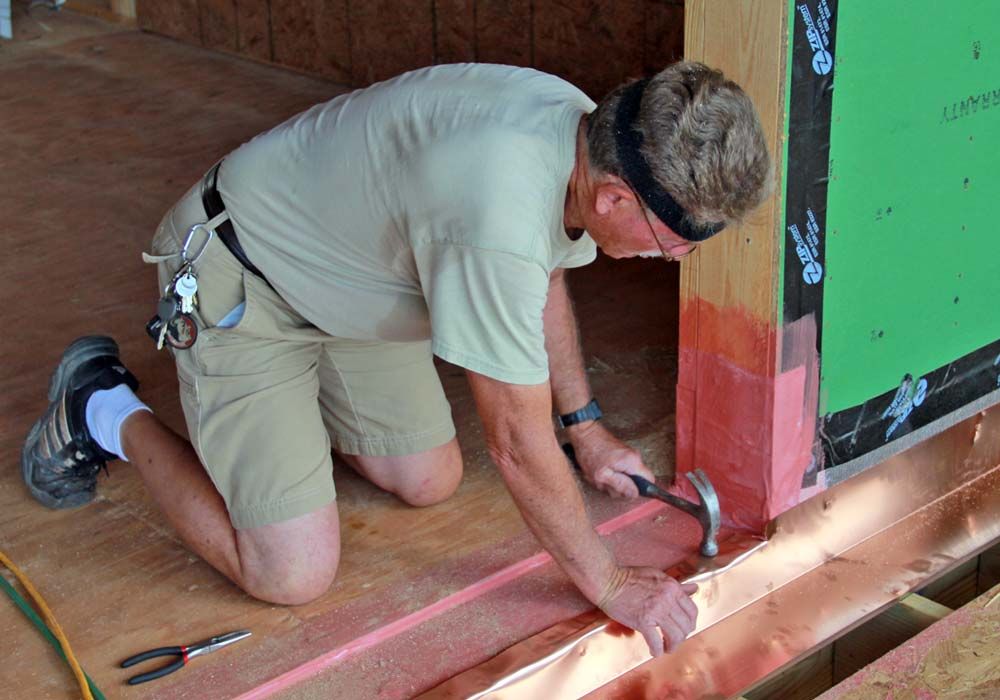
Jasper installs copper deck flashing after sealing the sliding glass door sill with a fabric impregnated rubberized coating to protect the vulnerable areas.  Note the recess area in the floor which will allow the sliding glass door threshold to set down lower and flush with the tile floor covering.

Filiberto planes out a truss so that the decking will lay flat with no humps or dips.  This is an important step in getting the a nice straight line at the edge of the roof.

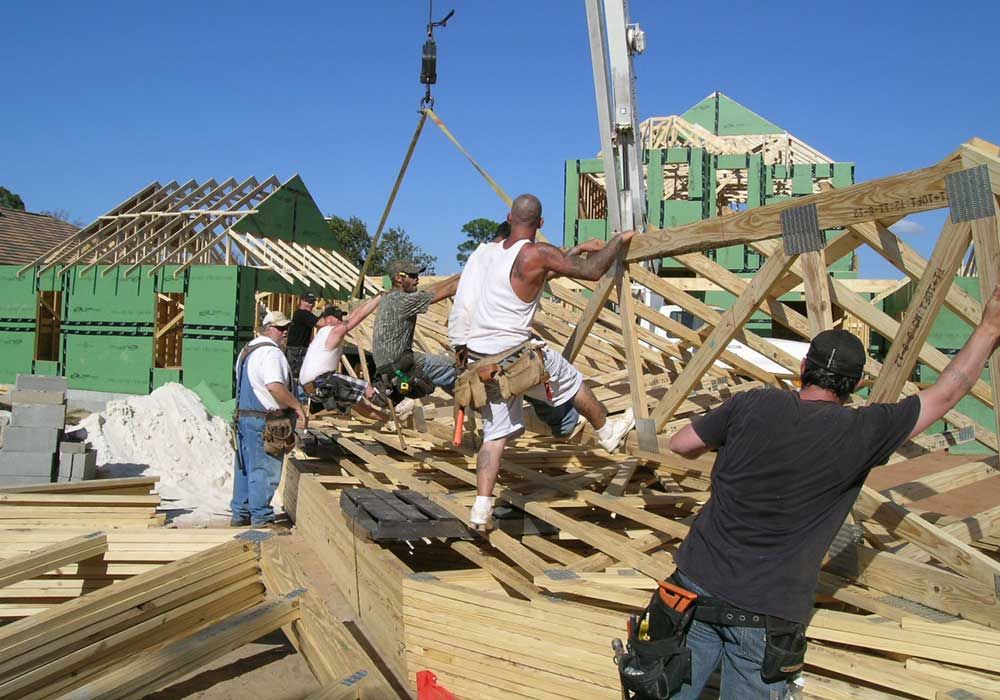
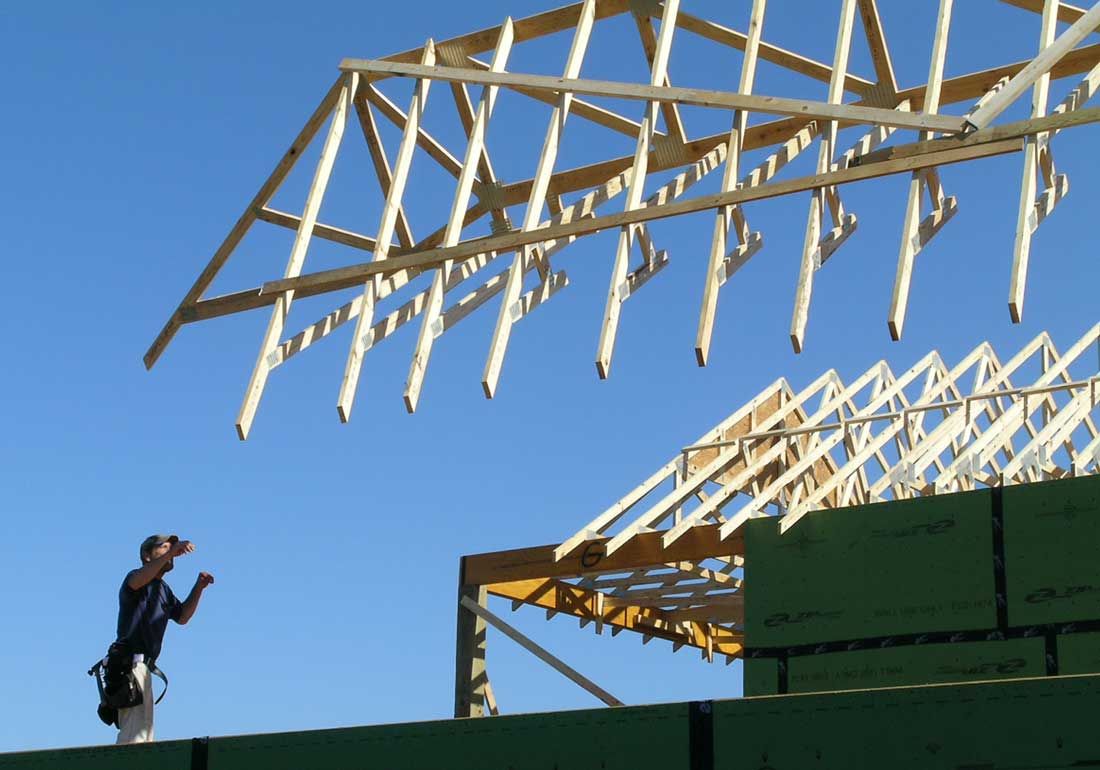
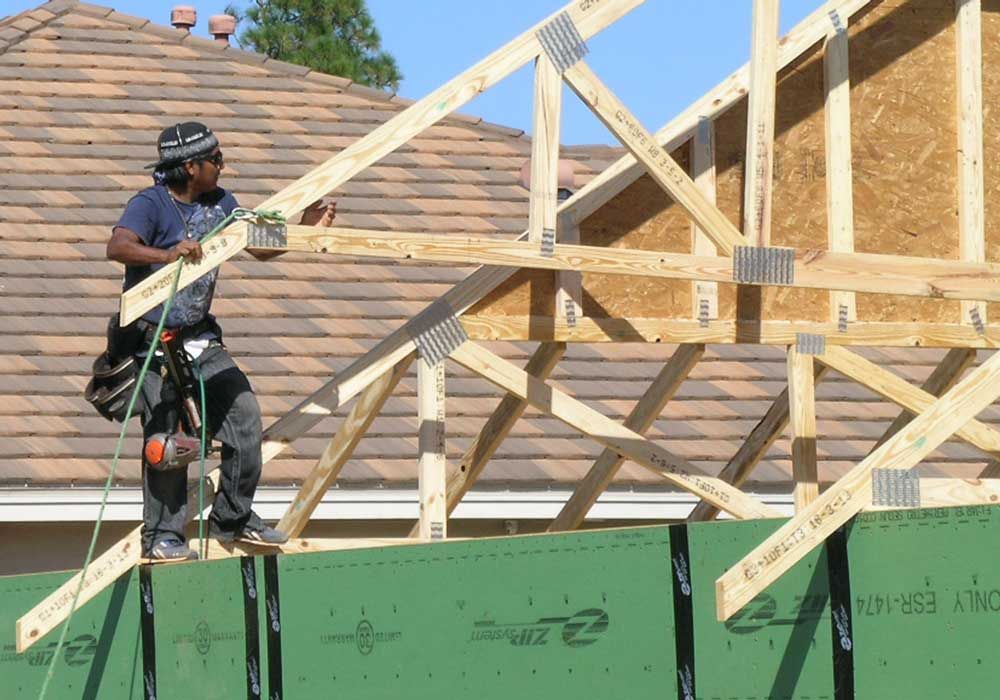
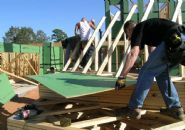
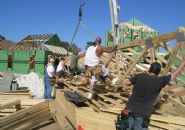
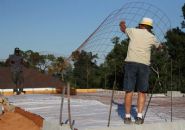
Red assembles a dutch gable truss set on the ground.

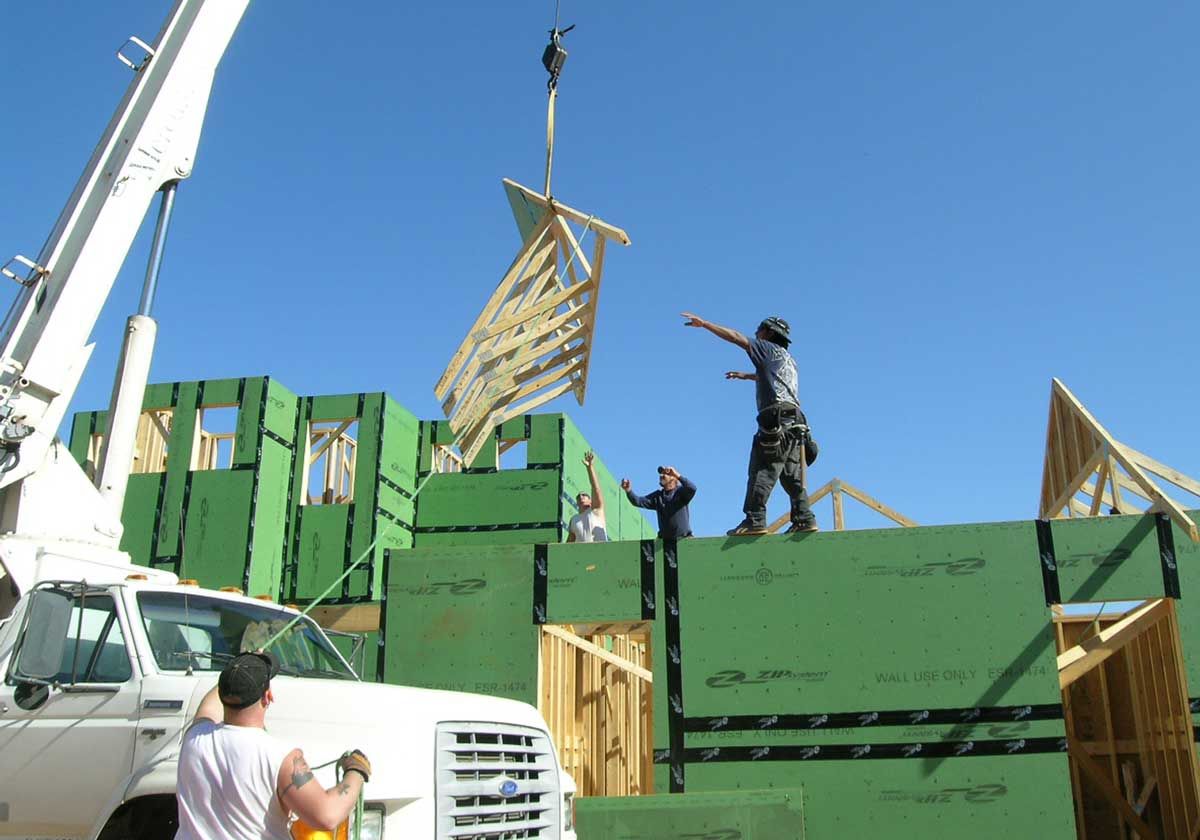
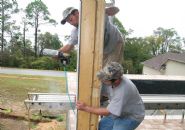
Eddie controls the tag line while Filiberto, Steve, and Ronnie set the pre assembled dutch gable truss set on the garage.

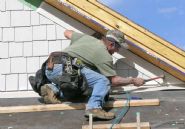
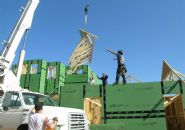
David, Ronnie, Robert, Eddie, and Red counterbalance a rotating pre assembled hip set as it lifts off.

Steve catches a flying hip set.

Filiberto installs a common truss on the garage.

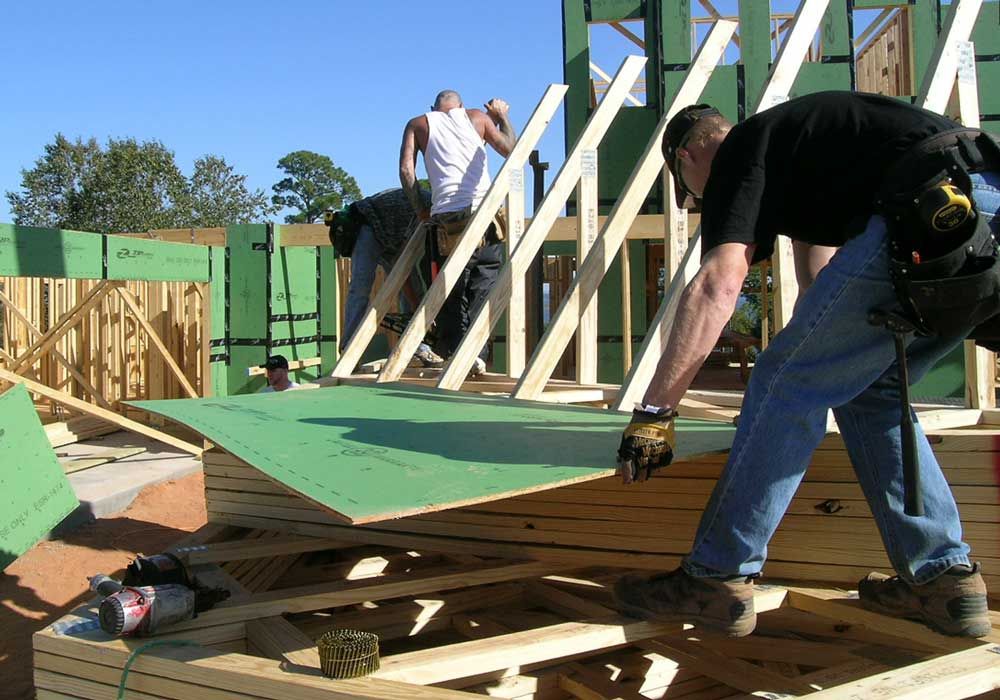
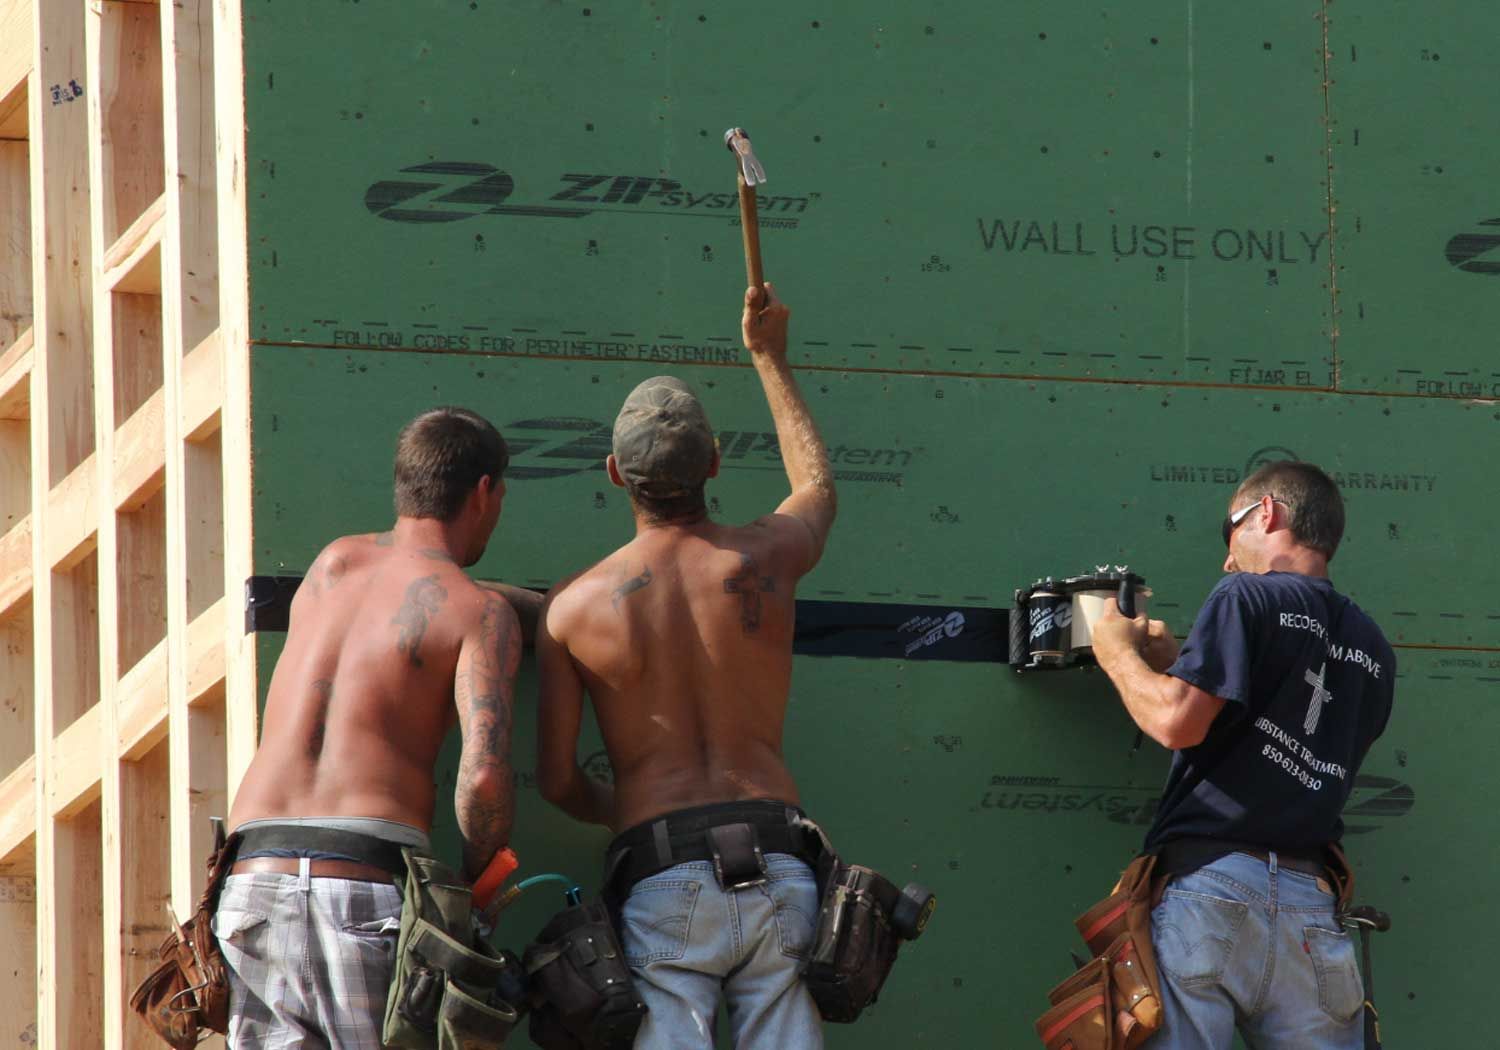
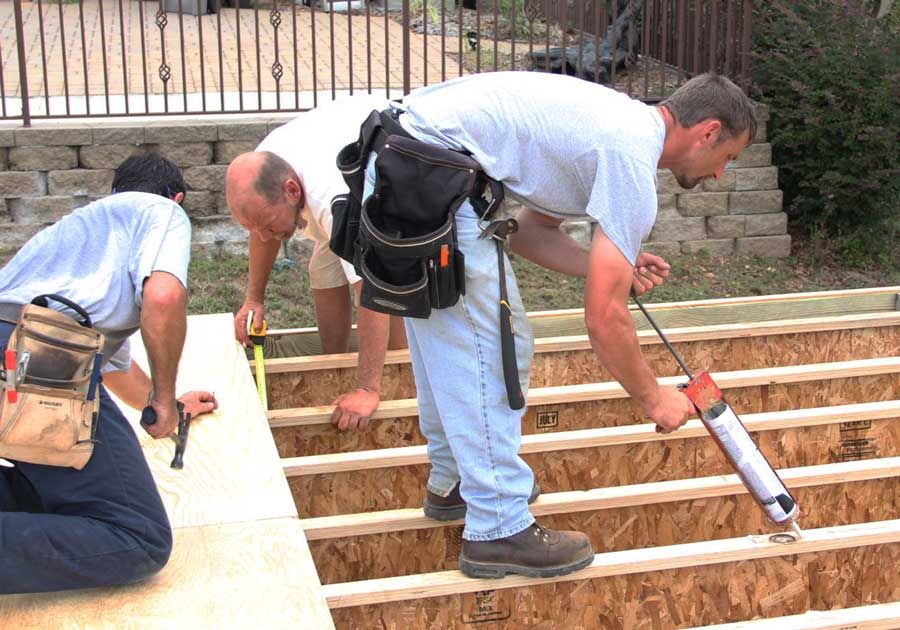
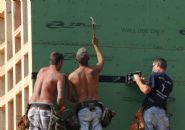
Robert holds the zip wall sheathing in place while Ronnie and Steve nail it off.  The zip wall has a green weather proof coating.  The mid wall horizontal blocking allows the sheathing to be structurally attached to the framing on all 4 ends with an engineered nailing pattern which creates a solid structural wall panel from top to bottom.

Ronnie and Robert nail off the zip wall while Dustin applies the zip tape which seals the joints between sheathing panels.  This system creates an extremely air tight and weather proof thermal envelope which is far superior to the typical uncoated wall sheathing with house wrap common to most new construction in this area.  The zip wall coating will actually seal around the nails fastening the sheathing to the wall studs as well as the nails fastening the siding to the walls thus preserving the air tight integrity of the walls.  Typical house wrap is full of holes by the time the siding is installed and is highly compromised as an air infiltration barrier.  Just about useless in fact.  This home is built high on the bluffs overlooking Escambia bay and will be subject to constant breezes and high winds.  These air tight walls will ensure low utility bills and a comfortable home regardless of the weather.

Gulf Coast Pools workmen pour the pool wall footings inside the pool containment structure.

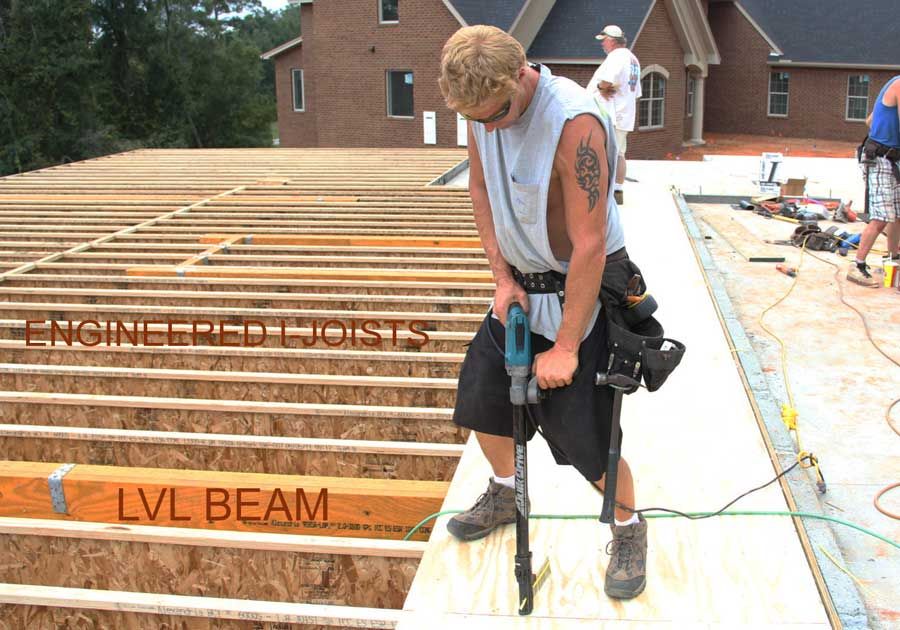
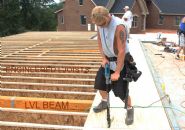
Red screws down the floor decking.  We're using engineered I-joists for the floor framing.  These I- joists are quite a bit stronger and straighter than 2x12's.  This floor system will be flatter, stiffer, and more uniform than a conventionally framed floor system using dimensional lumber.  The Laminated Veneer Lumber beams support the load bearing walls above.

Dustin applies glue to the I-joists.  The plywood floor decking is being glued and screwed to add strength and prevent future floor squeaks.  Steve, in the background, is checking lateral alignment of the floor joists while Dale pins them in place with a nail through the decking.  Red will follow and screw off the decking.

Jasper grinds the top course of foundation block smooth for an even fit of the floor system.

Willie pours a basement slab in the foundation crawl space.  The white coating on the block walls seals the walls from moisture intrusion so that the crawl space can maintain a lower humidity level.

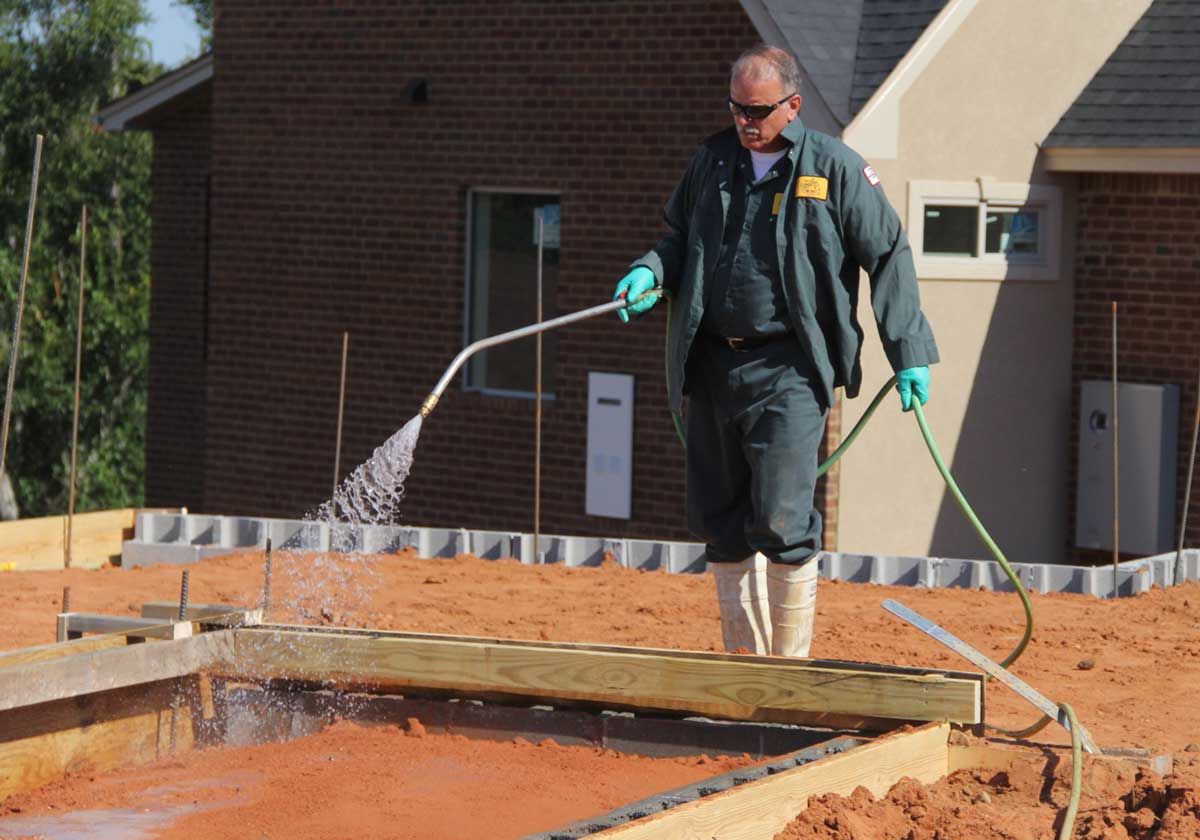
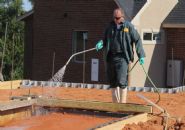
Pat sprays termite treatment on the soil underneath the concrete slab areas.

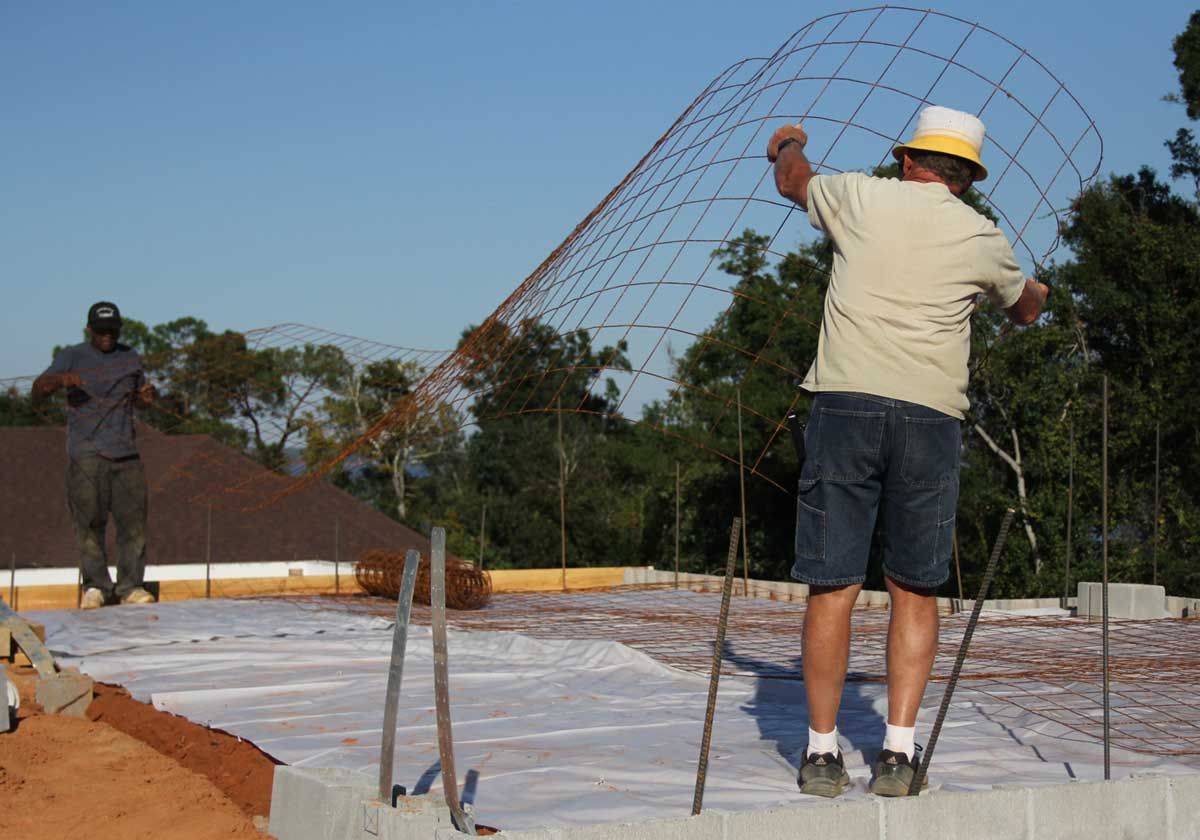
Jasper and Willie install the welded wire mesh slab reinforcement over the vapor barrier.

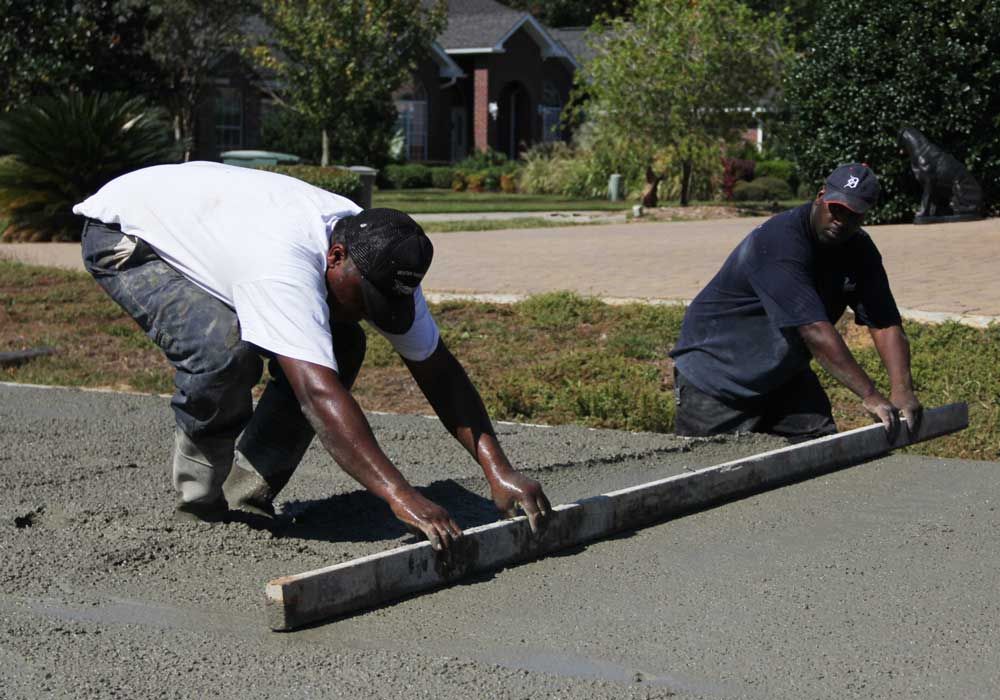
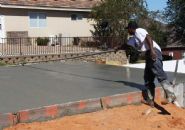
Willie and Darin screed the concrete to a level state.

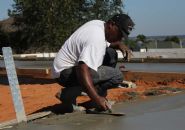
Willie fills in a low spot with a pinch of concrete.  I wish my eyes were that good.

Willie kicks a dash of concrete into a low spot.

Willie bull floats the slab to push the aggregate down below the surface.  Good thing the garage isn't one foot deeper.

Willie creates a turned down area in front of the garage in order to keep water from blowing up under the garage door seal.

Darin trowels the garage slab smooth.

Willie sprinkles water on the slab as he operates the rotary trowel to finish the garage concrete surface.

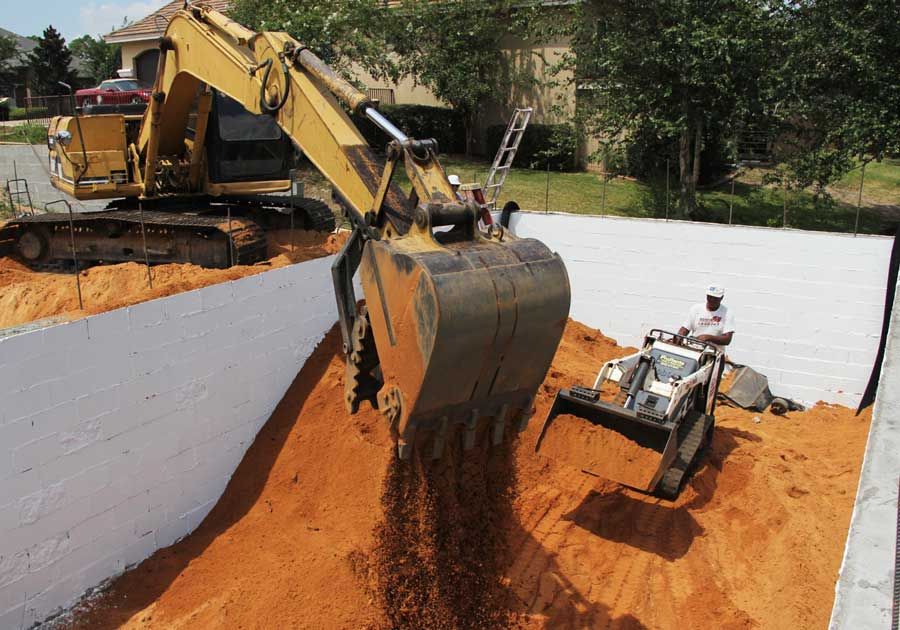
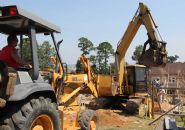
Matt built an 8 foot tall dirt ramp to get his excavator high enough to fill the pool containment structure.

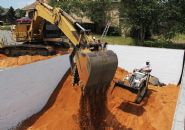
Matt dumps fill into the pool containment structure while Willie operates a mini bobcat to put the fill where it needs to go.  The black pipes in the corners are connected to french drains in the bottom to allow any trapped water to escape.

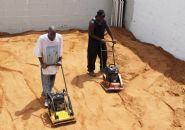
Van and Kevin compact the fill with vibrating blade tampers.

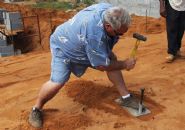
Mike makes a test hole to insert the density measuring probe to see how well the fill dirt has been compacted.

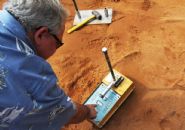
Mike reads the meeter which tests the density of the compacted fill dirt.

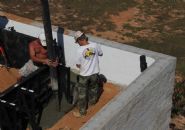
Jasper applies the first of 2 coats of masonry sealer to the inside of the pool containment structure to prevent any moisture from seeping through the block walls that might drain down through the paver deck around the pool above.

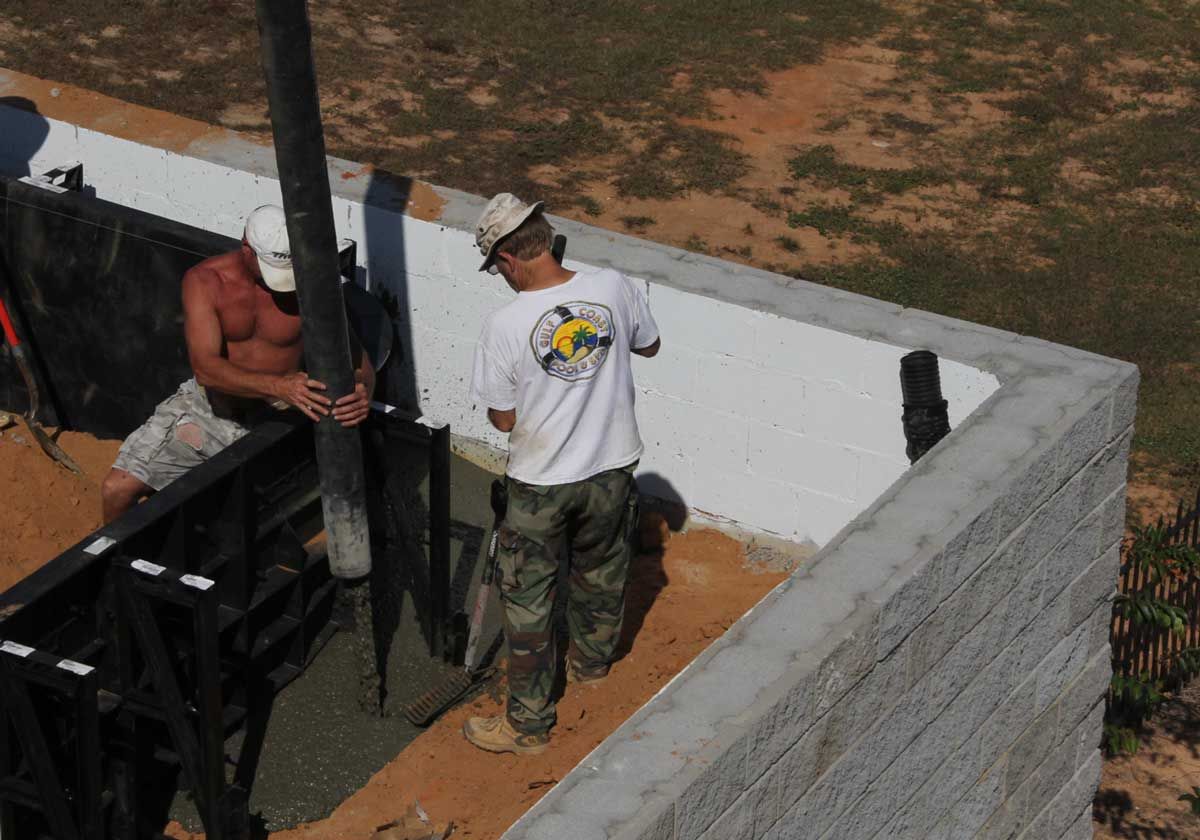
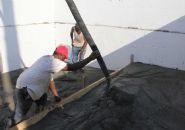
Willie G pours concrete into the walls of the pool containment structure while Darin finishes it.  The boom pump operator is manuevering the boom to keep the nozzle right where Willie needs it.

Willie walks the wall with the pump hose while the boom operator controls the boom.  He's using a small diameter hose to better control the flow of concrete.  A more liquid concrete mix with smaller gravel and chemical curing retarders is being used for this application.

Willie operates a vibrator which helps the concrete consolidate down into the block cells.  We drilled inspection ports at the base of the walls so that we could verify that concrete had flowed all the way to the bottom.

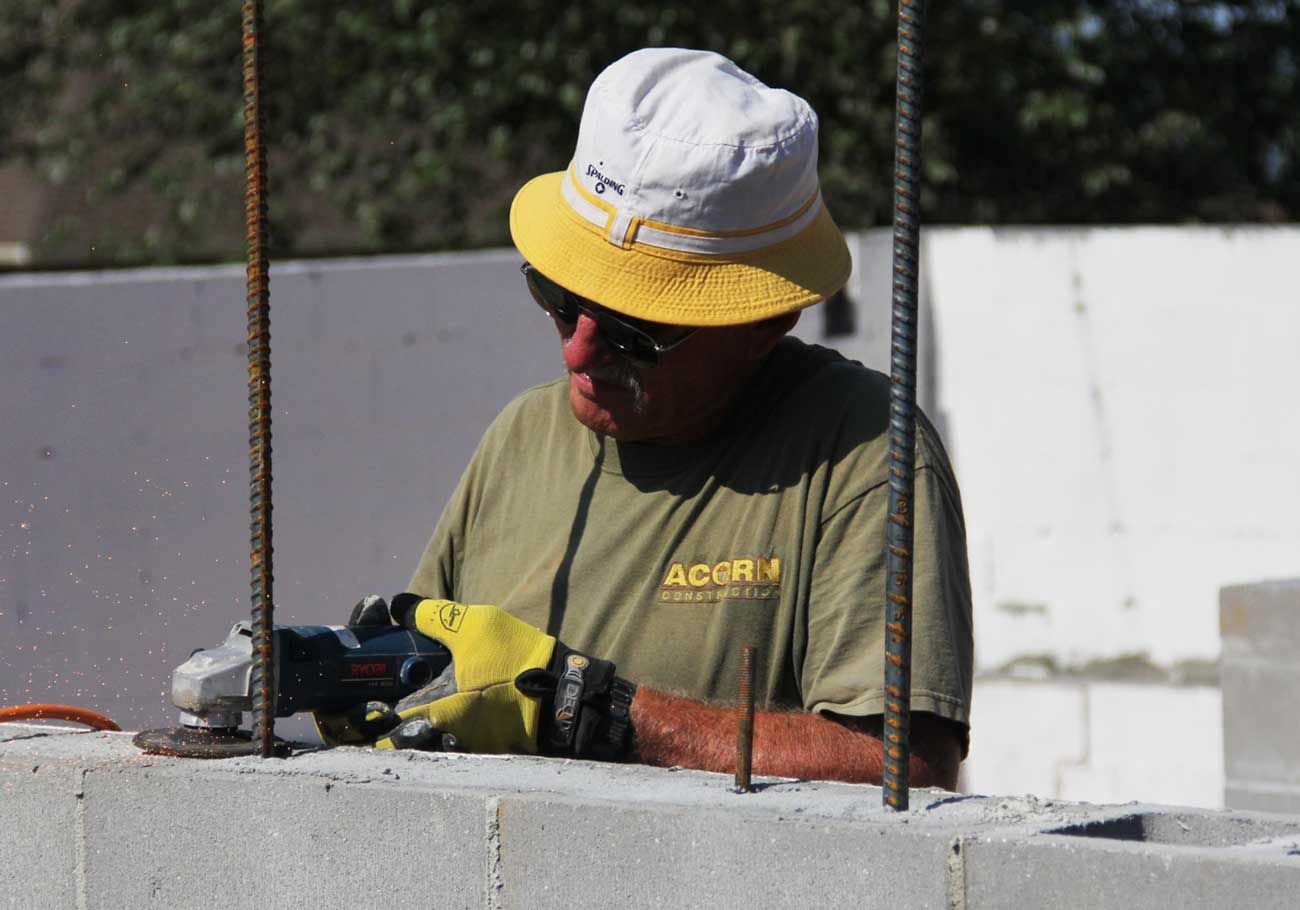
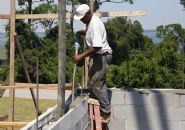
Willie Gaines cuts a grove in the block so horizontal steel rebar can be laid in that course.  There will be horizontal steel rebars every 4 courses of block (32").

Jasper drills inspection holes in the bottom of the block walls so we can make sure that concrete fills each cell completely.

Matt scoops out the sod and organic material from inside the garage area with an excavator while Todd hauls it off.  Since the lot slopes down hill about 20' I decided not to clear the site during construction and leave the natural sod in place to prevent erosion during heavy rains.  This has kept the site intact and prevented the footings from being washed out.  Now we're selectively removing the sod from the garage area and pool containment structure.

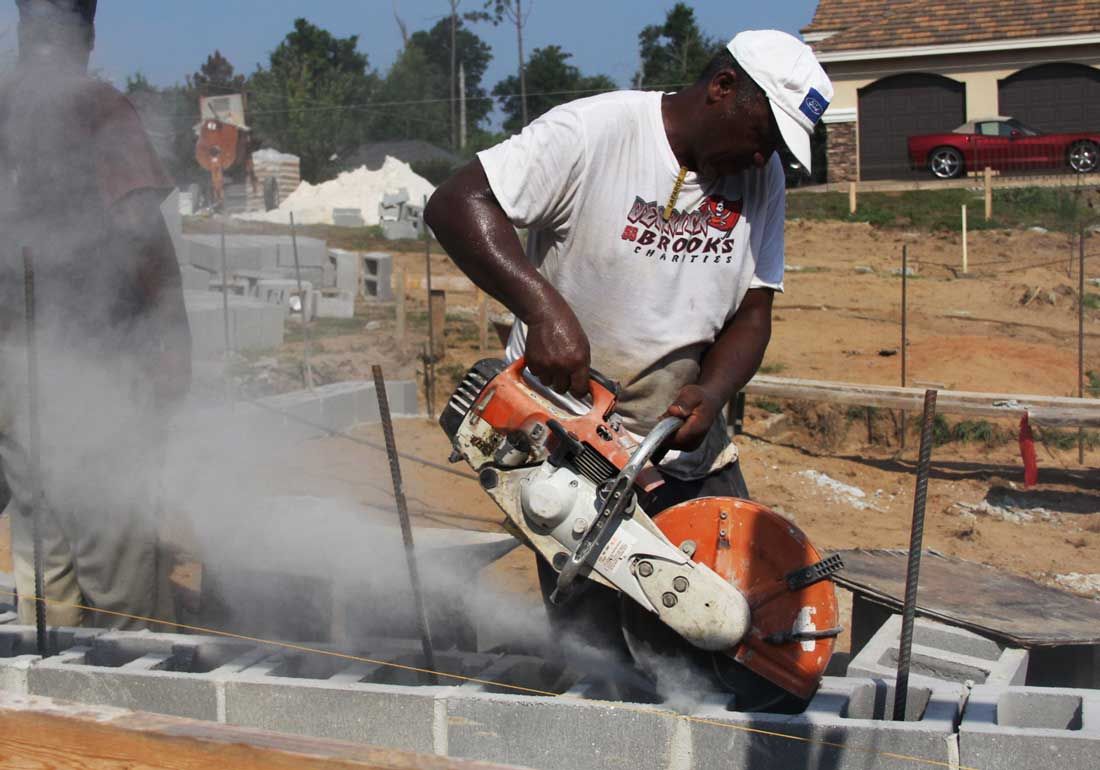
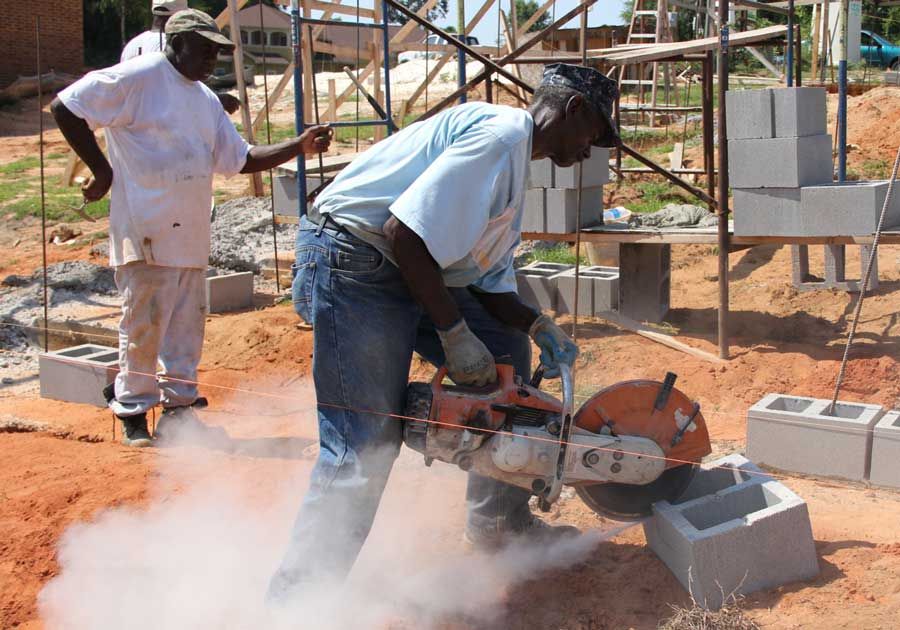
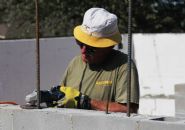
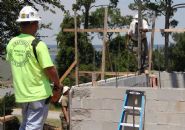
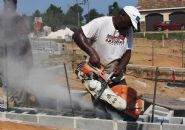
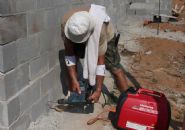
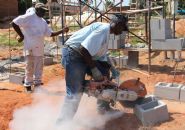
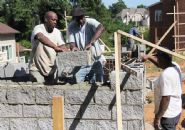
Clarence cuts block for the masons with a gas powered saw with a diamond blade.

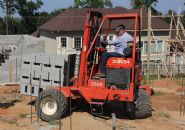
A 3 wheeled tractor called a spider is used to deliver a cube of block close to where it will be needed.

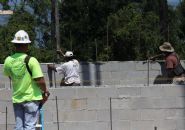
Falstaff and Eddie B lay up decorative 12" face block on the pool containment structure.  Man, those things are heavy!

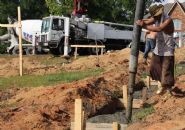
We used a 118' boom pump to pour the footings.  You can see how the footings step down the slope in 8" increments.

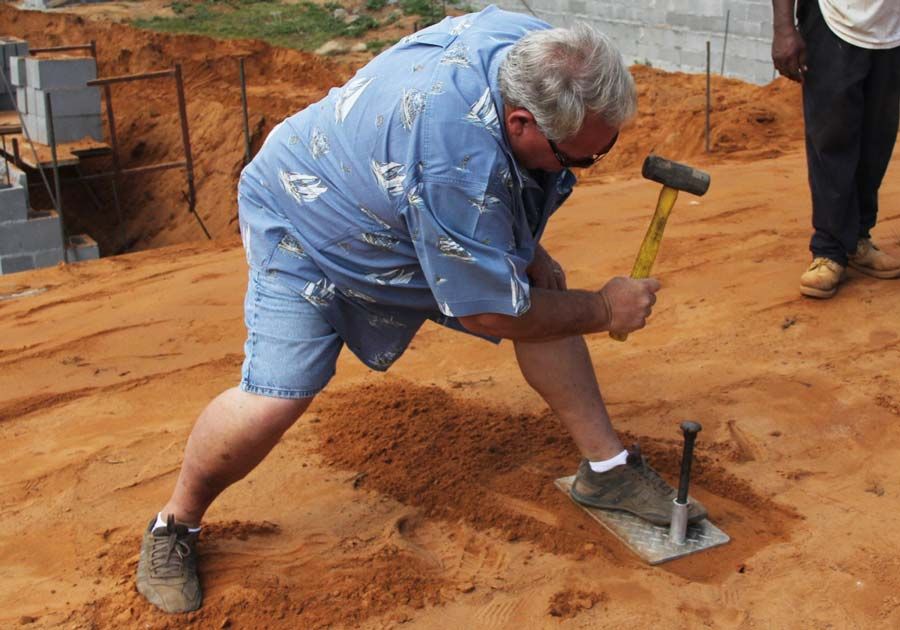
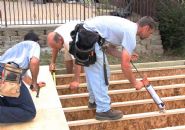
Guiermo and Julio measure the layout strings.  The strings are attached to wooden structures called batter boards which define a level plane suspended in space at the floor level.  Man, those are some tall batter boards in the back!
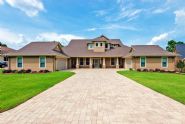
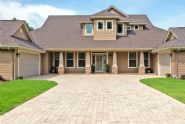
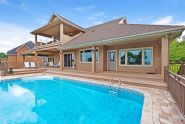
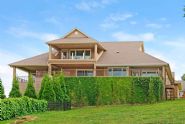
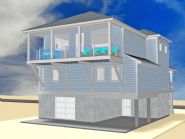
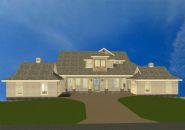
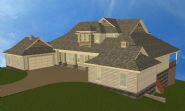
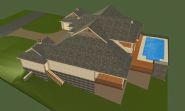
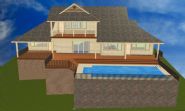
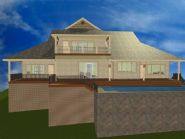
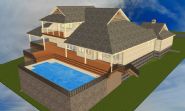
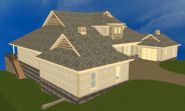
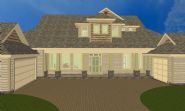
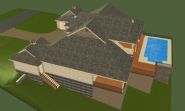
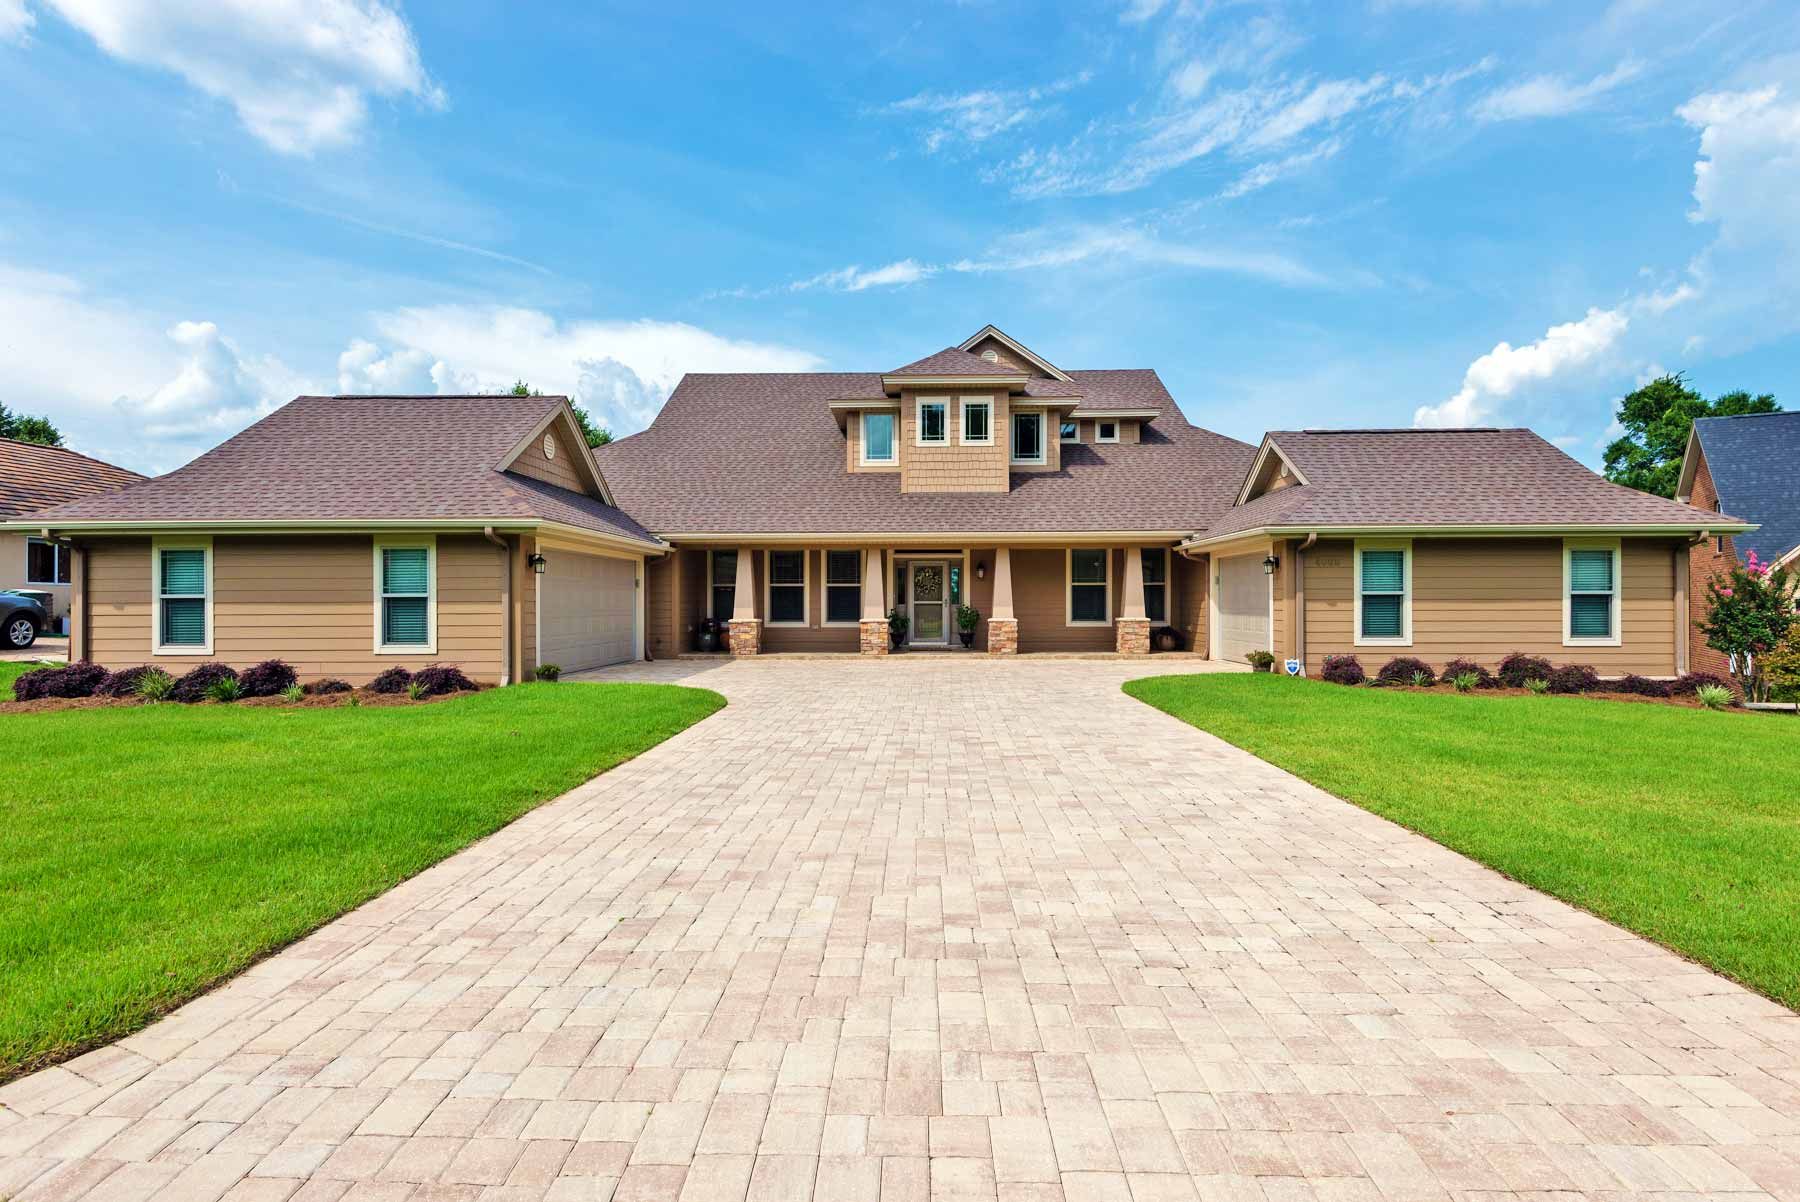
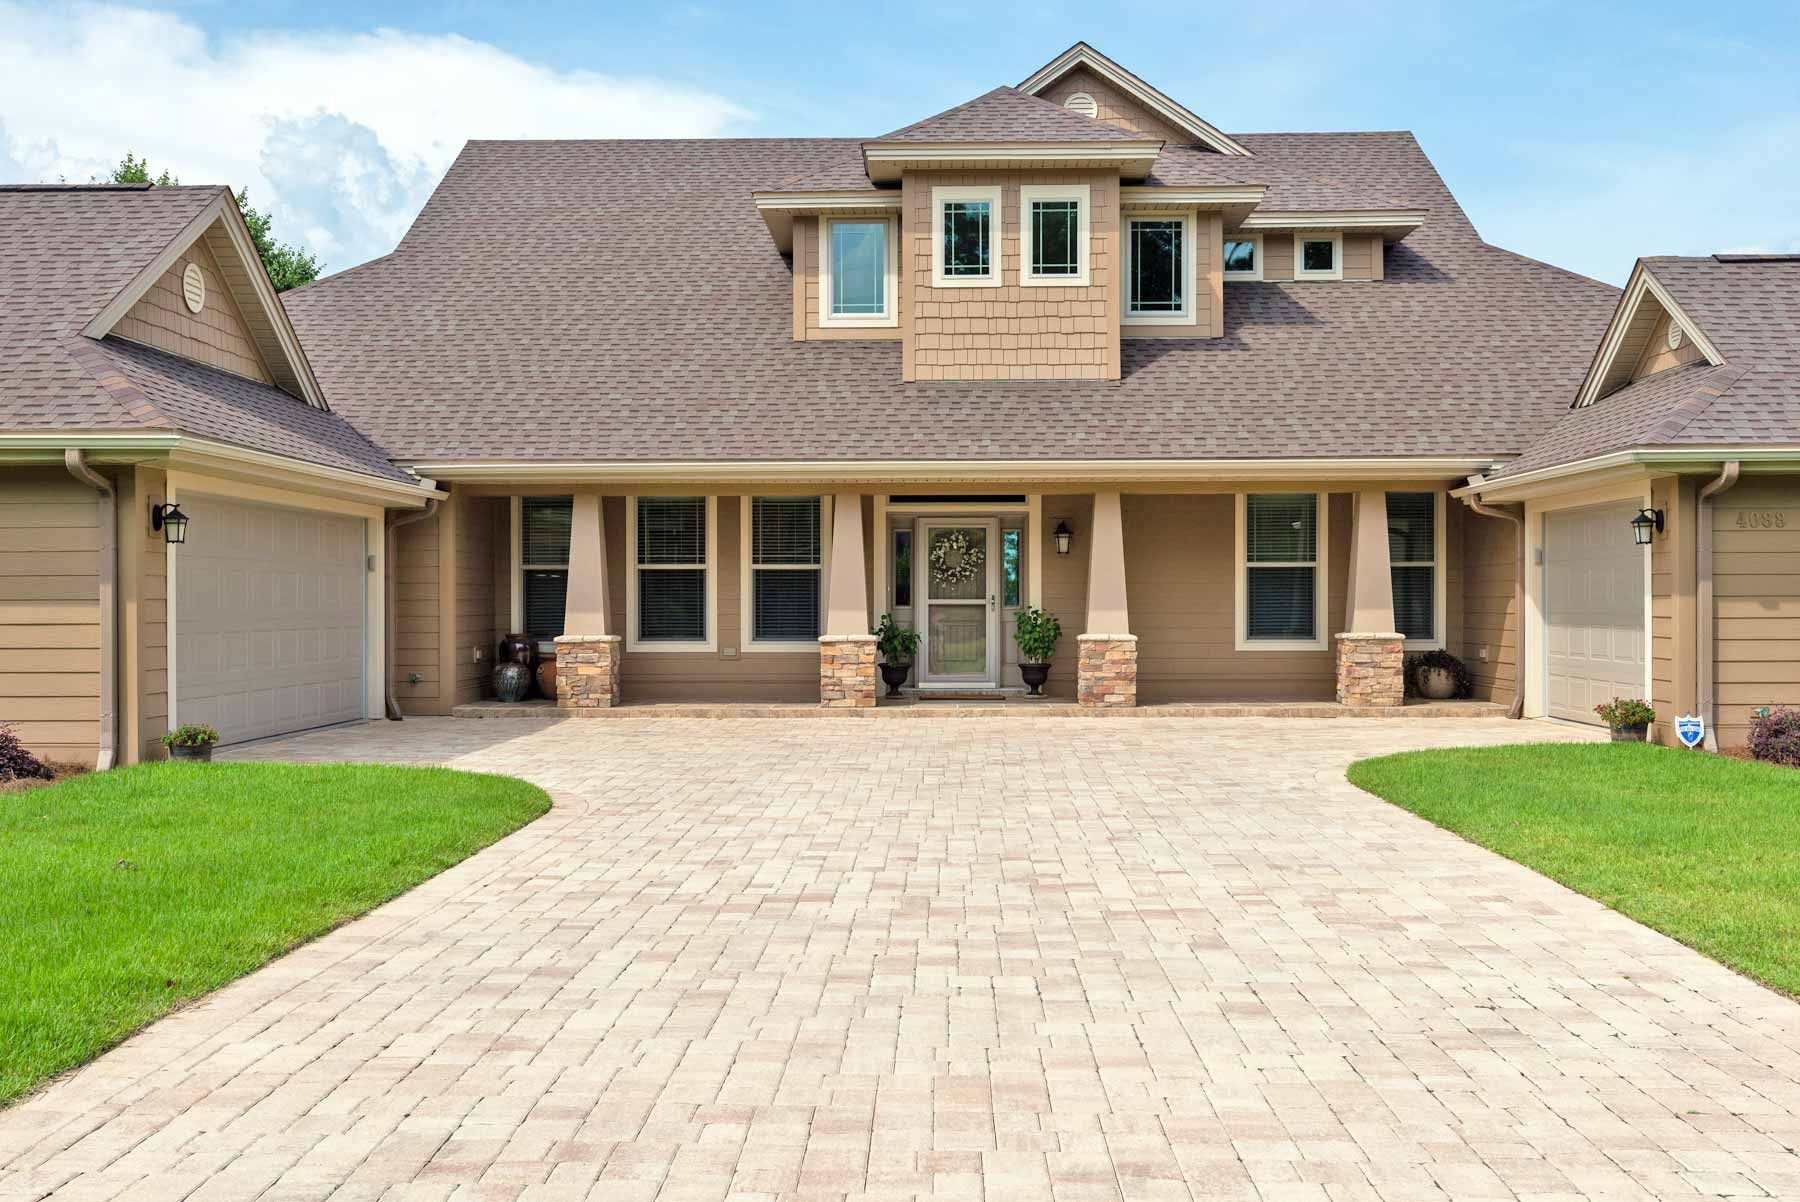
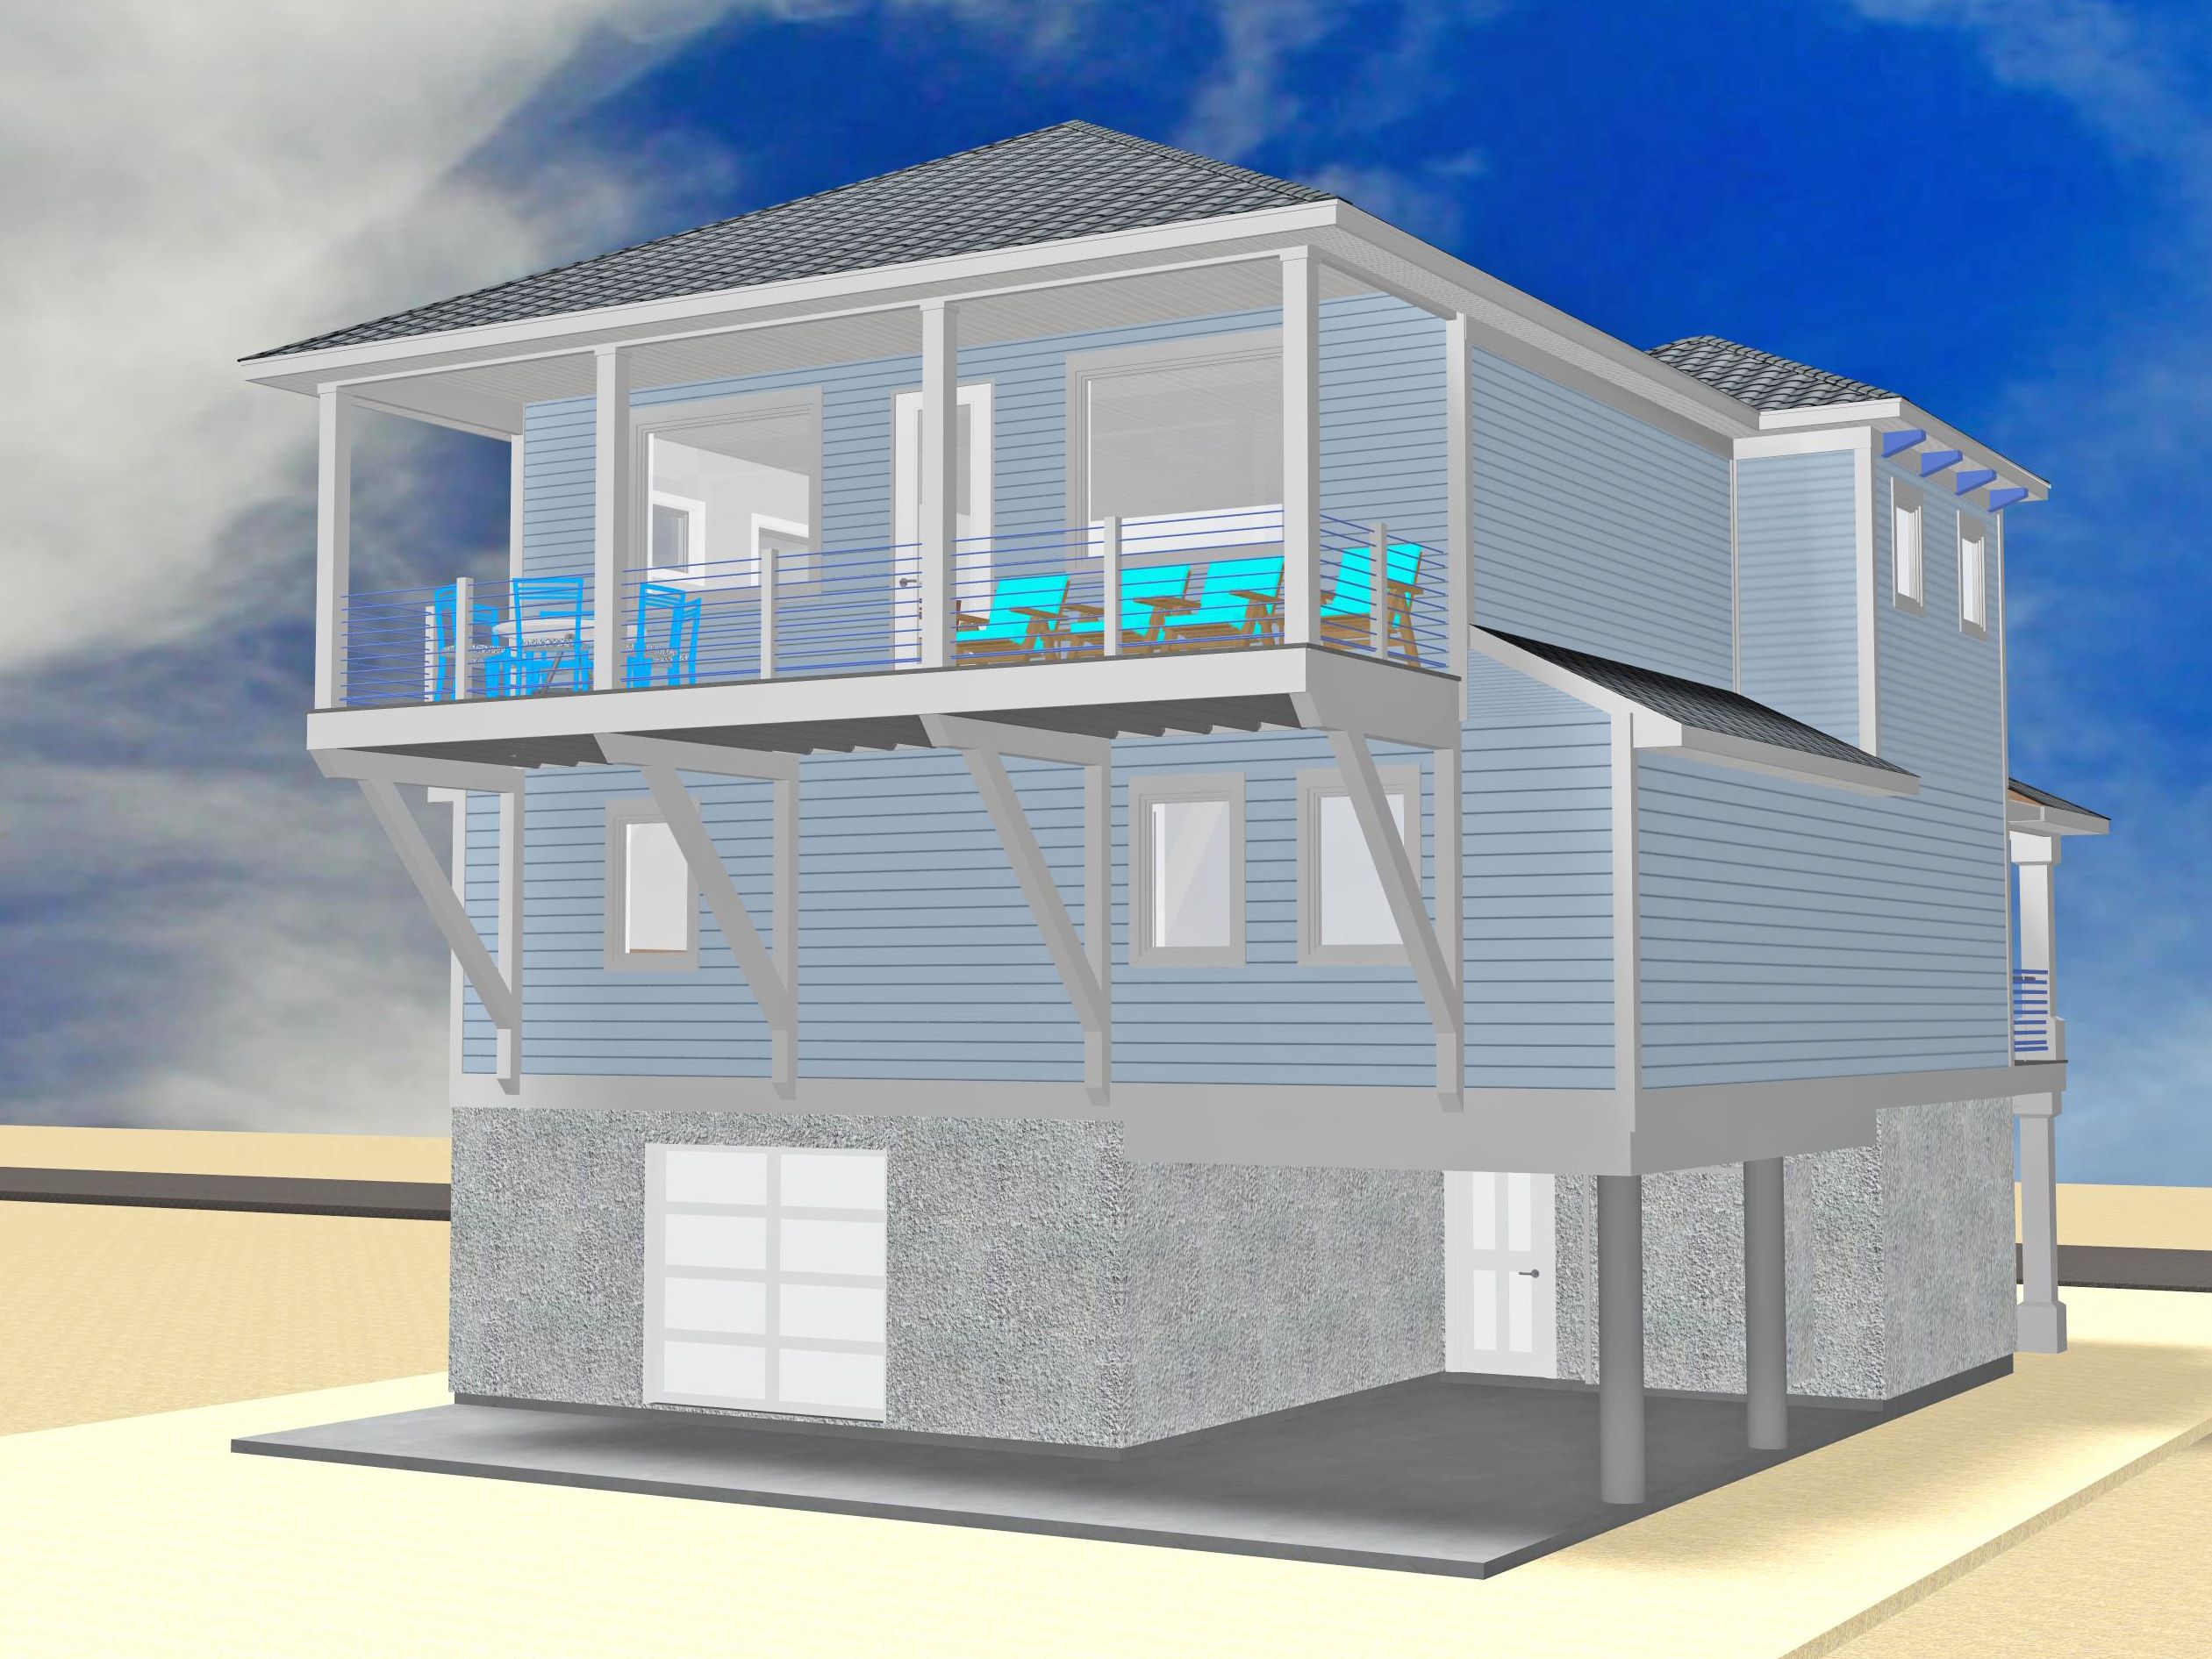
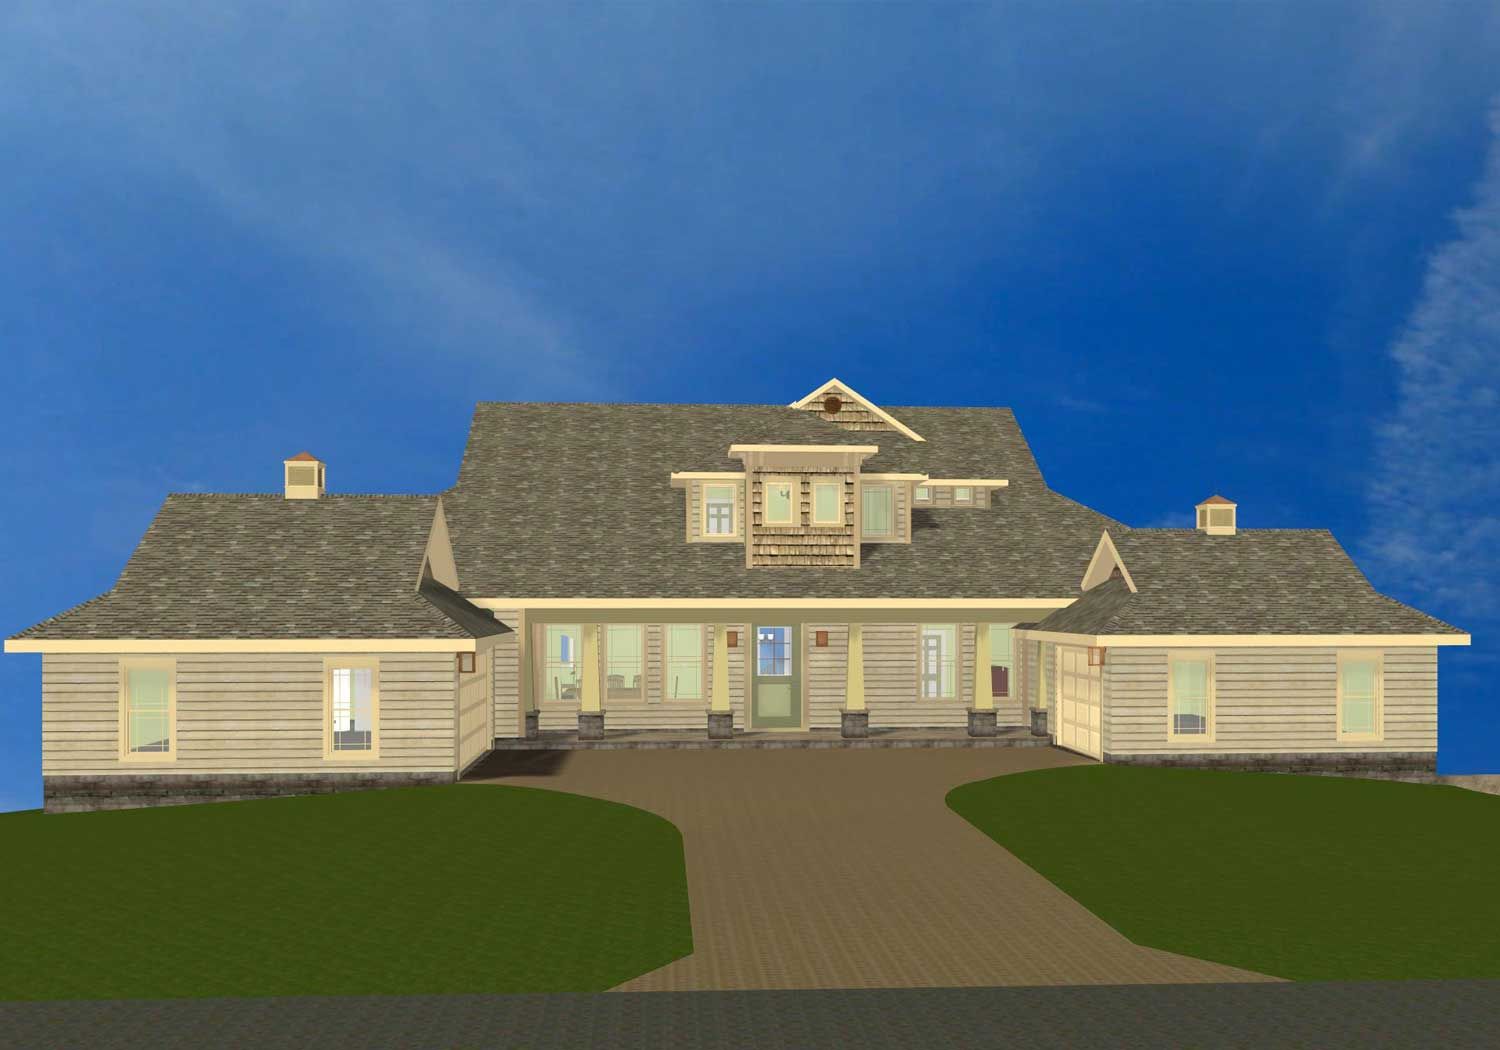
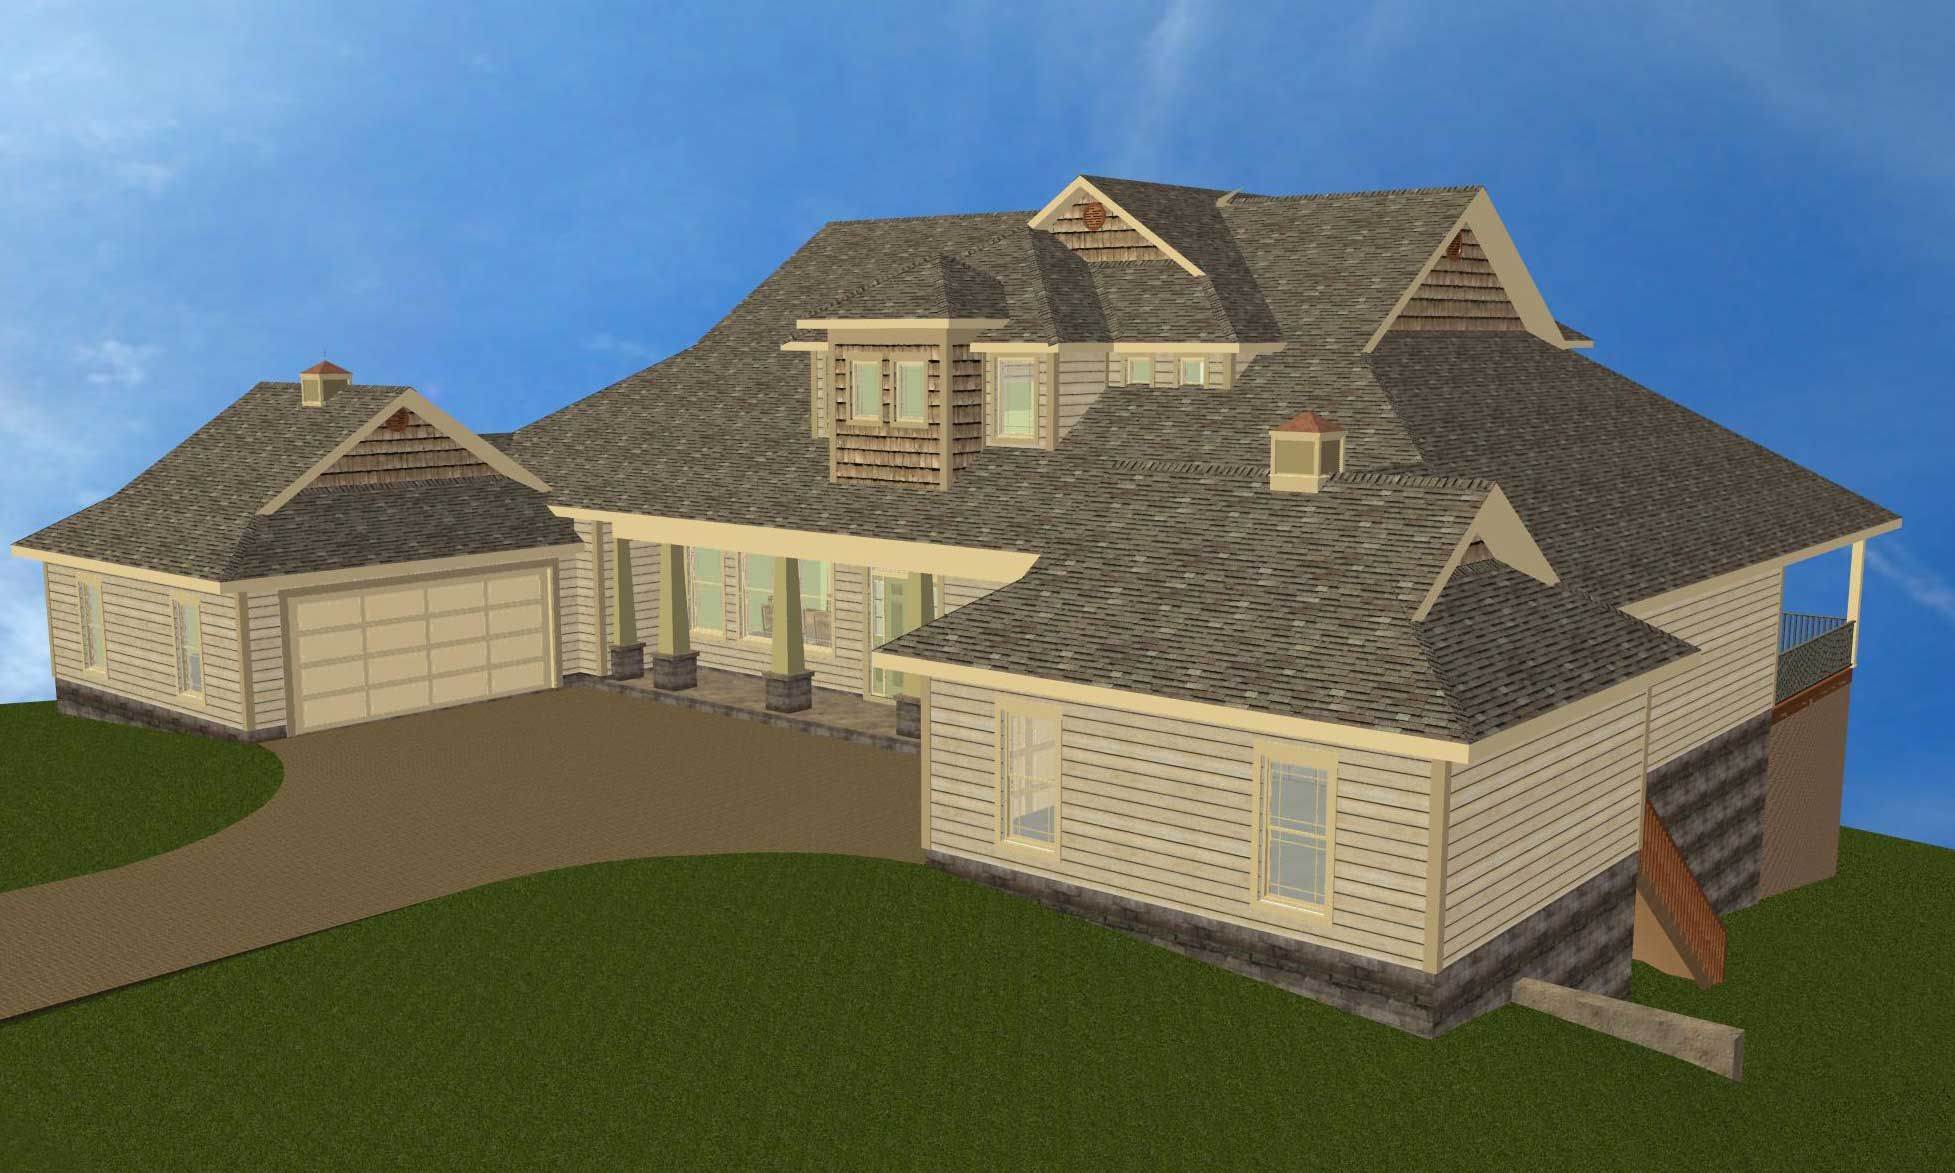
The Carters want a craftsman style home with a second floor nested within the attic space.  There wasn't room on their lot to put a 3 car garage on one side so I created 2 carriage house style garages.  I like the way they balance the front elevation.
NEW PLAN
NEW PLAN
Carter residence in Pensacola by Acorn Fine Homes - Thumb Pic 1
Carter residence in Pensacola by Acorn Fine Homes - Thumb Pic 2
Carter residence in Pensacola by Acorn Fine Homes - Thumb Pic 3
Carter residence in Pensacola by Acorn Fine Homes - Thumb Pic 4
Carter residence in Pensacola by Acorn Fine Homes - Thumb Pic 5
Carter residence in Pensacola by Acorn Fine Homes - Thumb Pic 6
Carter residence in Pensacola by Acorn Fine Homes - Thumb Pic 7
Carter residence in Pensacola by Acorn Fine Homes - Thumb Pic 8
Carter residence in Pensacola by Acorn Fine Homes - Thumb Pic 9
Carter residence in Pensacola by Acorn Fine Homes - Thumb Pic 10
Carter residence in Pensacola by Acorn Fine Homes - Thumb Pic 11
Carter residence in Pensacola by Acorn Fine Homes - Thumb Pic 12
Carter residence in Pensacola by Acorn Fine Homes - Thumb Pic 13
Carter residence in Pensacola by Acorn Fine Homes - Thumb Pic 14
Carter residence in Pensacola by Acorn Fine Homes - Thumb Pic 15
Carter residence in Pensacola by Acorn Fine Homes - Thumb Pic 16
Carter residence in Pensacola by Acorn Fine Homes - Thumb Pic 17
Carter residence in Pensacola by Acorn Fine Homes - Thumb Pic 18
Carter residence in Pensacola by Acorn Fine Homes - Thumb Pic 19
Carter residence in Pensacola by Acorn Fine Homes - Thumb Pic 20
Carter residence in Pensacola by Acorn Fine Homes - Thumb Pic 21
Carter residence in Pensacola by Acorn Fine Homes - Thumb Pic 22
Carter residence by Acorn Construction - Thumb Pic 23
Carter residence by Acorn Construction - Thumb Pic 24
Carter residence by Acorn Construction - Thumb Pic 25
Carter residence by Acorn Construction - Thumb Pic 26
Carter residence by Acorn Construction - Thumb Pic 27
Carter residence by Acorn Construction - Thumb Pic 28
Carter residence by Acorn Construction - Thumb Pic 29
Carter residence by Acorn Construction - Thumb Pic 30
Carter residence by Acorn Construction - Thumb Pic 31
Shake siding on the Carter residence - Thumb Pic 32
Shake siding on the Carter residence - Thumb Pic 33
Shake siding on the Carter residence - Thumb Pic 34
Sealoflex deck - Thumb Pic 35
Trapping the racoon - Thumb Pic 36
releaseing the coon - Thumb Pic 37
foam insulation - Thumb Pic 38
Carter job in Pensacola by Acorn Construction - Thumb Pic 39
window installation by Acorn Construction - Thumb Pic 40
window flashing tape by Acorn Fine Homes - Thumb Pic 41
door threshold flashing - Thumb Pic 42
planing out trusses - Thumb Pic 43
preassembling trusses for Acorn Construction - Thumb Pic 44
setting trusses for Acorn Construction - Thumb Pic 45
setting trusses for Acorn Fine Homes - Thumb Pic 46
setting trusses for Acorn Construction - Thumb Pic 47
installing a common truss on the roof for Acorn Construction - Thumb Pic 48
Zip wall installation by Acorn Construction - Thumb Pic 49
Taping the zip wall by Acorn Fine Homes - Thumb Pic 50
Pool footings by Gulf Coast Pools - Thumb Pic 51
Screwing the floor decking - Thumb Pic 52
Glueing the off grade floor system - Thumb Pic 53
Acorn Fine Home construction in Pensacola - Thumb Pic 54
Acorn Construction new home in Pensacola - Thumb Pic 55
Acorn Construction building the Carter residence in Pensacola - Thumb Pic 56
Acorn Fine Homes building the Carter residence in Pensacola - Thumb Pic 57
Acorn Construction builds custom home in Pensacola - Thumb Pic 58
Acorn Fine Homes building custom homes in Pensacola - Thumb Pic 59
Acorn Construction pouring foundation for a custom home in Pensacola - Thumb Pic 60
Acorn Construction bull floating a slab for a custom home in Pensacola - Thumb Pic 61
Acorn Fine Homes builds an off grade foudnation in Pensacola - Thumb Pic 62
Acorn Construction building a concrete slab and crawl space foundation in Pensacola - Thumb Pic 63
Acorn Fine homes building a concrete slab foundation in Pensacola - Thumb Pic 64
filling the pool for Acorn Fine Homes - Thumb Pic 65
pool containment structure for Acorn Construction - Thumb Pic 66
tamping pool fill for Acorn Fine Homes - Thumb Pic 67
compaction testing for Acorn Fine Homes - Thumb Pic 68
compaction testing in Pensacola - Thumb Pic 69
block sealing pool container at Carter job for Acorn Fine Homes - Thumb Pic 70
pumping concrete for Acorn Construction in Pensacola - Thumb Pic 71
pumping concrete for Acorn Fine Homes in Pensacola - Thumb Pic 72
vibrating concrete in Pensacola - Thumb Pic 73
cutting block on the Carter job - Thumb Pic 74
drilling inspection holes in the block - Thumb Pic 75
Carter job site work - Thumb Pic 76
cutting block on the Carter new home in Pensacola - Thumb Pic 77
laying block on the carter job - Thumb Pic 78
laying face block on the Carter job in Pensacola - Thumb Pic 79
Footings - Thumb Pic 80
Foundation layout of the Carter job - Thumb Pic 81
 - Thumb Pic 82
 - Thumb Pic 83
 - Thumb Pic 84
 - Thumb Pic 85
 - Thumb Pic 86
 - Thumb Pic 87
 - Thumb Pic 88
 - Thumb Pic 89
 - Thumb Pic 90
 - Thumb Pic 91
 - Thumb Pic 92
 - Thumb Pic 93

Carter residence

The Carter home includes all the latest "aging in place" features designed to allow Tom & Pauline to enjoy living in their home for the rest of their lives, close to family, friends, and convenient to shopping.  We built high on a blugg to take advantage of a spectacular view of Escambia bay.  This is the 3rd project I have done for Tom Carter.  It should be the last one because I don't know how I'm going to top it.

Les White, Acorn Construction General Contractor, #RG0055853
Copyright © 2024 Acorn Construction